


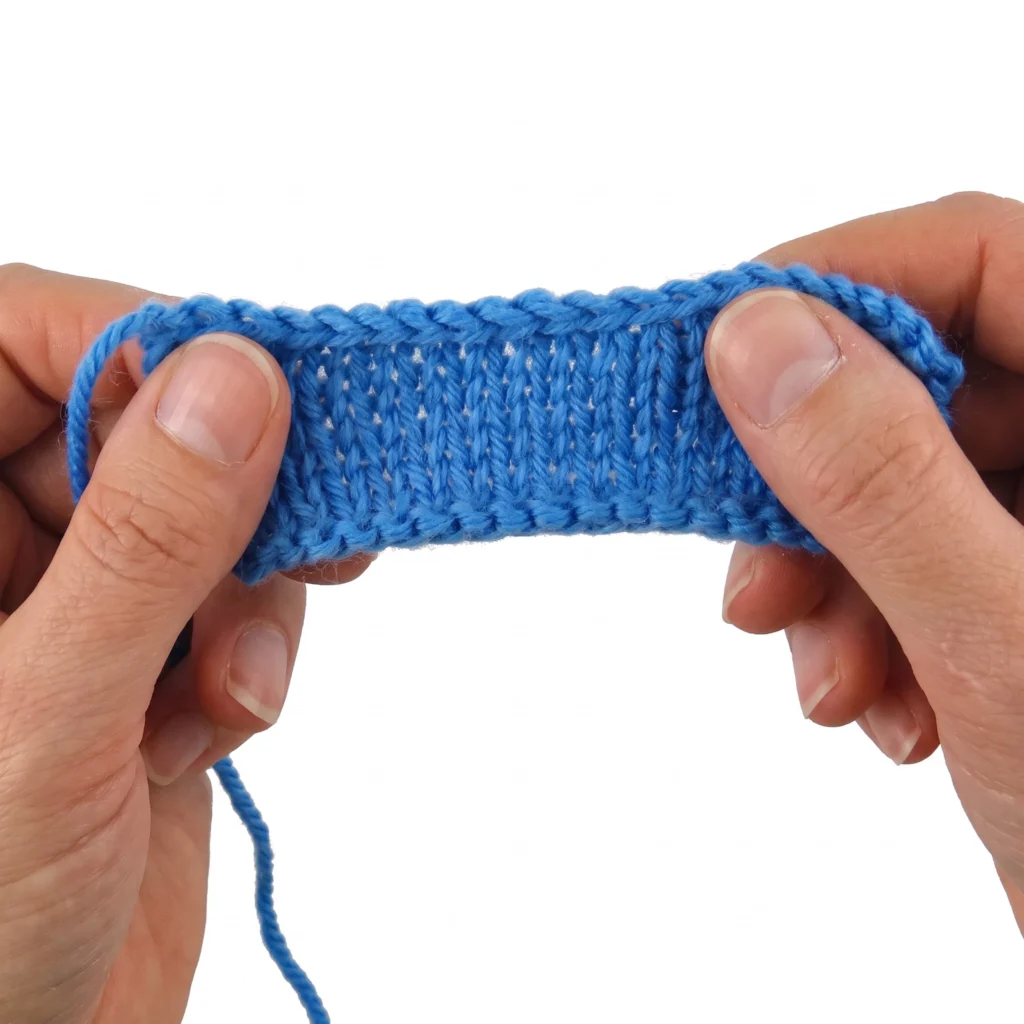
Few moments feel as rewarding as seeing a finished edge hold its shape. Yet a tight finish can pull fabric inward, making a scarf or blanket feel stiff. If that has happened, a relaxed final row can make all the difference.
The basic finish is widely used and works well for beginners. Patterns often shorten “bind off” as “BO,” so the letters are easy to spot in written directions. This simple step removes live stitches from the needles and secures the edge, rather than leaving loops at risk of unraveling.
This practical guide covers the supplies you need, each part of the finishing process, and a secure way to handle the last yarn tail. The first two stitches are worked more loosely, which helps create a stretchier edge. With a little learning and practice, even people who are learning to knit can feel more confident finishing a project.
Key Takeaways
- The basic method is common and beginner-friendly.
- Patterns often use “BO” as shorthand for “bind off.”
- Finishing removes live stitches from the needles and secures the edge.
- Working the first two stitches loosely helps keep the edge stretchy.
- A clear guide can help you finish with a neat, secure yarn tail.
What the Basic Bind-Off Does
The basic bind-off creates a finished edge by securing live loops as they leave the needle. It suits many projects, from scarves to simple blankets, and gives beginners a clear first finishing method. Patterns often shorten “bind off” to “BO,” so the abbreviation is useful when reading instructions.
When to Use This Beginner-Friendly Technique
Choose this method when your piece of knitting is ready for its final edge. Work one loop, then pass the previous loop over it. This simple action closes each stitch and keeps the remaining loops secure.
The basic knit finish is a common choice, though other techniques may suit edges that need extra stretch. A beginner-level video can show the hand movement at a steady pace. People who want to learn knit basics can use it as a visual guide, then follow written steps at their own speed.
- Use it when live loops need a secure finish.
- Look for “BO” in a pattern; it means “bind off.”
- Try this accessible method before exploring other finishing techniques.
Gather Your Needles and Yarn
Before starting, set out the two supplies used in this tutorial: the knitting needles holding your live stitches and a ball of yarn. Keep the yarn attached to the fabric until the last loop is secure. This quick check prevents a rushed search midway through the final row.
Choose a needle that feels steady in your hand. The basic cast-off asks you to move loops across it again and again, so a comfortable grip can help your hands stay relaxed. Make sure the needle feels smooth and leaves room near its tip for each loop.
Set up in a well-lit spot with enough space to see the live loops clearly. A simple work area makes the first steps easier to manage. You need only a few basics:
- The needles holding your project
- A ball of yarn still joined to the fabric
- A clear view of the edge as you begin
With these supplies close at hand, you can focus on an even finish instead of searching for tools. Keep your setup simple and comfortable.
How to bind off knitting with the Basic Method
This cast method closes the live loops in a steady sequence. Work each step with care, and the edge can stay neat without pulling inward.
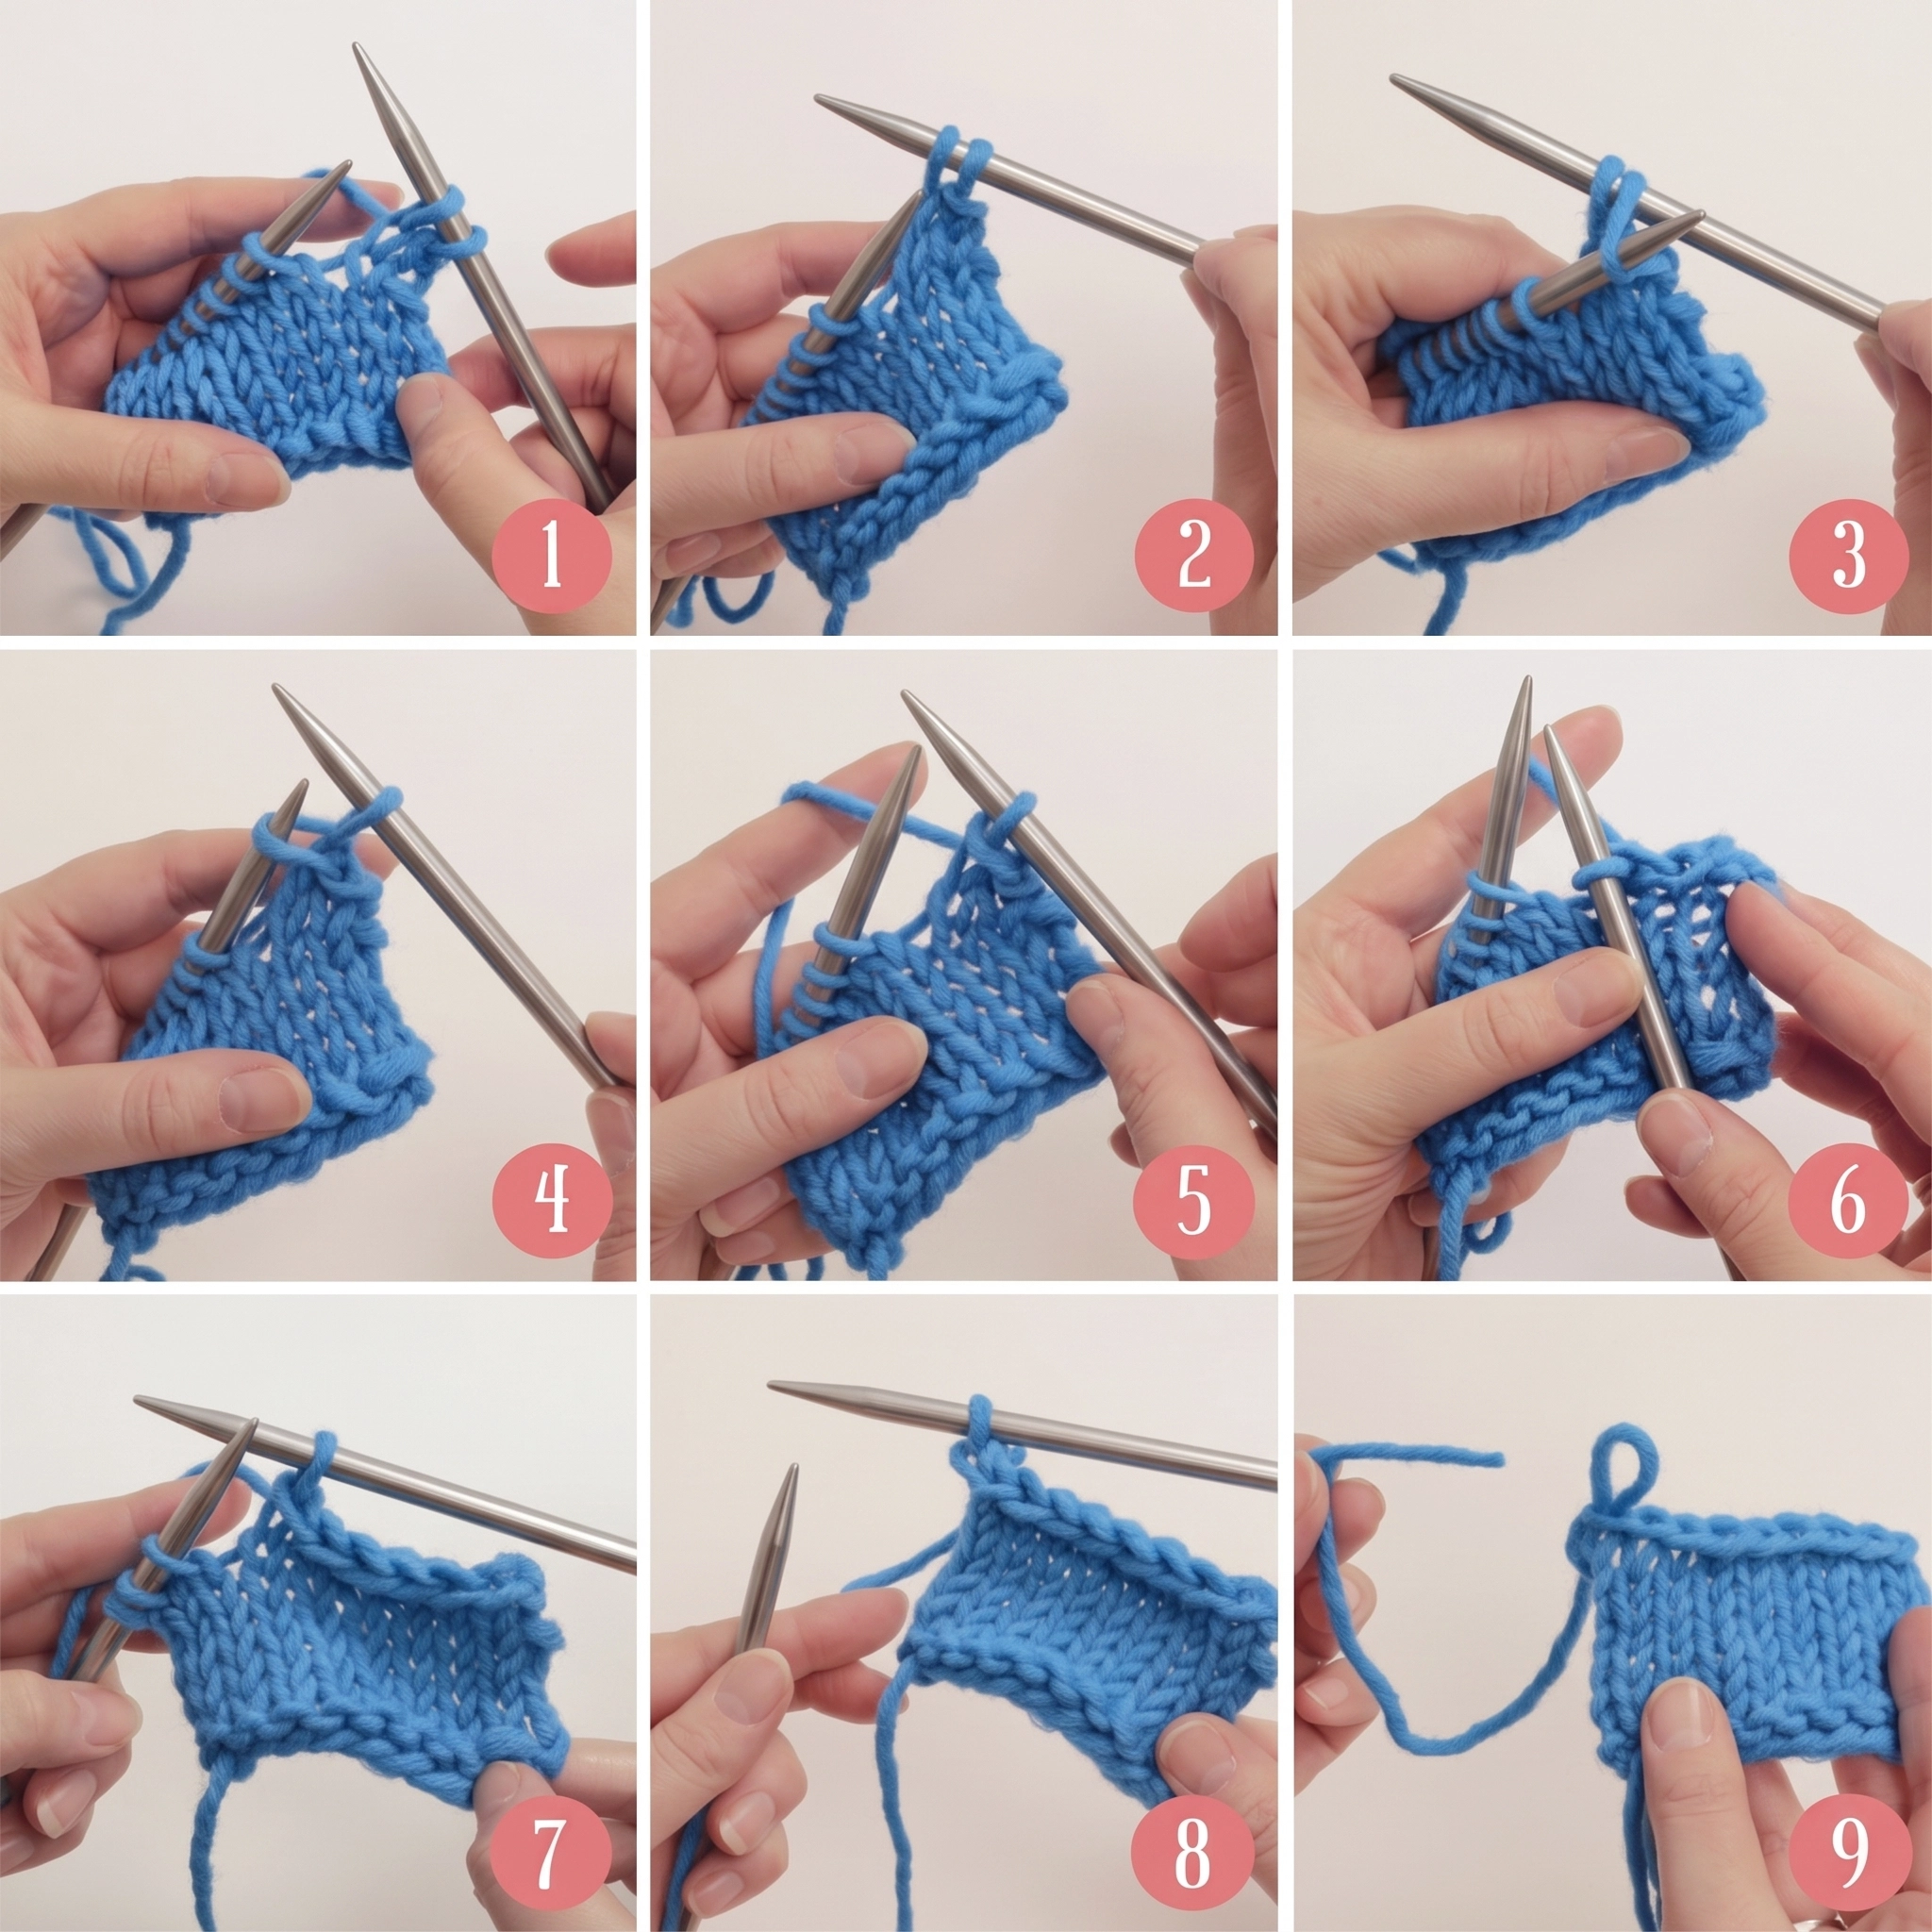
Knit the First Two Stitches
Knit two stitches onto the right needle, keeping each loop looser than usual. This small change gives the edge more stretch and makes each pass-over easier. Let the yarn move freely rather than tugging it tight.
Pass the First Stitch Over the Second
Place the left needle under the first stitch on the right needle. Lift it over the second stitch, then let it drop from the needle. Some patterns call this move PSSO, or “Pass slipped stitch over.”
Repeat Until One Stitch Remains
Knit the next loop. You now have two stitches on the right needle. Repeat the pass-over, then knit another loop. This cast sequence is one of several finishing techniques; a video can help clarify the hand motion. Continue until no loops remain on the left needle. One stitch stays on the right, ready for the next finishing step. Keep the last stitch relaxed for a smooth edge.
Keep the Bind-Off Edge Stretchy and Even
An even edge should move with the fabric, not pinch it. During this knitting step, steady tension helps the final row lie flat and keeps a scarf or sleeve flexible.
Work the Stitches Loosely
Work the first two stitches more loosely than usual. This gives the edge extra give and makes each pass-over easier. Keep a calm rhythm as you knit; the yarn should glide without a firm tug after every loop. Let loops travel along the needle instead of crowding its tip.
Use a relaxed, steady motion as you finish each stitch. Watch the fabric as you work, not just the loops. A balanced edge looks even and feels soft when handled.
- Keep a similar size in each stitch as you pass loops over.
- Relax your grip if the edge looks tighter than nearby fabric.
- Let the stitches move freely; avoid bunching them near the needle tip.
- Check the cast edge gently; it should keep some give.
These small checks support a smooth finish without changing the basic method. New makers can use these techniques while learning. A little extra room in the edge can make the whole piece feel more comfortable.
Secure the Last Stitch and Finish the Yarn Tail
Once the final loops leave the needle, one stitch remains on the right needle. Keep the fabric steady and leave that loop in place; it will anchor the edge during this final step.
Cut yarn, leaving six to eight inches for the tail. Draw it through the last stitch, then tug gently until the loop closes around it. A light pull secures the edge without squeezing it.
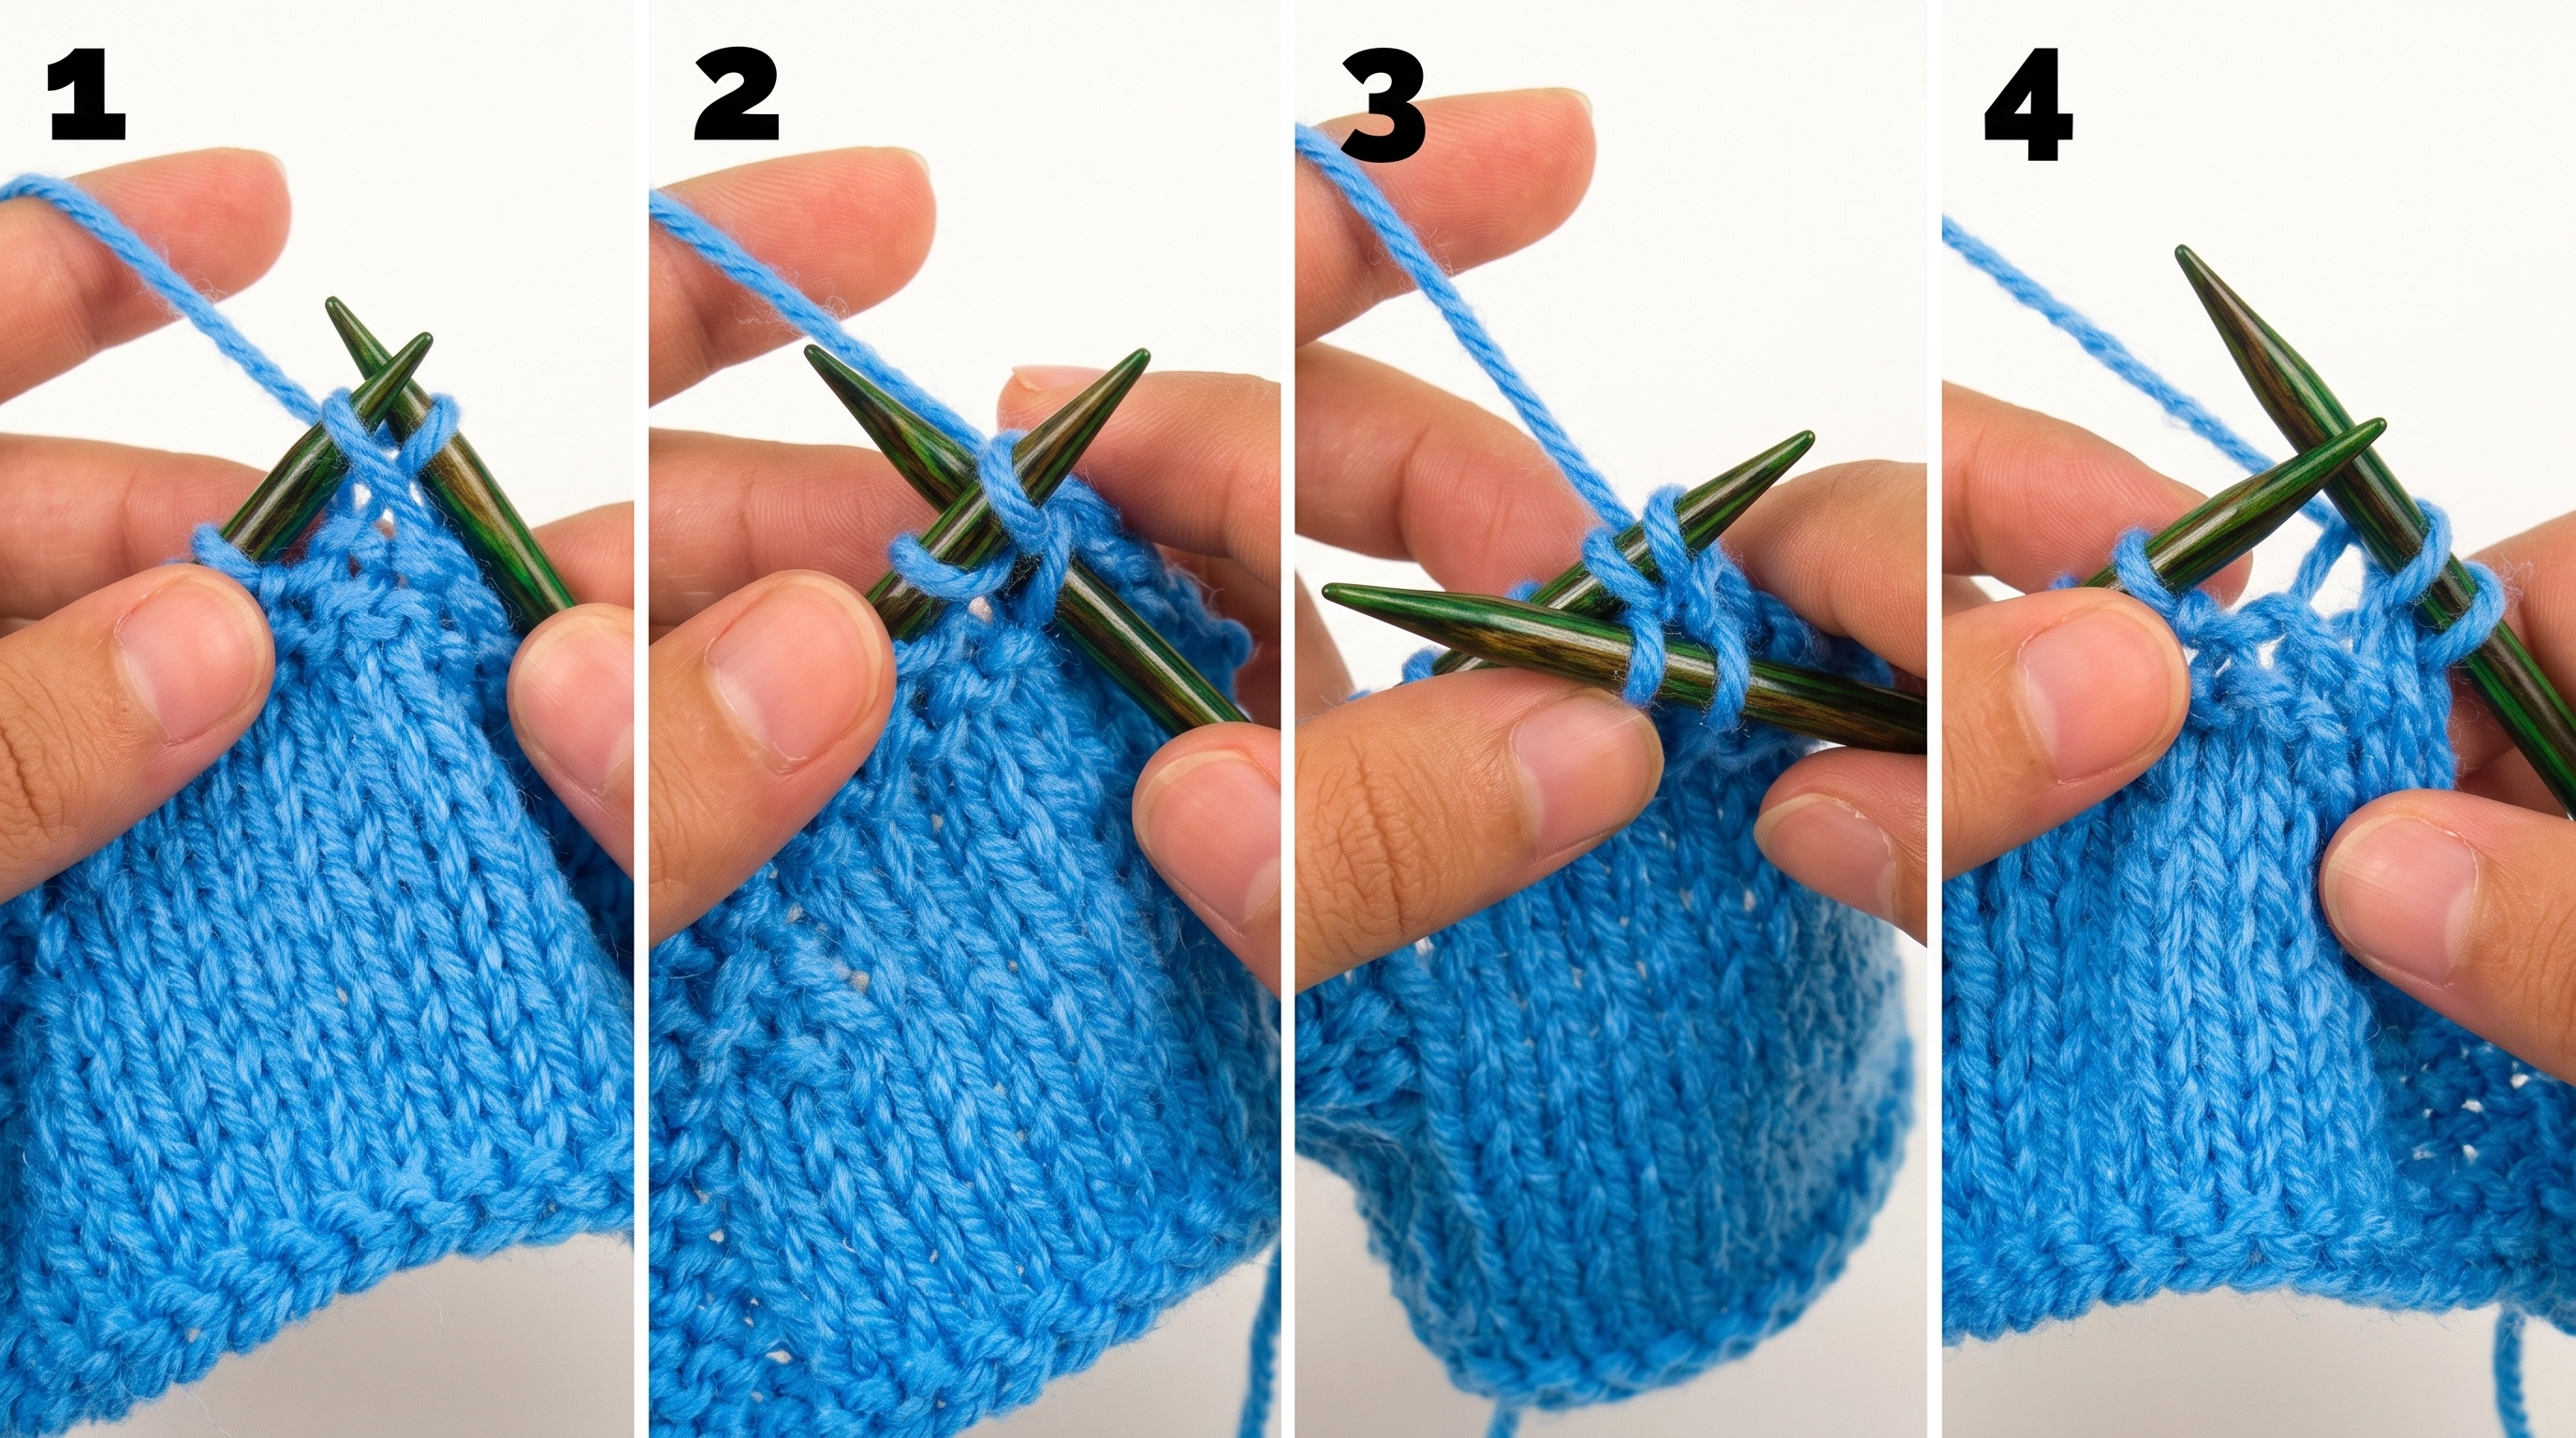
- Leave the remaining loop on the right needle.
- Keep a six-to-eight-inch tail for a neat finish.
- Pull the tail through the loop and make a gentle final tug.
The video tutorial suggests about six inches and uses the same motion to form a small knot. This cast finish needs no hard pull. A relaxed knit edge should stay flexible, so stop once the loop feels secure.
That length also leaves enough yarn for weaving the end into nearby loops later. Handle it with care, and the finished edge can stay smooth without losing its stretch.
Troubleshoot a Tight or Uneven Edge
A finished edge can look smooth in one spot and pinched in another. Small tension changes often cause this. A quick check while you work can help you spot trouble early and keep the fabric flexible.
Ease Stitches Along the Needle as You Bind Off
If the edge feels tight, slide loops along the needle as you work. Avoid pulling each loop firmly toward the tip. A light, steady touch can help the edge stay even without changing the basic method.
Check the Edge Before Cutting the Yarn
Keep the yarn attached while you review the first stitch and the rest of the edge. If one area looks uneven, check whether you worked the first two stitches with the looser tension described earlier. Make any needed adjustment before you cut yarn.
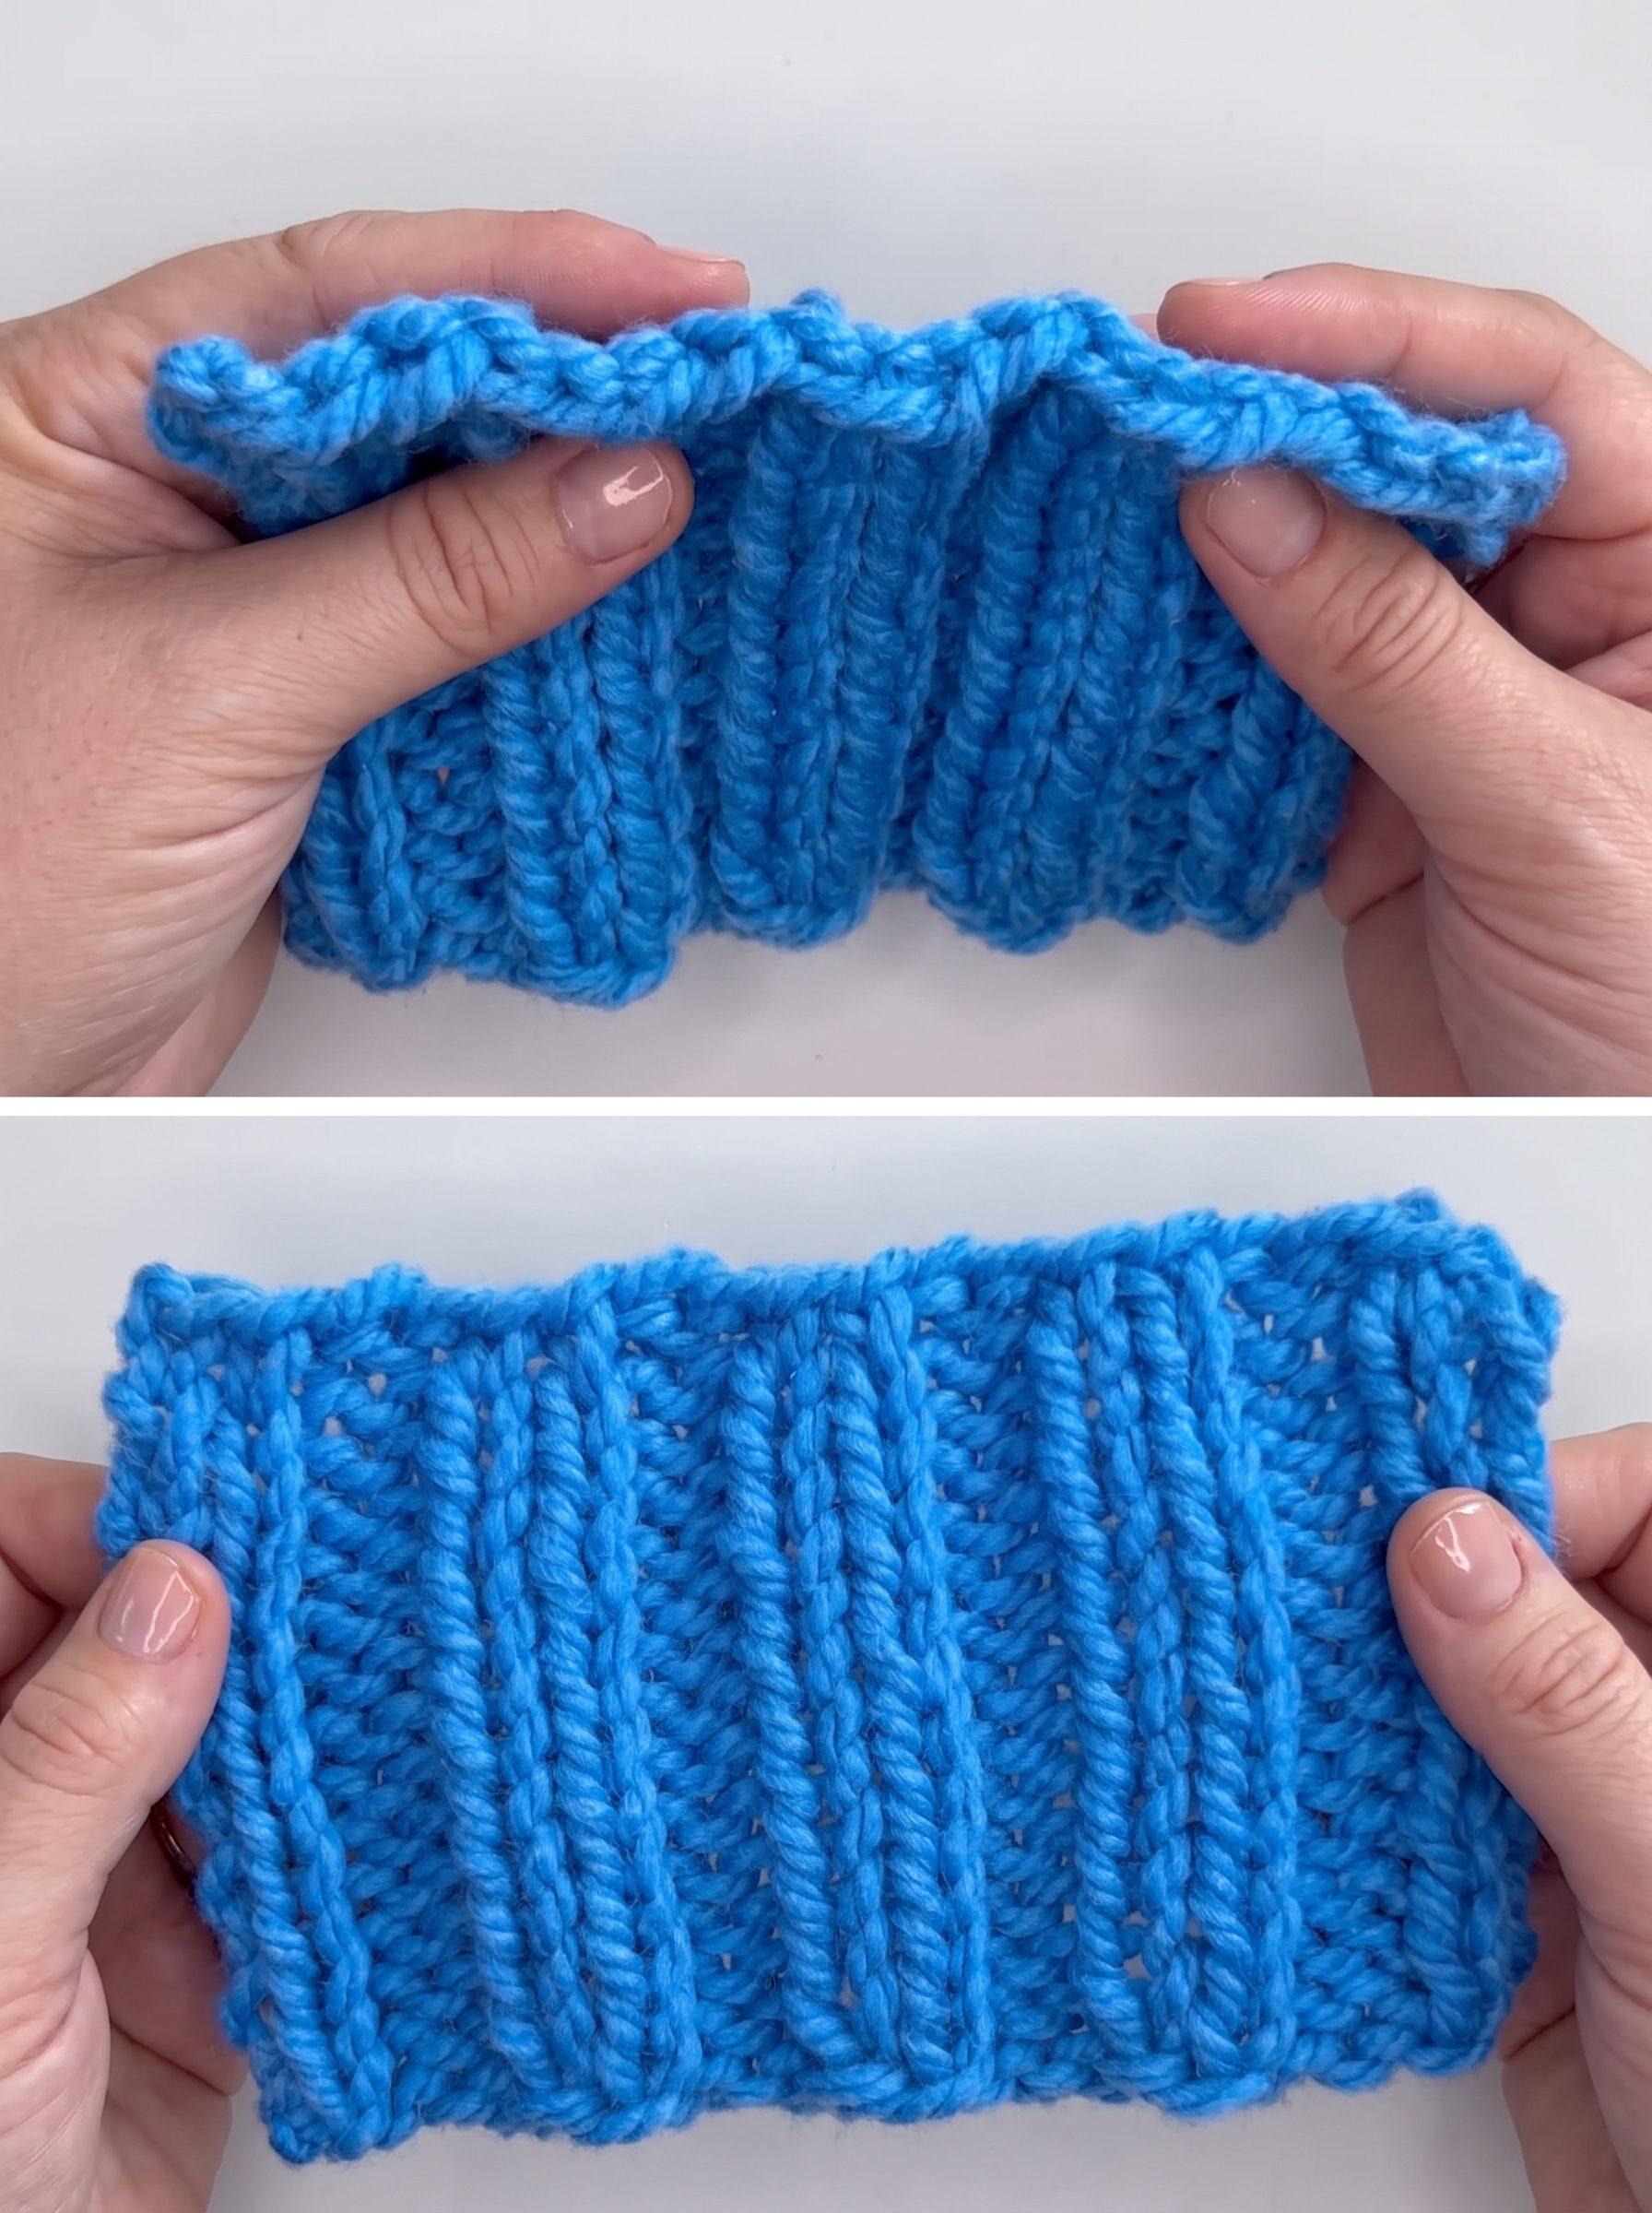
- Finish all stitches, leaving one stitch on the right needle.
- Draw the yarn through the last stitch.
- Tug gently to secure it without tightening the edge.
Pause for a final look before securing the tail. This simple check can catch uneven tension while the yarn is still attached.
Give Your Knitting a Polished Finish
A neat edge shows the care behind your knitting. Secure each live stitch, then weave the 6–8-inch tail through nearby loops. Draw yarn through the final loop and snug it gently; a firm tug can narrow the edge.
The basic cast sequence is simple: knit two stitches, lift the first over the second, then repeat until one remains. This steady rhythm can help new makers bind the edge without strain. Use this guide as a starting point, then explore other finishing techniques as your skills grow.
Stolen Stitches welcomes makers into its free Knithub community, with more than 2,000 members. If you want to learn knit basics or share progress, the group offers a friendly place for ideas and support.
Its knitting content offers helpful ideas for your next project. A calm final check helps each piece feel complete.
Have a question? Use the form above to submit your question or comment.
I love hearing from you and seeing what you made!