


If your Cricut is trying to cut every letter in a label, the design probably needs one more step before printing. Flatten turns the selected layers into a printable image so you can control what the machine cuts.
This guide walks through a pantry label and a sticker with a connected border. You can follow both examples on a US Letter sheet, then check the mat preview before using any printable material.
Flatten is especially helpful when your design mixes text, shapes, and color. Without it, those pieces can remain separate cut layers even though they look like one finished graphic on the Canvas.
You do not need to memorize every Design Space tool to use it. The key is to decide whether you want to print the artwork first or cut pieces directly from material.
For a beginner overview of the Canvas, see our Cricut beginner guide. Keep this article open when you reach the layer preparation stage.
We will cover what Flatten changes, where it appears, when to use it, how to reverse it, and why a flattened design may still have more than one outer cut path.
What Flatten does in Design Space
Flatten compresses your selected layers into one Print Then Cut layer. Their visible colors and details become part of a single printable design.
It is a preparation step for projects that go through a home printer before the Cricut cuts them. It does not send a cut-only design to the machine as separate pieces.
The three changes to check
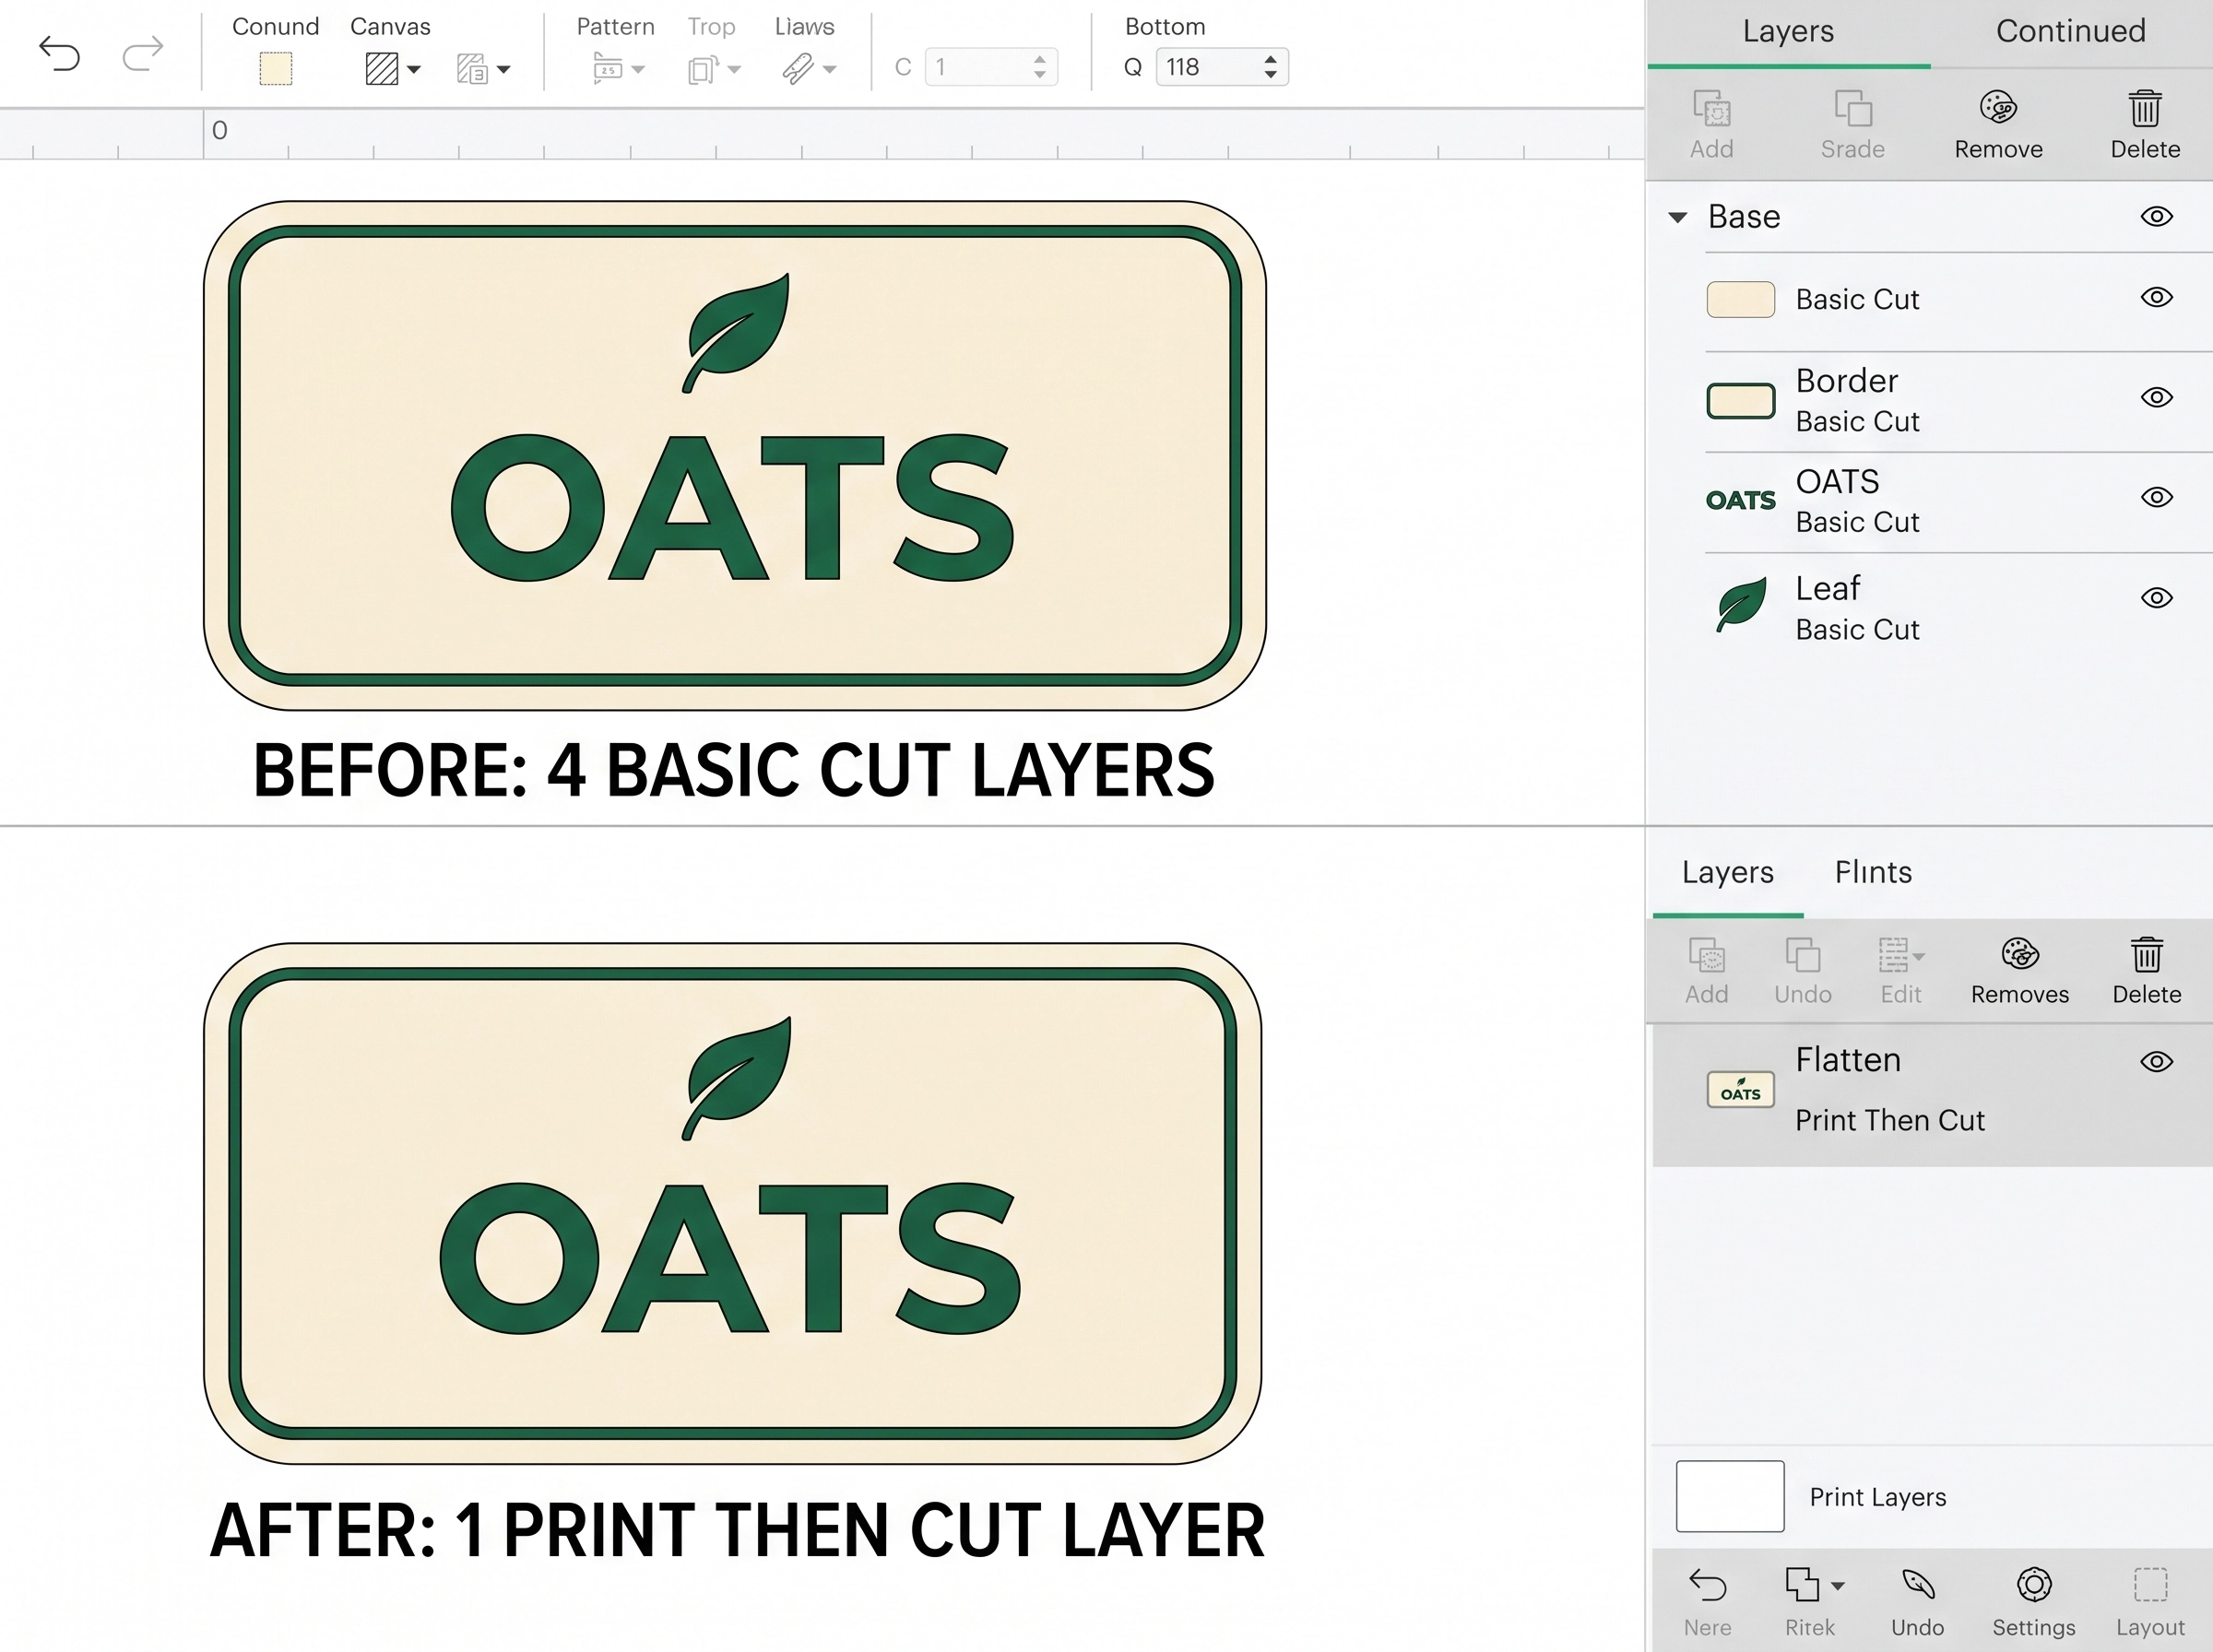
First, the Layers panel shows one flattened item where the selected components used to appear. You can move or resize that item as a whole.
Second, the new item’s Operation becomes Print Then Cut. Design Space will print the artwork and cut around its outer printable shape.
Third, overlapping text and artwork no longer produce individual cut paths inside a solid background. Separate islands or transparent gaps can still create separate edges, so inspect the result before printing.
The easiest visual check is to compare the Canvas and Layers panel before and after. The artwork may look nearly identical, while the layer list and Operation reveal the real change.
Where to find Flatten
On a Windows or Mac computer, select your design and look at the bottom of the Layers panel. Flatten appears among the layer actions; Unflatten appears when a flattened layer is selected.
On iOS or Android, select the objects and open Actions, then choose Flatten. Menus can vary with your machine selection and available actions, so rely on the tool name instead of an old screenshot’s exact position.
If you cannot see the action, check that you are on the Canvas and have selected a visible layer. A locked or hidden layer will not behave like an actively selected design element.
When Flatten is useful
Use Flatten when you want several elements to print together, such as lettering over a colored label base. The base provides one continuous outside edge for the cut.
It also works for a sticker made from type and illustrations. Put a solid shape or connected offset behind the design if you want one sticker rather than separately cut letters.
For a single layer that is already the right printable image, you can choose Operation > Print Then Cut instead. Cricut documents Flatten as the way to combine a design with multiple layers.
Flatten is not necessary for plain vinyl lettering that you intend to cut from colored vinyl. Keep that as Basic Cut and use the relevant layer tools for your cut-only project.
Which layers can be included?
Text, shapes, and images can be selected together for Flatten. Arrange their size, color, and stacking order before merging them into one printable layer.
If a line is meant to be drawn or scored by the machine, pause before flattening it into a printed graphic. Review the Operation of every selected layer so the result matches the project you intend.
You can flatten one visible layer, but it is often simpler to change that layer’s Operation directly. The multi-layer case is where Flatten earns its place.
Why it matters for Print Then Cut
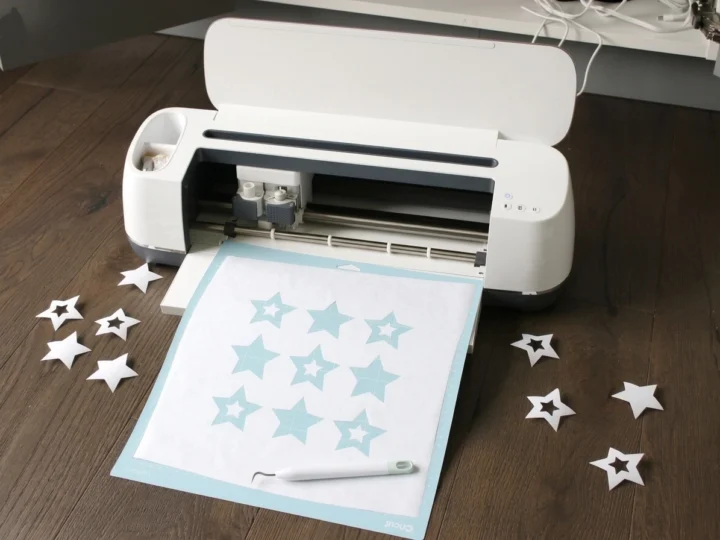
Print Then Cut uses a printer to put your artwork on compatible material and a Cricut machine to cut around it. The machine reads sensor markings on the printed sheet to locate the design.
Design Space needs a printable image for that workflow. Flatten changes a collection of Canvas pieces into one Print Then Cut layer while keeping the colors you arranged.
One layer does not automatically mean one connected physical piece. A solid backing shape is the reliable way to join separated lettering or icons into a single cut outline.
For a clean first attempt, use a compatible Cricut machine, a home printer, and an ordinary test sheet before loading your final label or sticker paper.
Printable material matters too. Cricut’s sensor guidance varies by machine and finish, so choose a material supported by your machine instead of assuming every glossy or dark sheet will scan reliably.
How to flatten a design
Start a new Design Space project and place two or more objects on the Canvas. Finish the layout first: align the text, choose colors, and move the intended background behind the other elements.
Drag a selection around every object that belongs in the printed graphic, or select the corresponding layers in the Layers panel. An overlooked layer will remain separate.
Choose Flatten from the Layers panel on desktop or Actions on mobile. Look for a single resulting layer with the Print Then Cut Operation.
Select Make and study the mat preview. A label with a continuous base should show one outside cut shape; a design with disconnected pieces can show more than one.
If the preview is wrong, return to the Canvas rather than printing. Unflatten, adjust the arrangement or background, and flatten the intended layers again.
When the preview is right, follow Design Space’s Print Then Cut prompts. Keep printing and cutting in the same Design Space session so the sensor markings remain correctly sized.
What Flatten does not preserve for editing
After flattening, you can adjust the combined item’s size and position. Editing a word’s font or recoloring one original icon requires Unflatten first.
Keep a saved editable copy of a design you may reuse with other wording. That is a practical safeguard when making a series of matching pantry labels.
Unflatten restores component layers from a flattened Design Space object, but those pieces remain printable layers. Change individual Operations if you want to return to Basic Cut.
Flatten and Weld solve different jobs. Weld joins cut shapes into a single cut shape; Flatten prepares visible artwork as one printable layer. Choose based on whether your material will pass through a printer.
Attach is different again: it holds selected objects in position. Attaching letters to a backing does not by itself turn the assembled artwork into one printable sticker.
Example 1: Make a printable pantry label
For a distinct sample design, create a rounded cream rectangle, a thin green border, a small leaf icon, and the word “OATS.” These are separate Canvas elements at the start.
The cream rectangle must sit behind and extend beyond the complete word and icon. Its continuous edge will become the label’s cut shape.
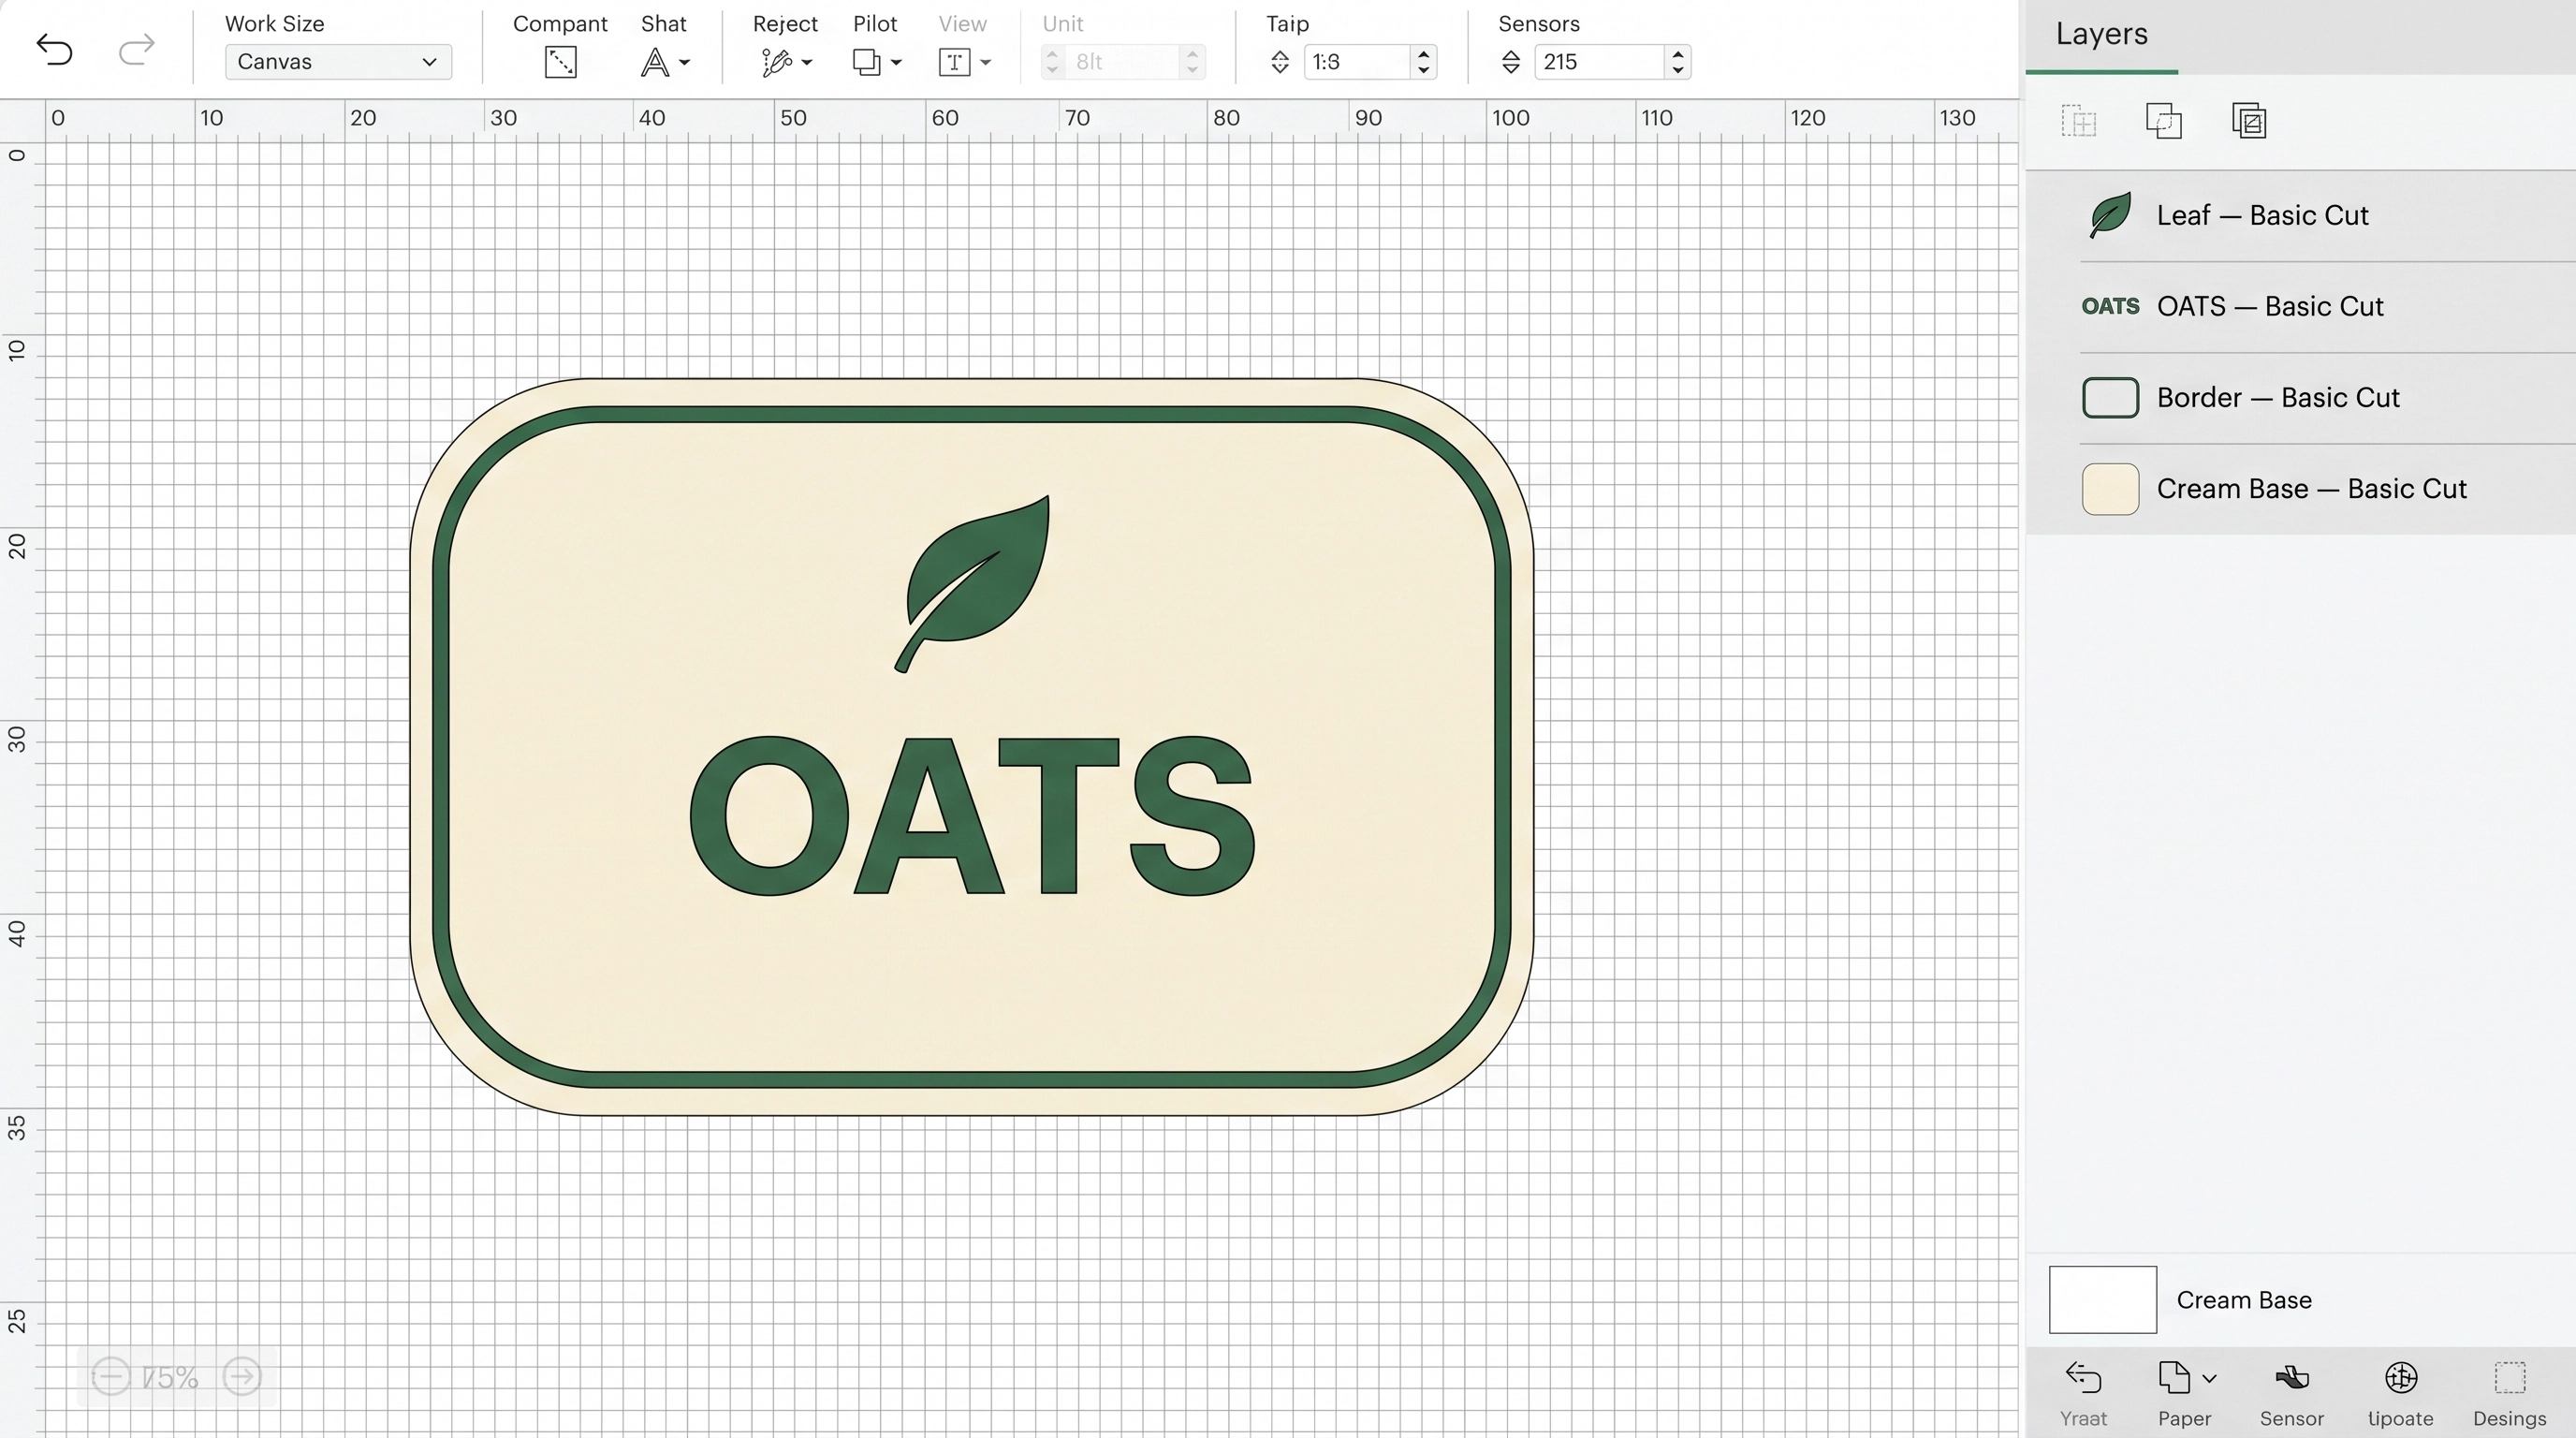
Select just the finished label elements, then Flatten. The Layers panel should show one Print Then Cut item, while the green, cream, and lettering still appear in the artwork.
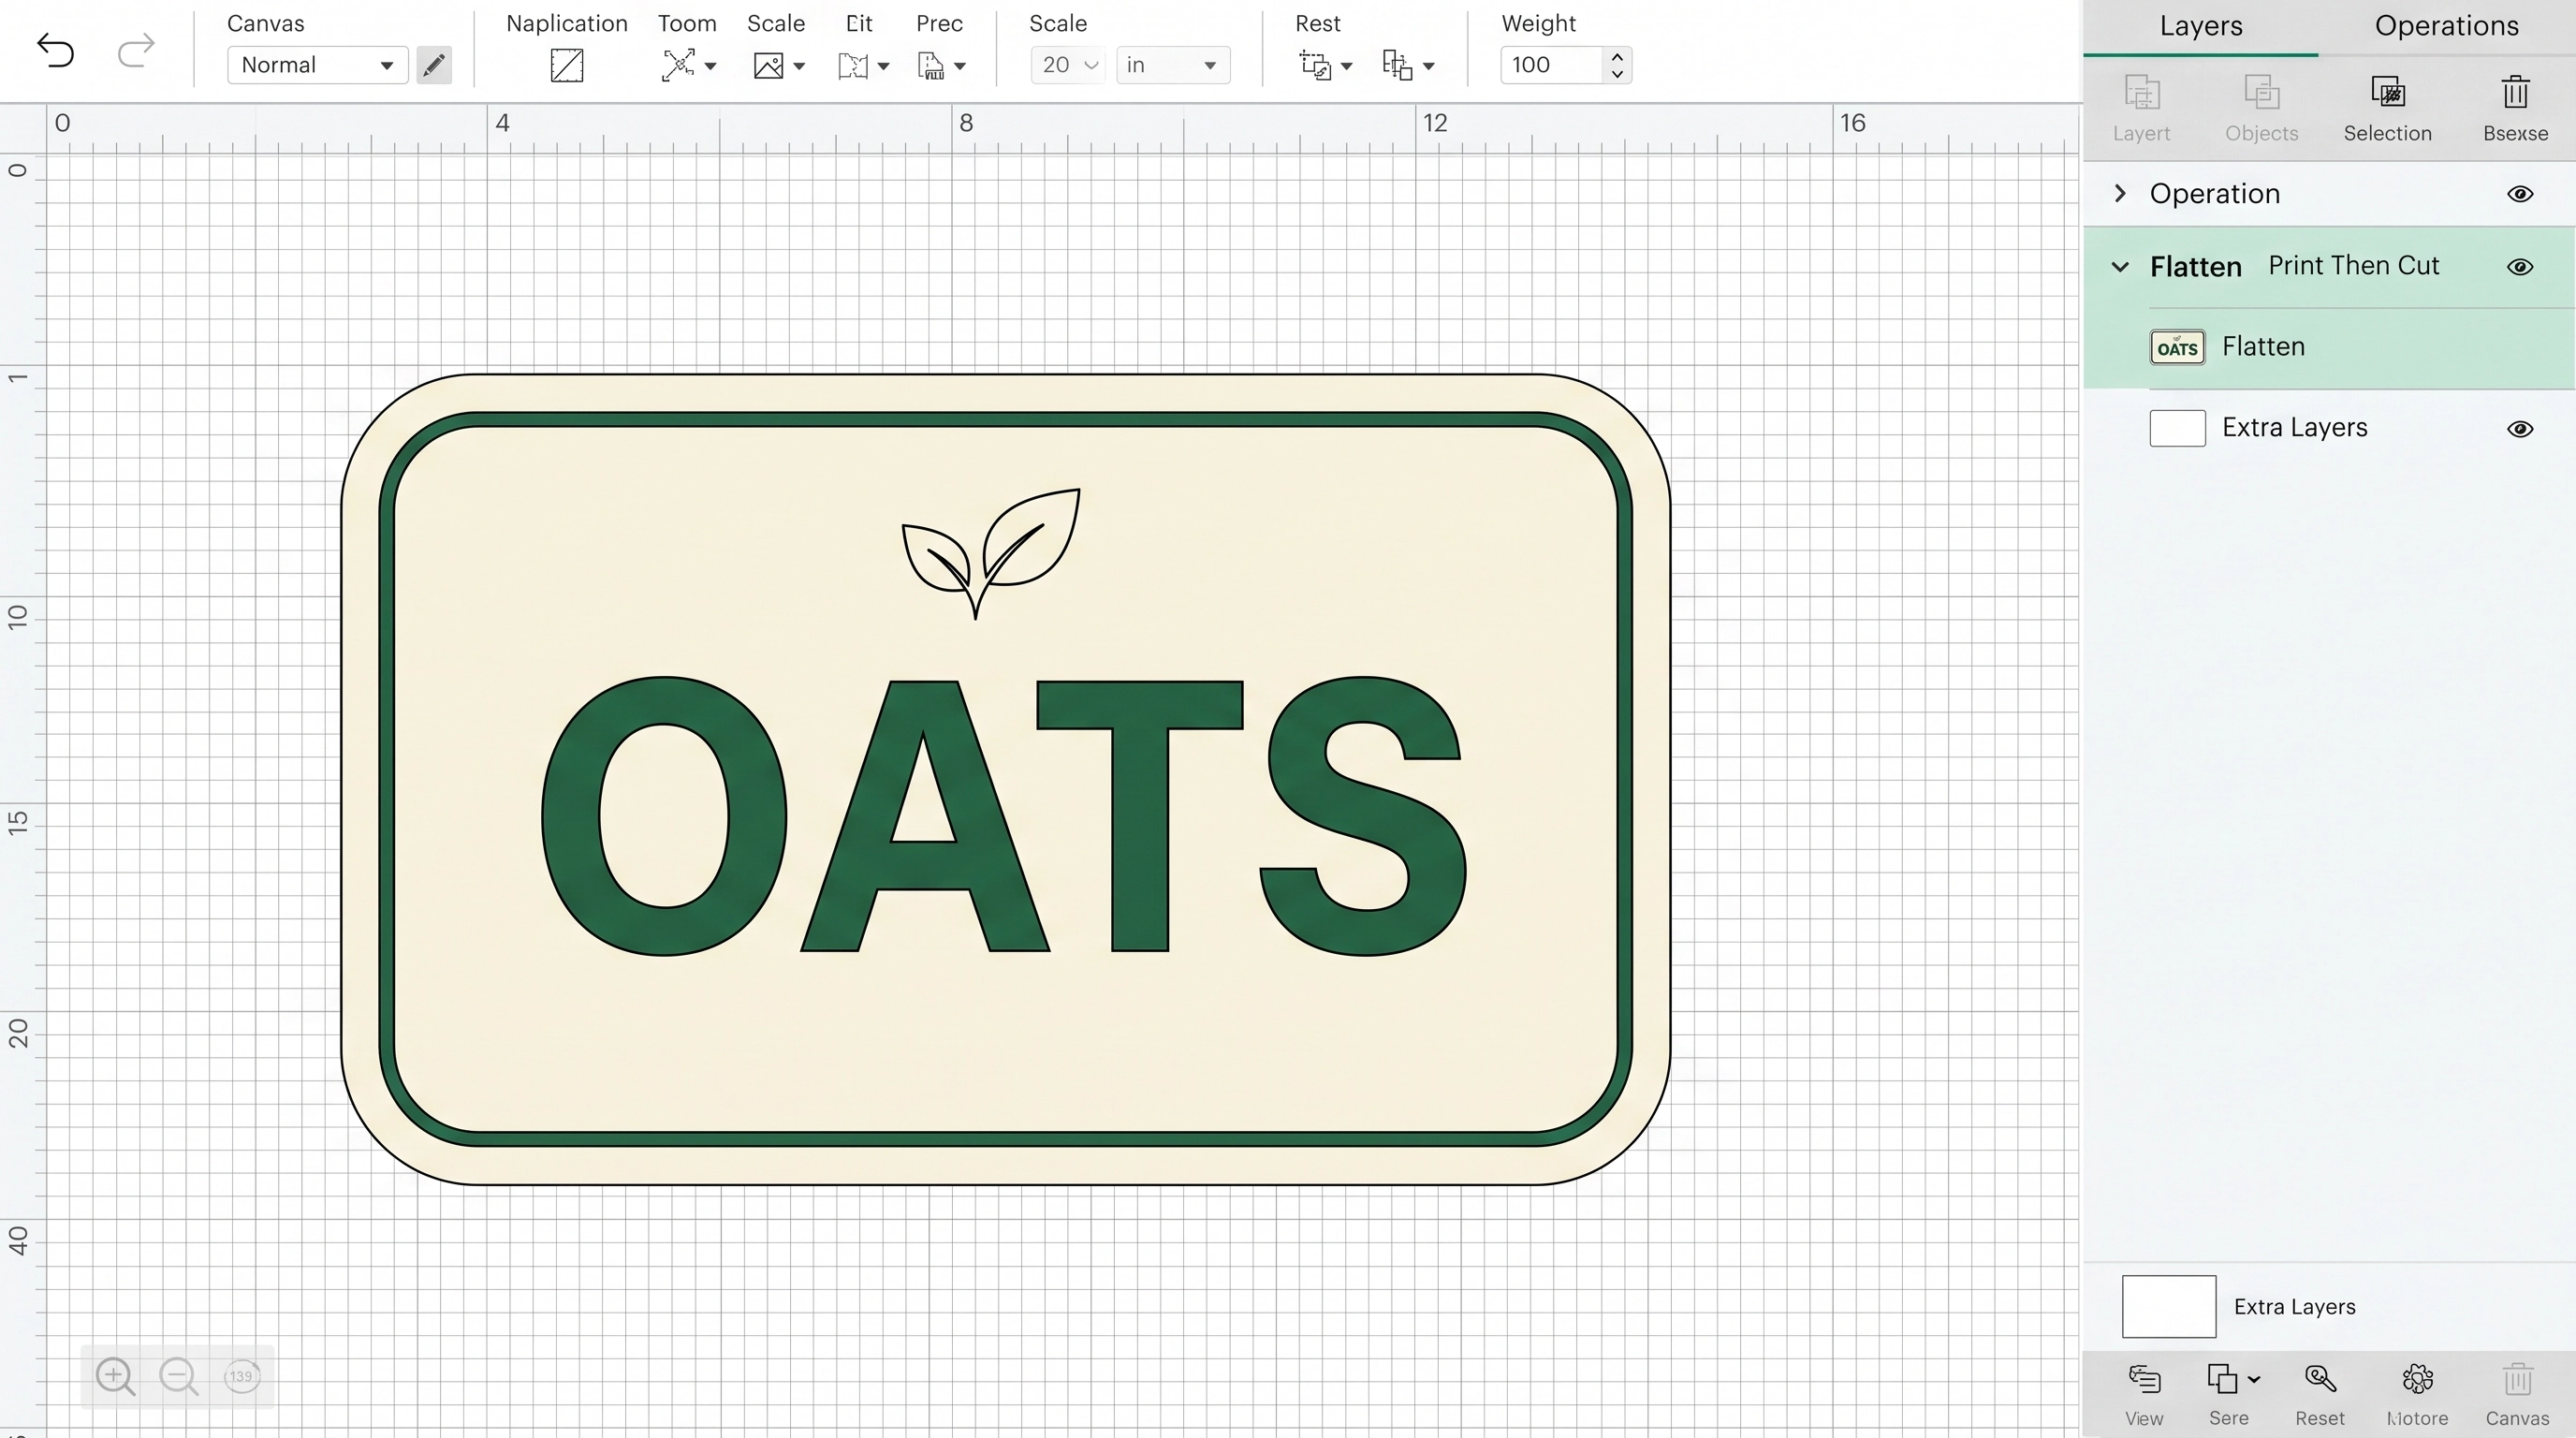
If you accidentally leave the leaf unselected, it will be a separate layer. Unflatten or Undo, include the leaf, and repeat before moving on.
Click Make to inspect the placement on the chosen paper size. For a US home printer, confirm that Design Space is set to the page size you actually loaded, often US Letter.
The printed page includes sensor markings around the cuttable area. Do not trim them away or rescale the print outside the Design Space workflow.
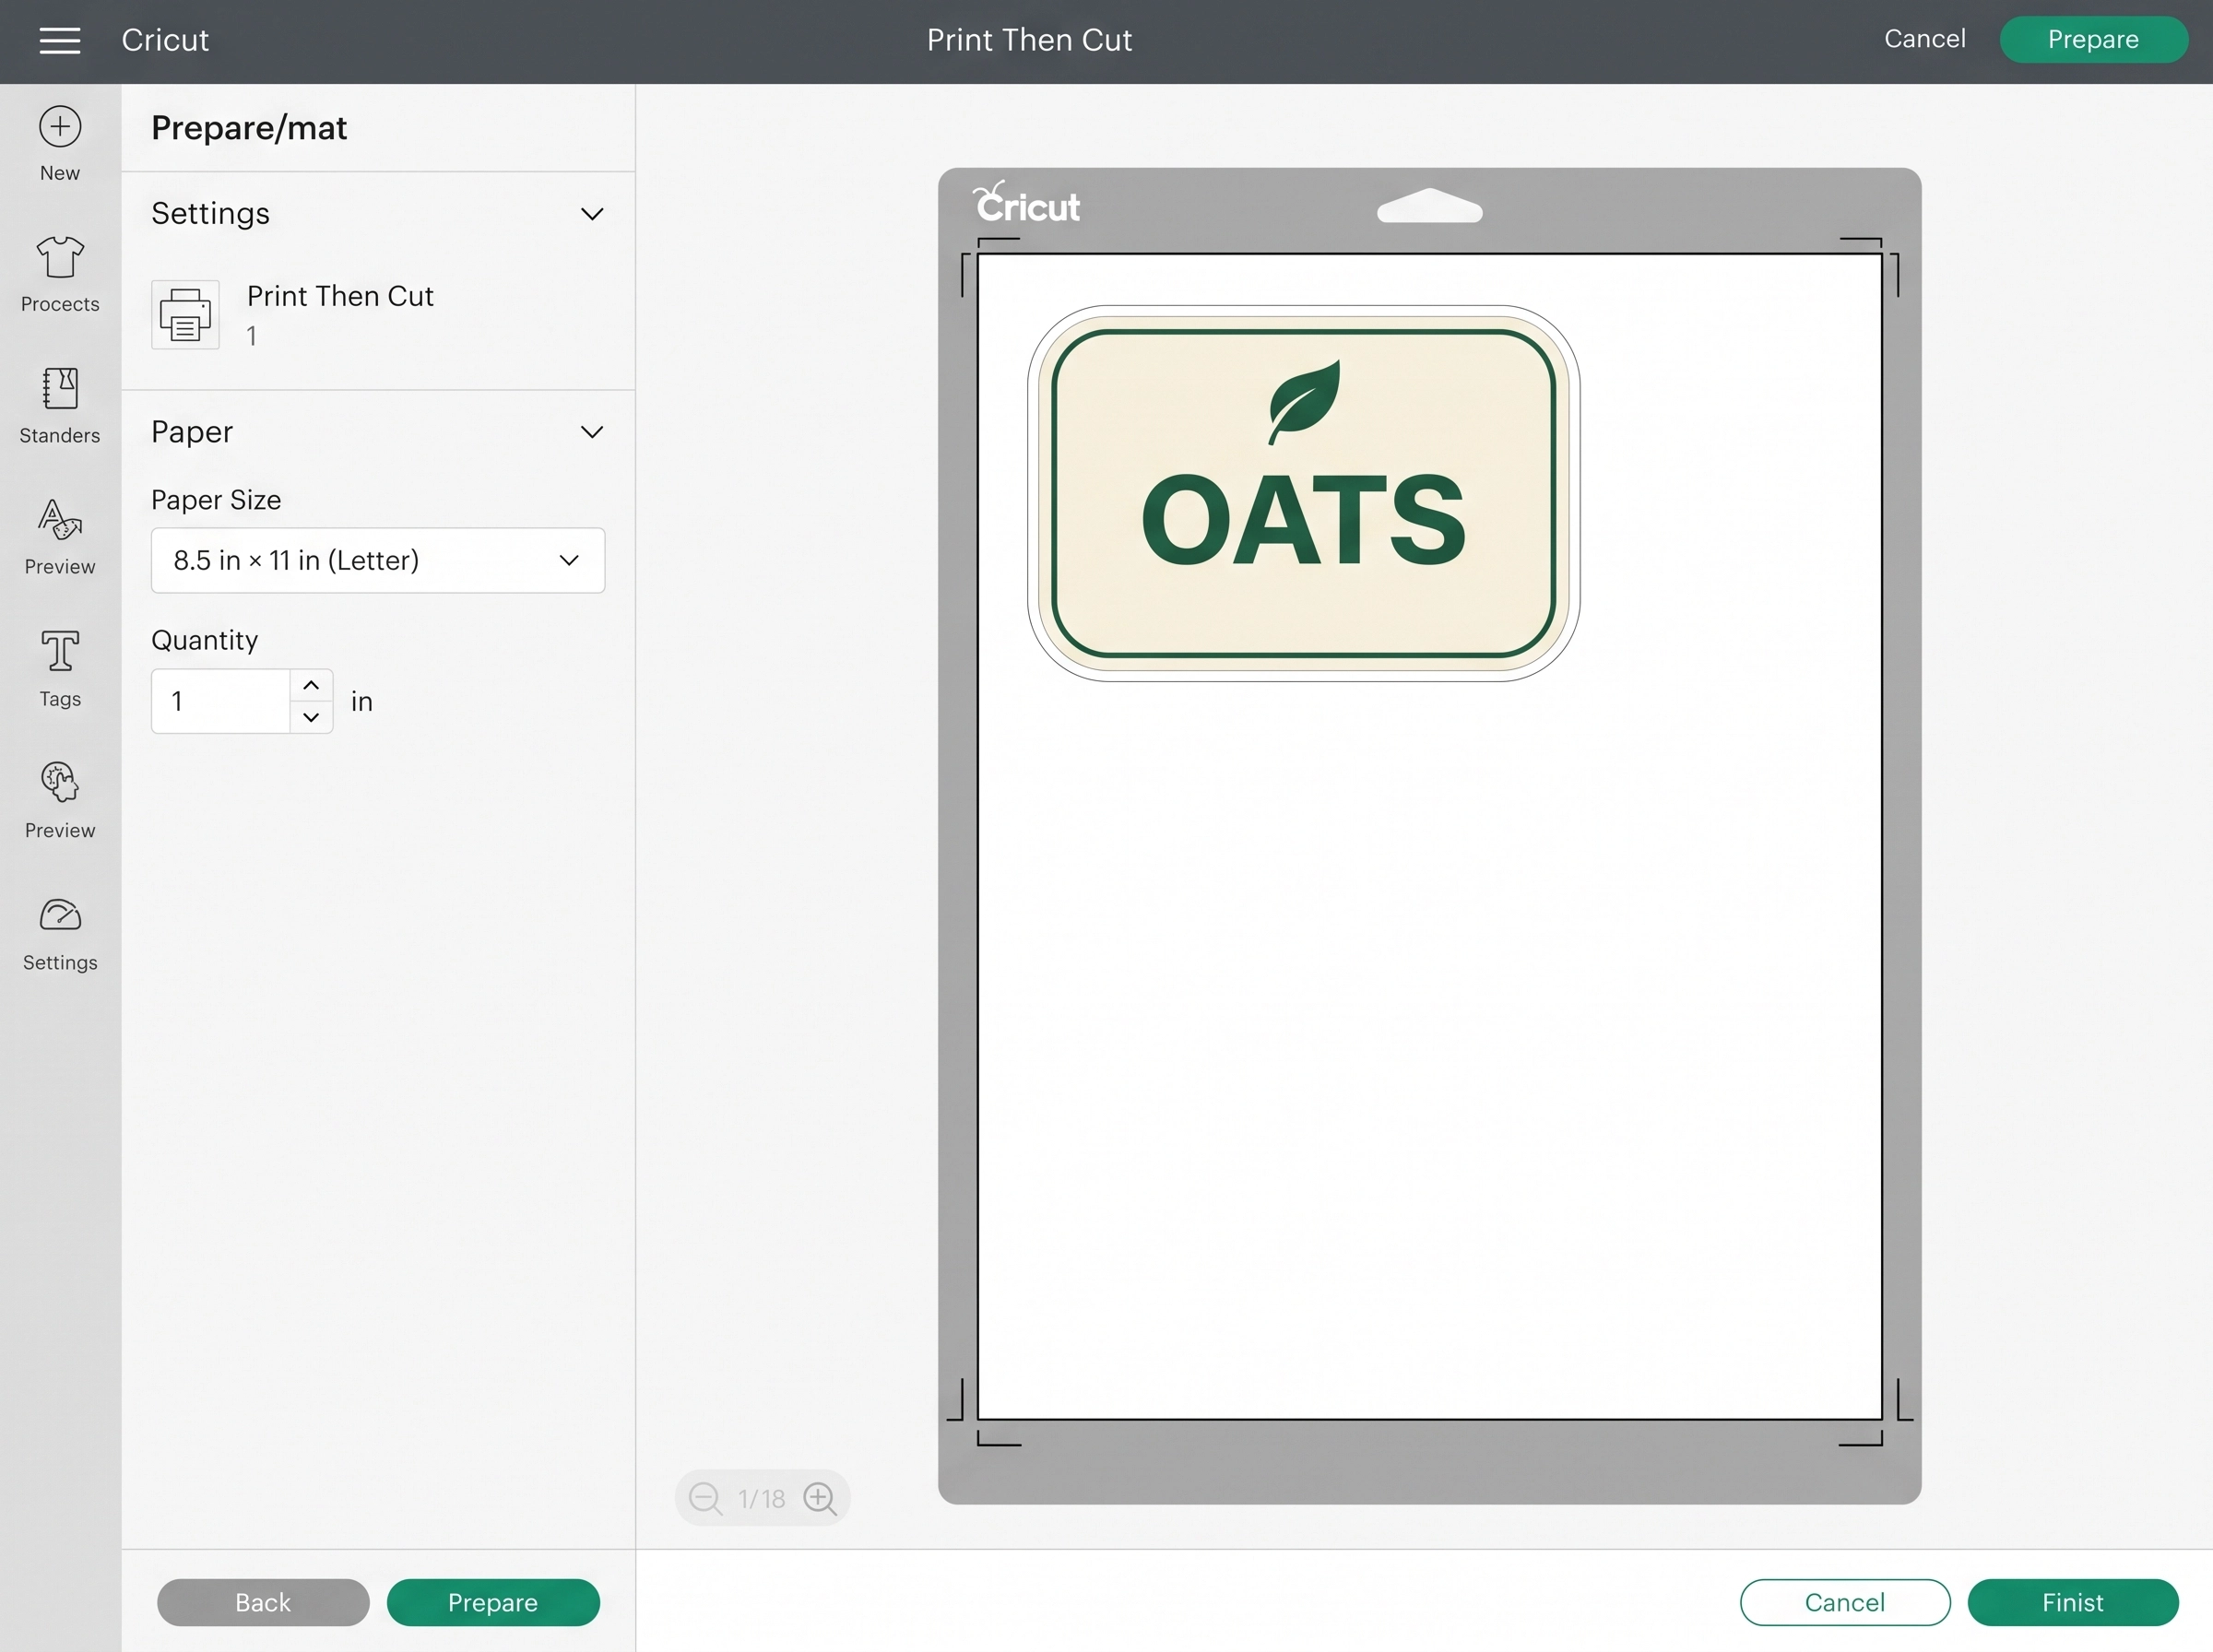
The Cricut should cut around the rounded cream rectangle, not around each letter in “OATS.” If the mat preview disagrees, check whether the rectangle is solid and included in Flatten.
Run a plain-paper test if this is your first Print Then Cut project or you changed printer settings. Save your printable material for the version whose preview and test cut look right.
Example 2: Keep a sticker in one piece
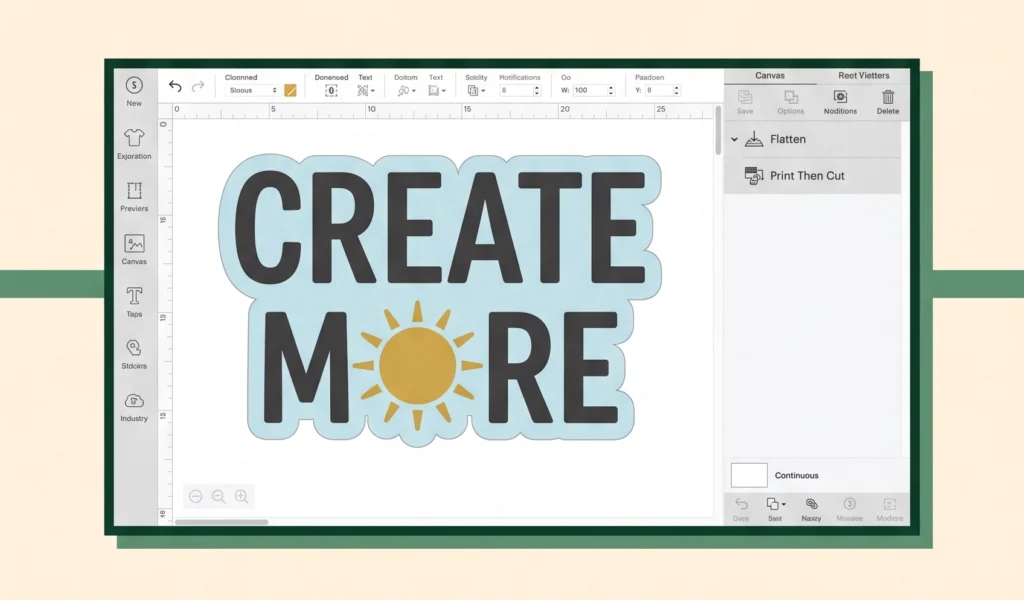
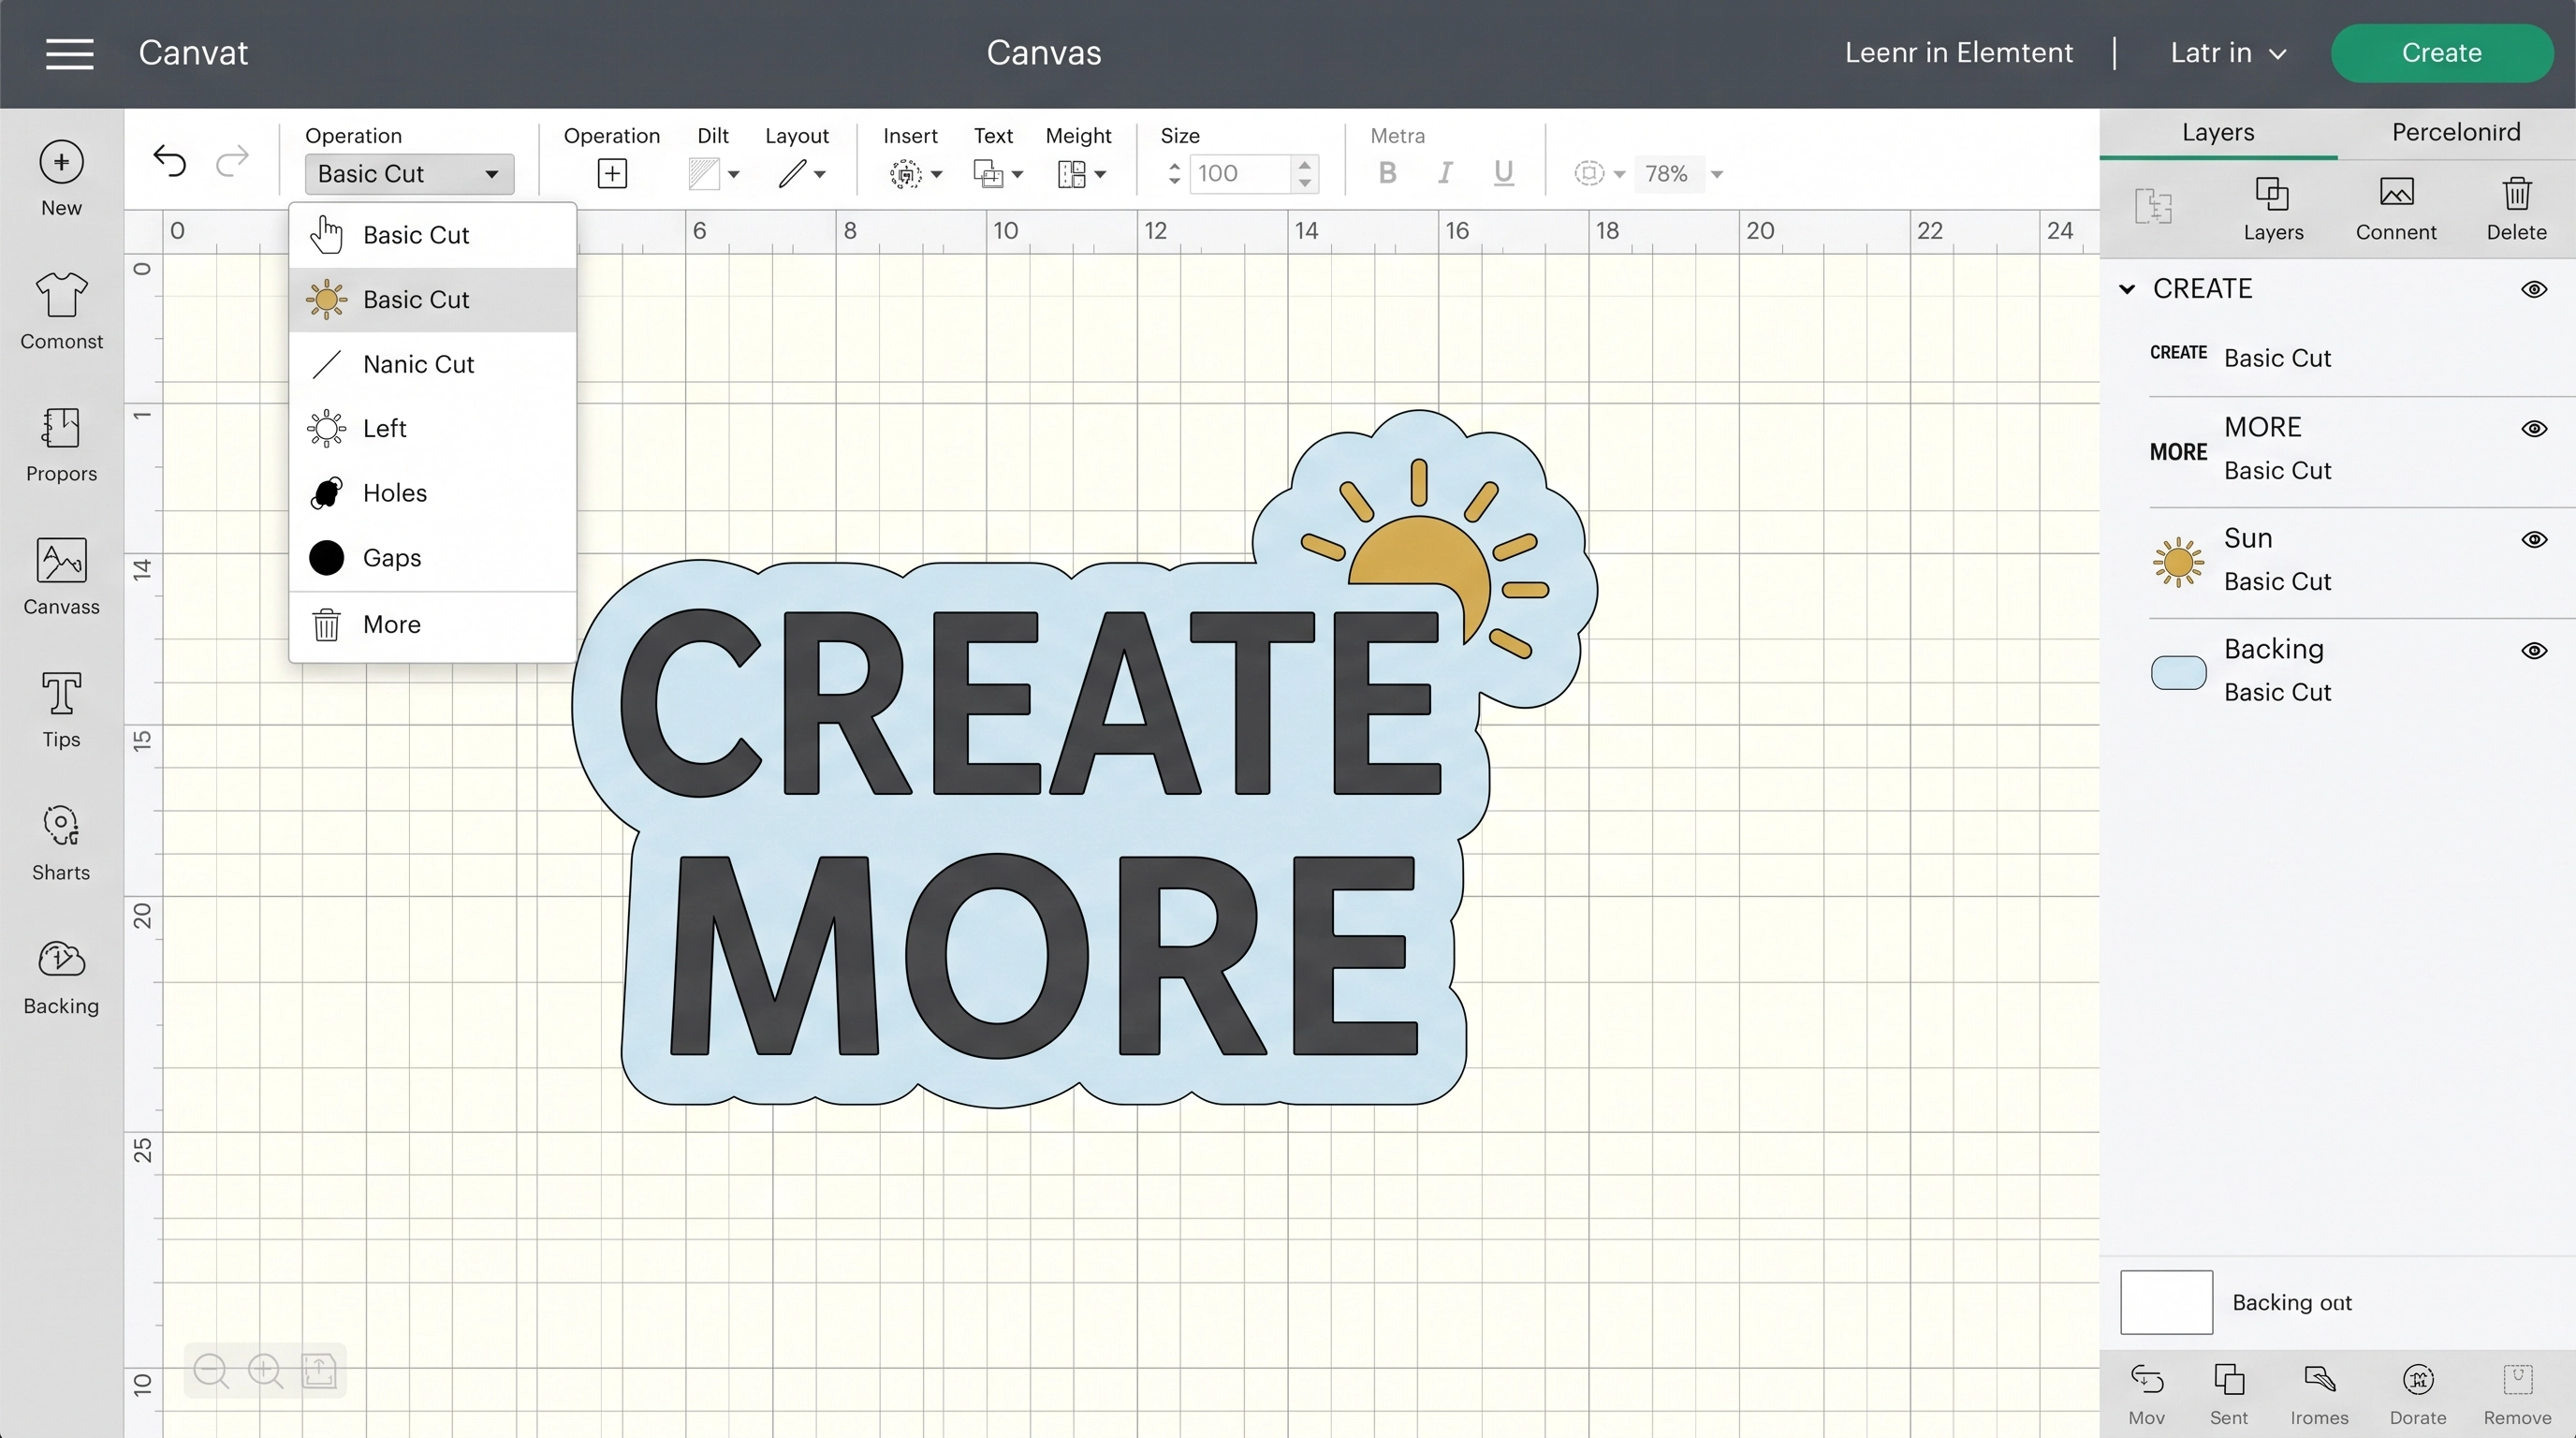
Imagine a small “CREATE MORE” sticker with two words and a simple yellow sun. With no connected background, the words and sun are separate islands on the Canvas.
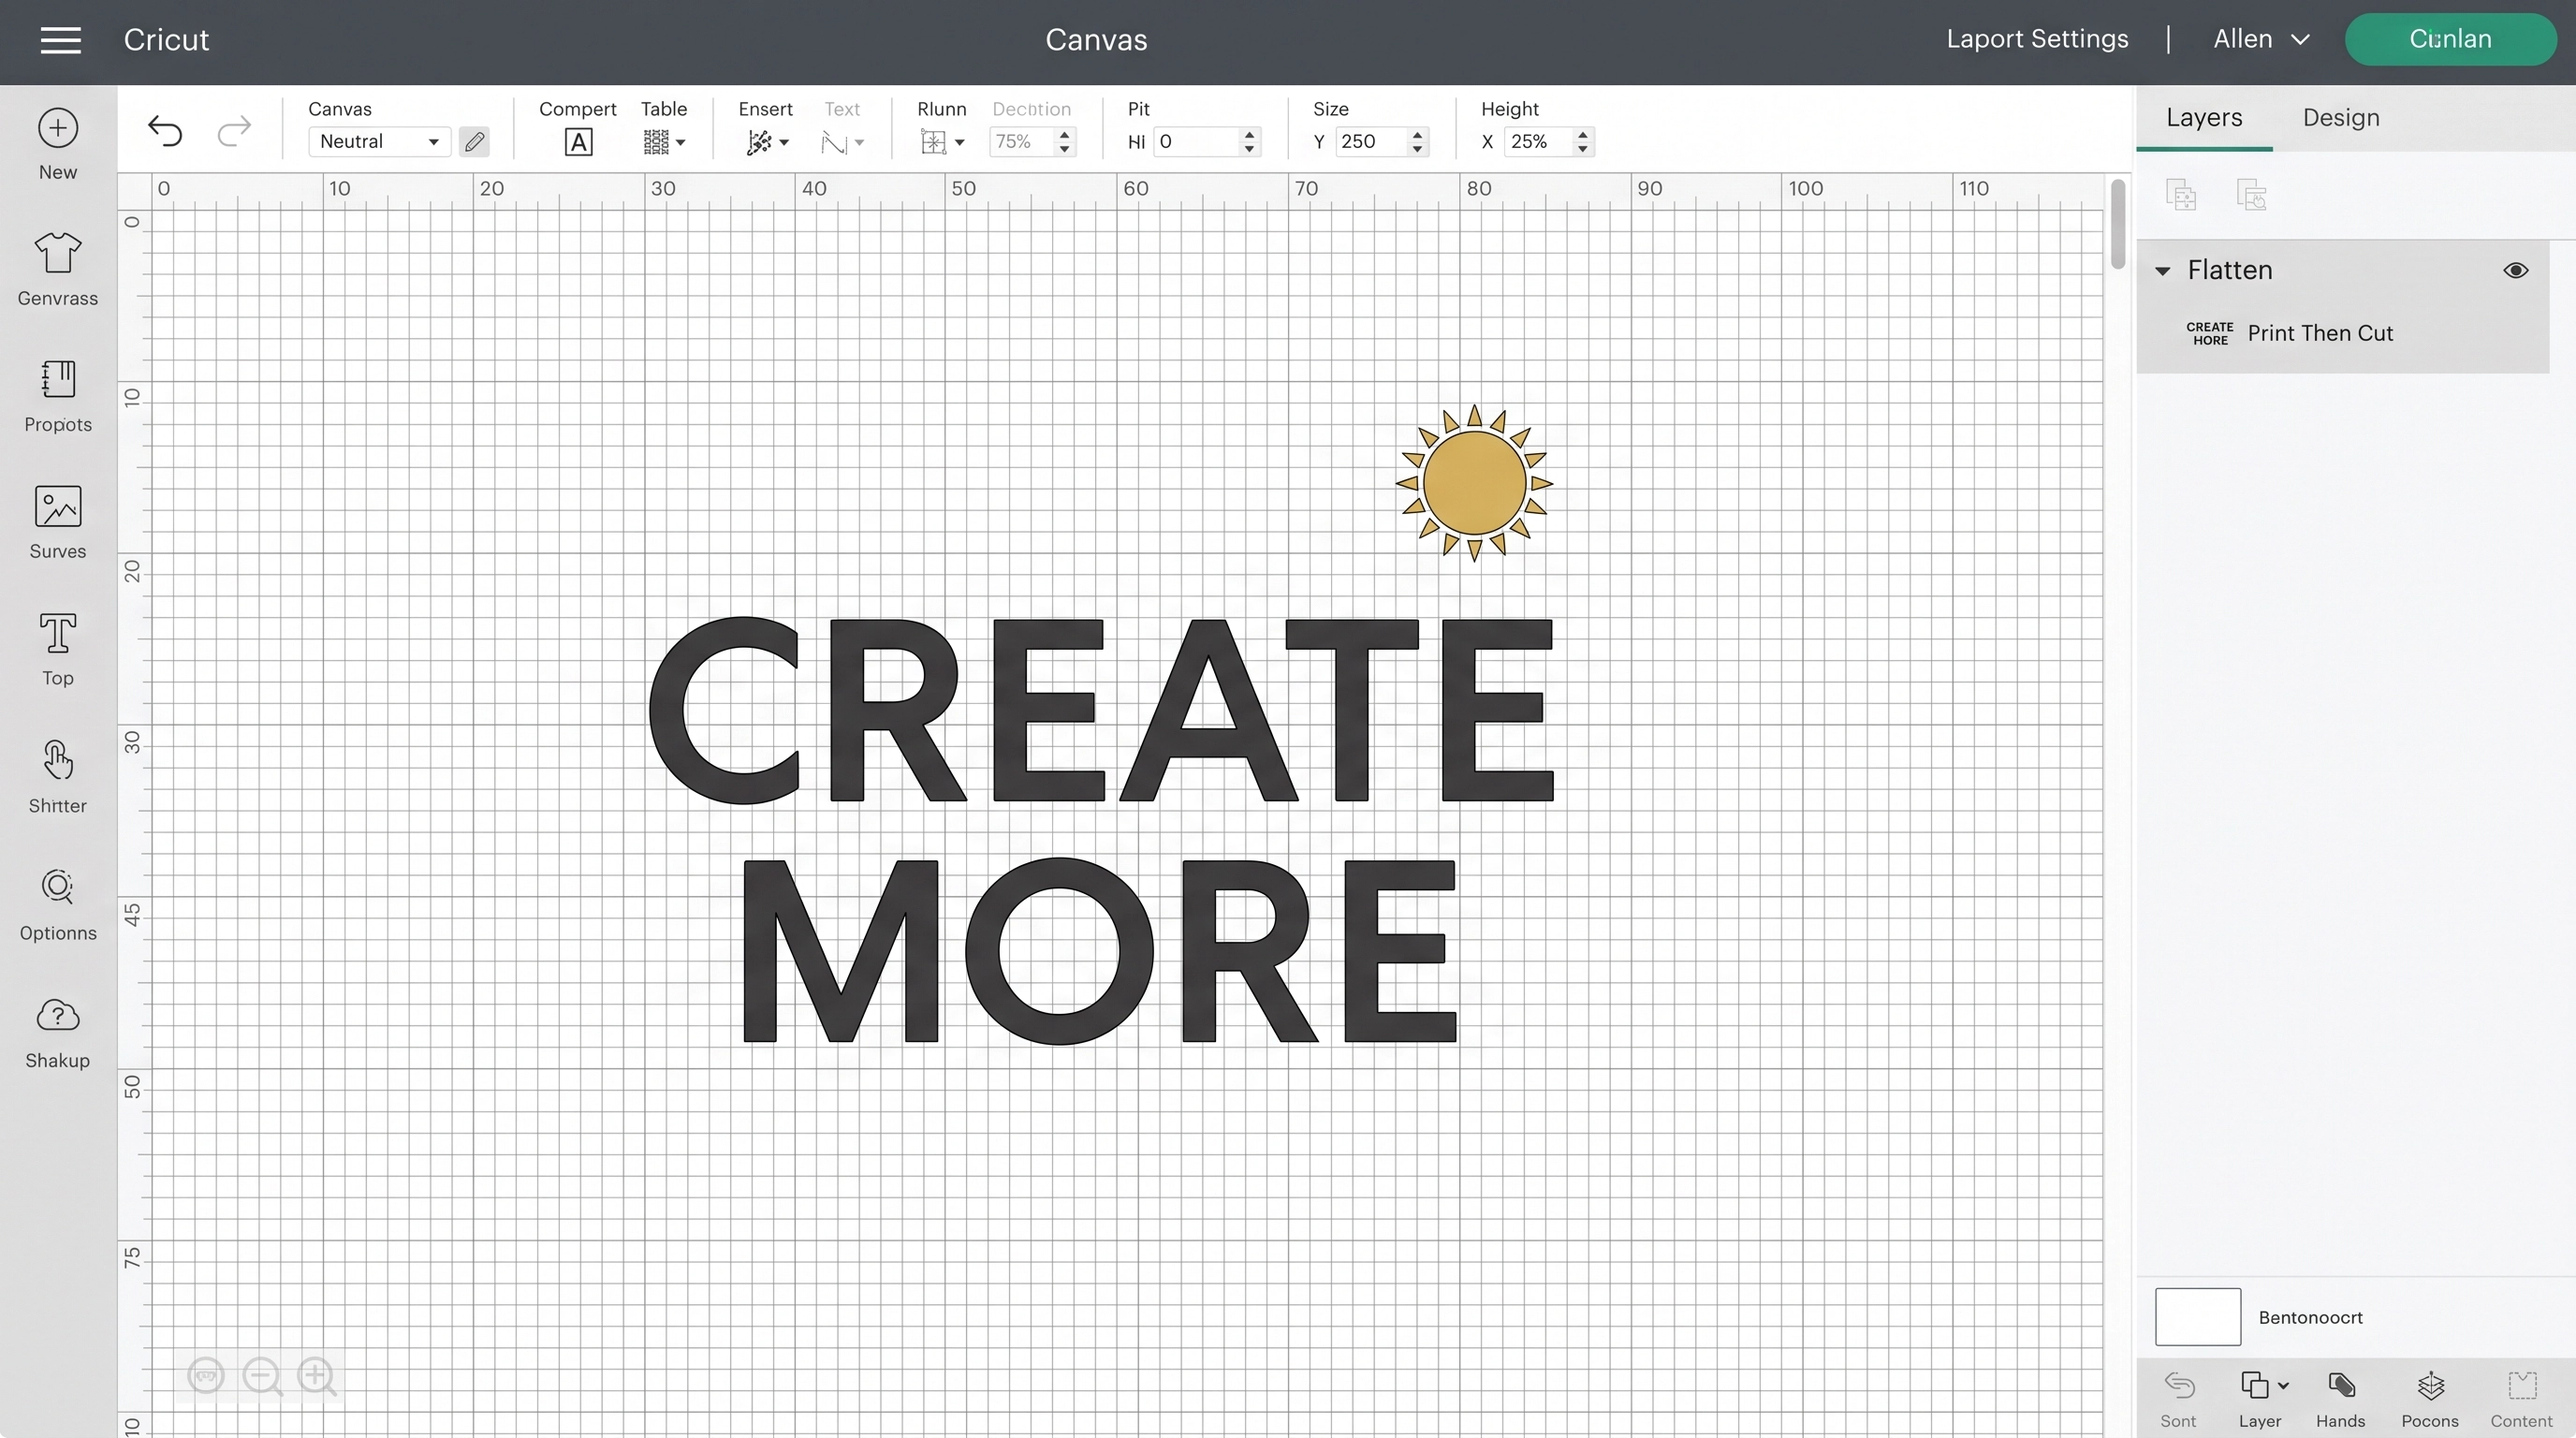
Flattening only those islands makes one printable layer, but it can still leave several outside contours. That is why a screenshot of one Layers panel item is not enough to guarantee one physical sticker.
Add a light blue rounded backing shape behind the full phrase and sun. Extend it far enough to form an even margin around the artwork.
A white backing is another option on white sticker paper; the printer may leave that area unprinted while the shape still defines the cut edge. Check the mat preview to confirm the outline.
You can also use Offset to create a border around selected art. Cricut’s Offset tool creates a new layer, so select both the art and the finished offset when you Flatten.
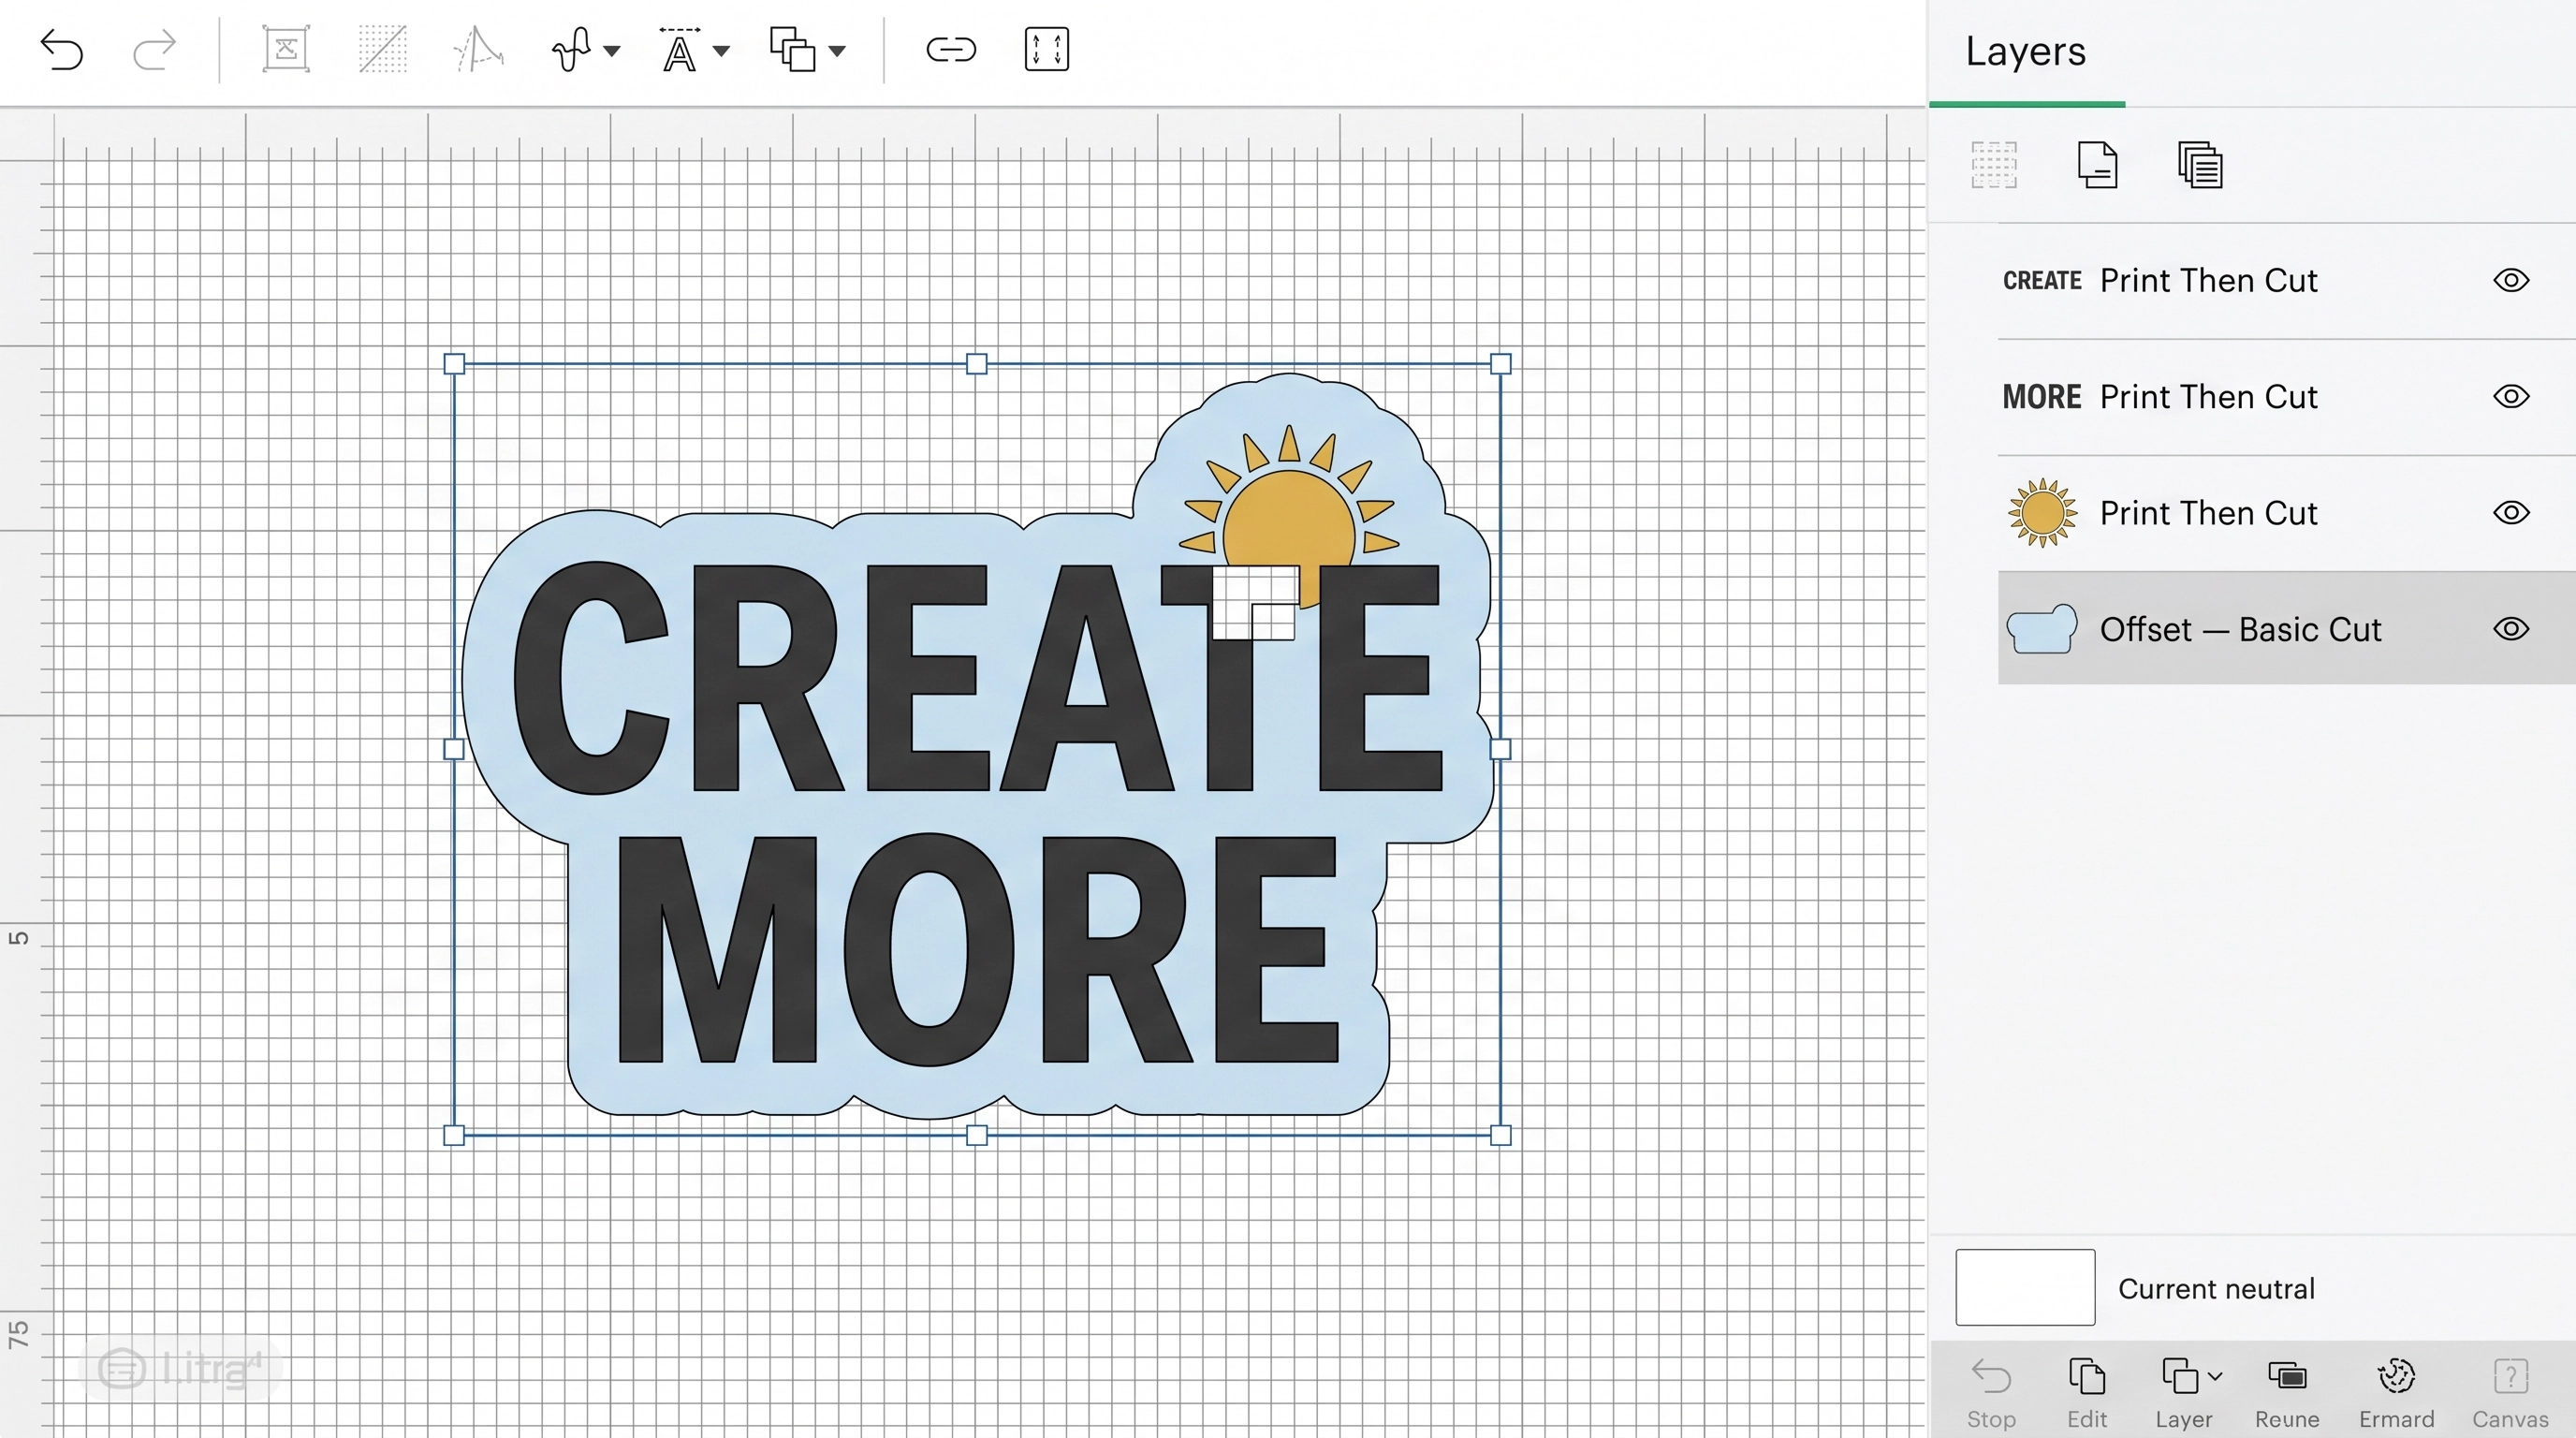
Inspect any small openings in the border. If a gap leaves exposed Canvas between elements, enlarge the offset, use a solid shape, or adjust eligible cut paths with Contour before flattening.
For help with that last option, see our Contour guide. It explains how to hide individual paths in a cut layer.
Once the backing is continuous, put it behind the lettering, select the whole sticker, and Flatten. The Layers panel should show Print Then Cut and the preview should show the outside of the backing.
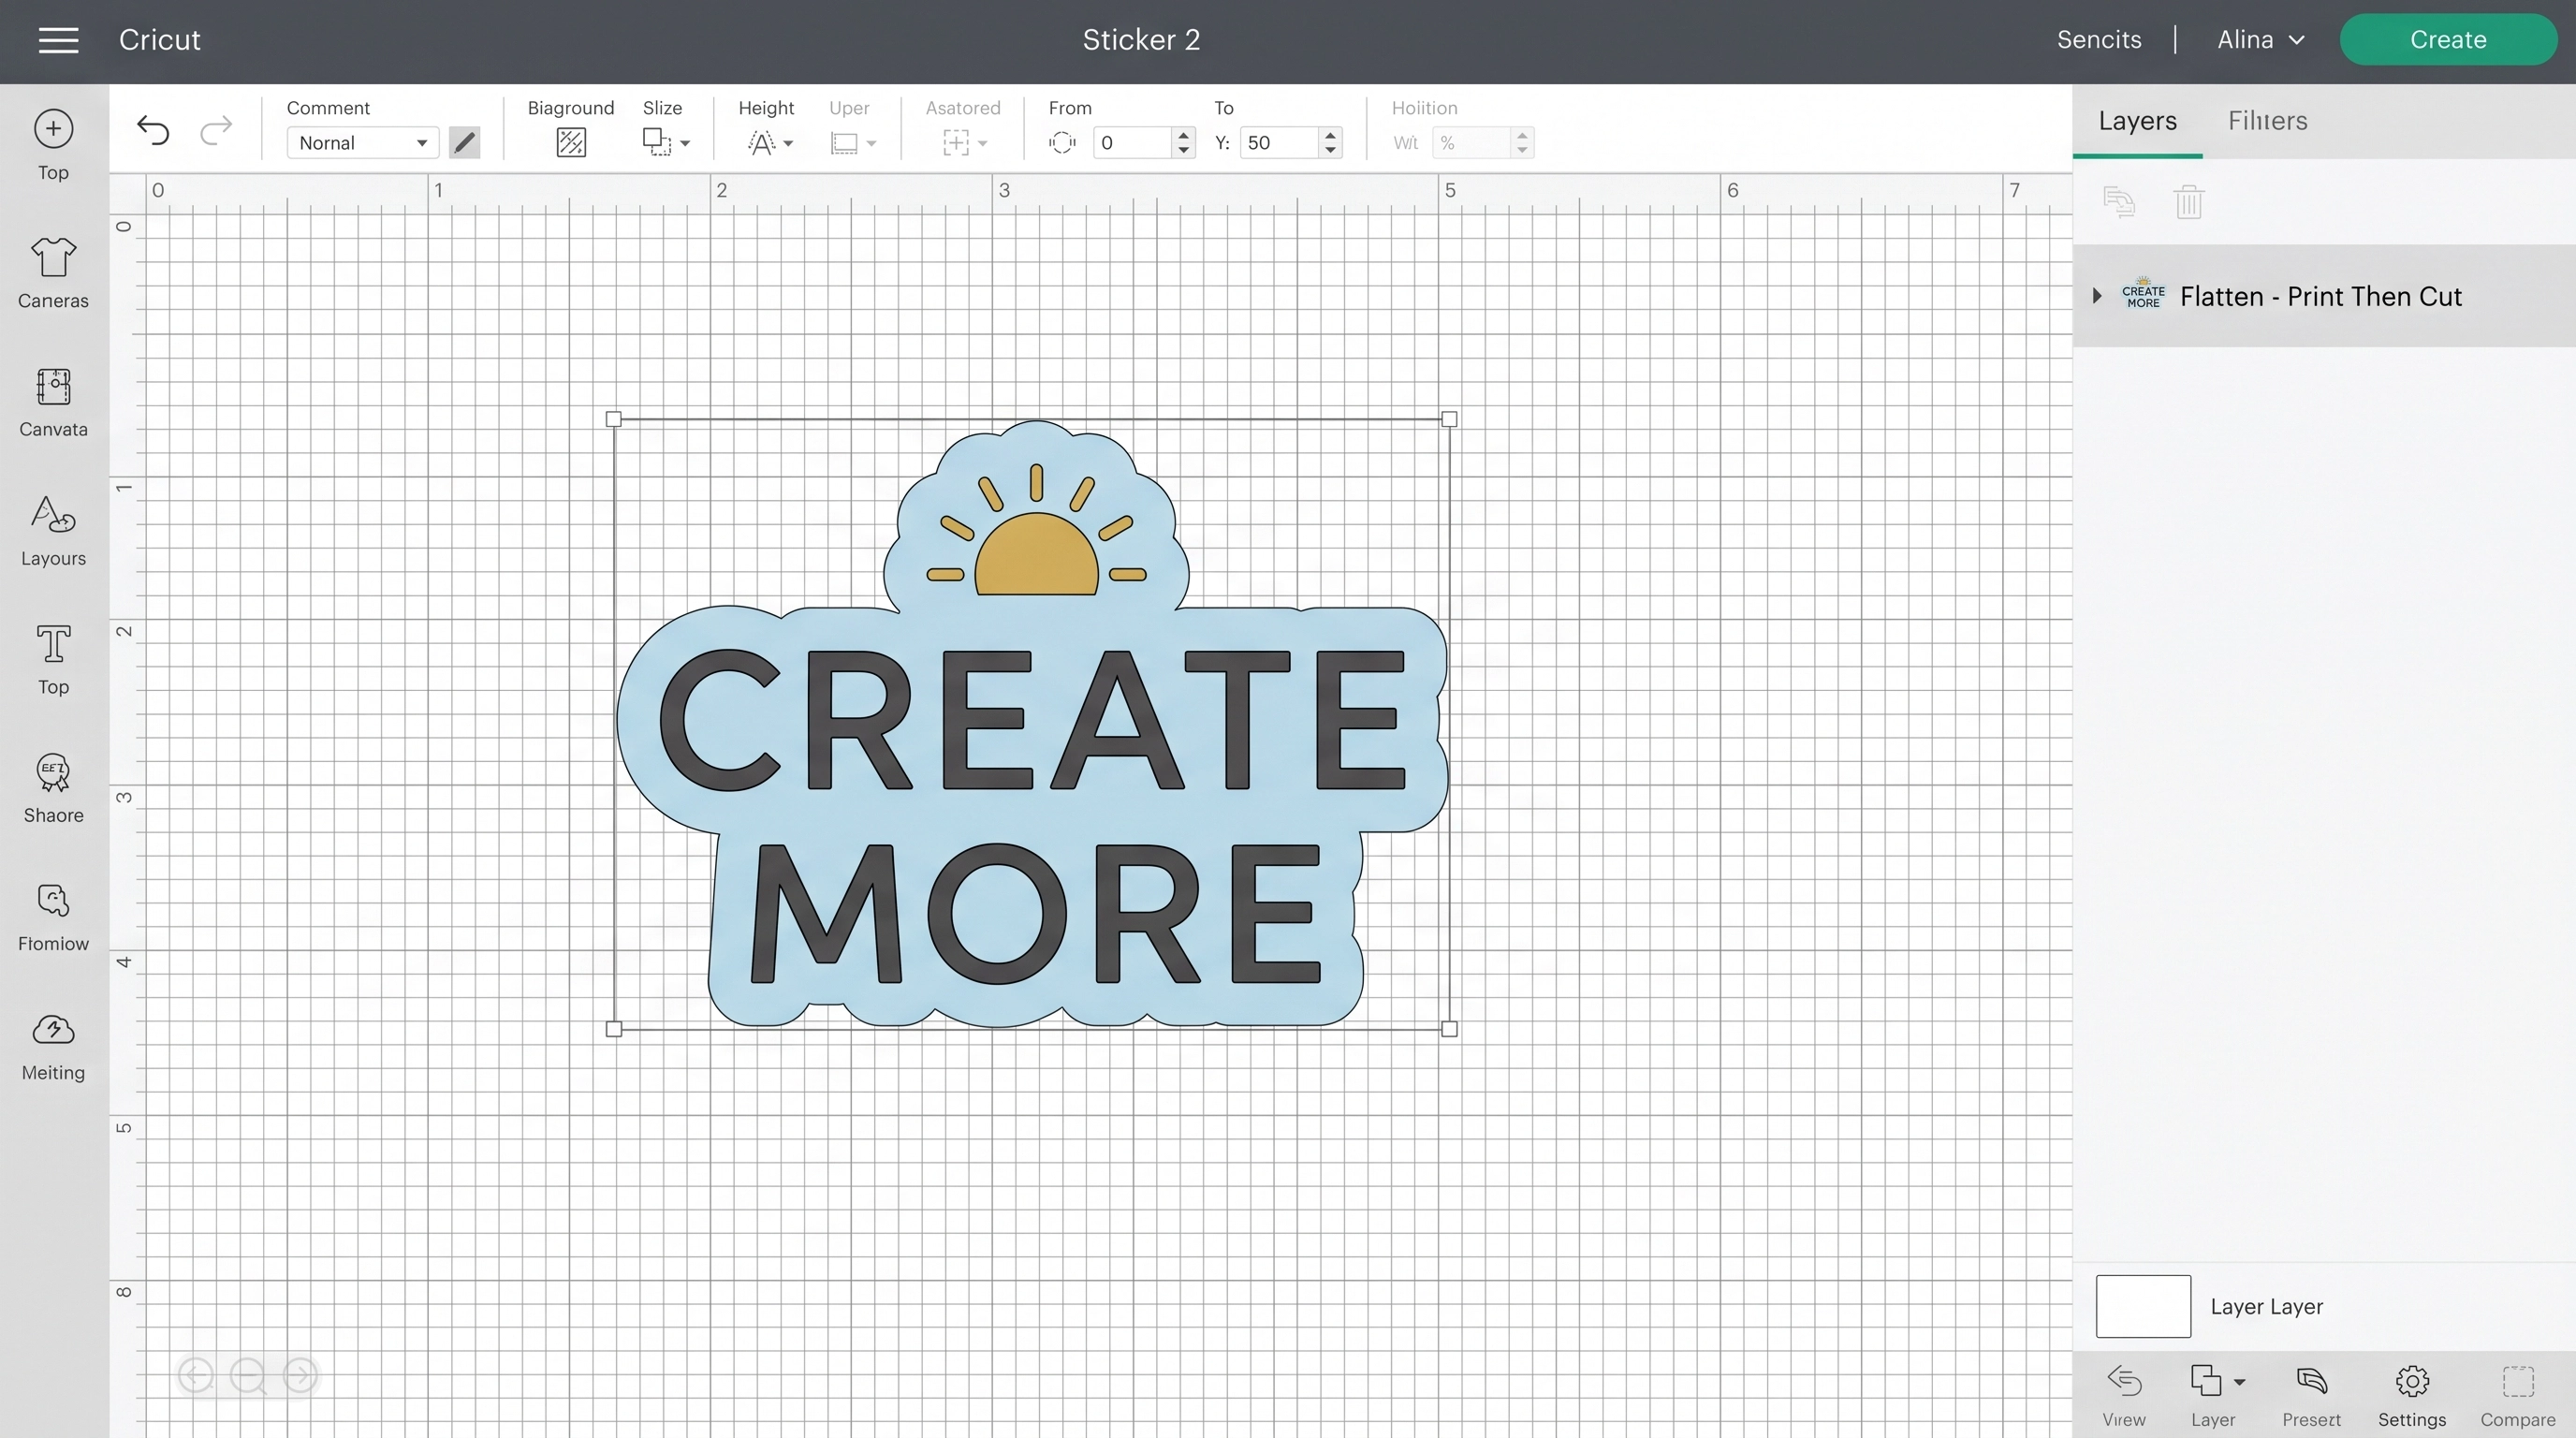
If your version of Design Space offers Create Sticker, that tool can prepare printable stickers and border choices in one flow. Flatten remains useful when you want direct control over the underlying layers.
How to unflatten and change operations
Select the flattened item on the Canvas or in the Layers panel. Choose Unflatten from the layer actions; on mobile, look in Actions.
The separate objects return, so you can change the text, size, color, or layout. Review them individually before flattening the corrected design again.
The returned layers can still say Print Then Cut. For a cut-only version, select the needed pieces and change their Operation to Basic Cut in the Edit controls.
Be aware that printable color and pattern detail may not survive a conversion to Basic Cut as separate cut colors. Check the Layers panel and mat preview rather than assuming the original cutting setup has been restored.
If you just clicked Flatten by mistake, Undo is the fastest correction. Unflatten is useful after you have continued working or reopened a saved project.
Troubleshooting Flatten
If Flatten is unavailable, return to the Canvas and select a visible object. Confirm that the layer has not been hidden and that the action is available for the current selection.
If Cricut cuts the inside of letters or around each icon, confirm the project is Print Then Cut and that the elements sit over a continuous background. Attach alone will not solve that cut pattern.
If the printable design is too large, open the warning in the Layers panel and resize the design or choose a supported page size in Print Then Cut settings. The printable area is smaller than the full sheet.
If the cut is shifted away from the printed edge, follow Cricut’s Print Then Cut calibration guidance and verify that you printed from the current Design Space session at the intended size.
The short version
Flatten when your finished design should print as one image. Check its Operation and mat preview, add a continuous background when you need one physical sticker, and use Unflatten whenever the component artwork needs editing.
Have a question? Use the form above to submit your question or comment.
I love hearing from you and seeing what you made!