


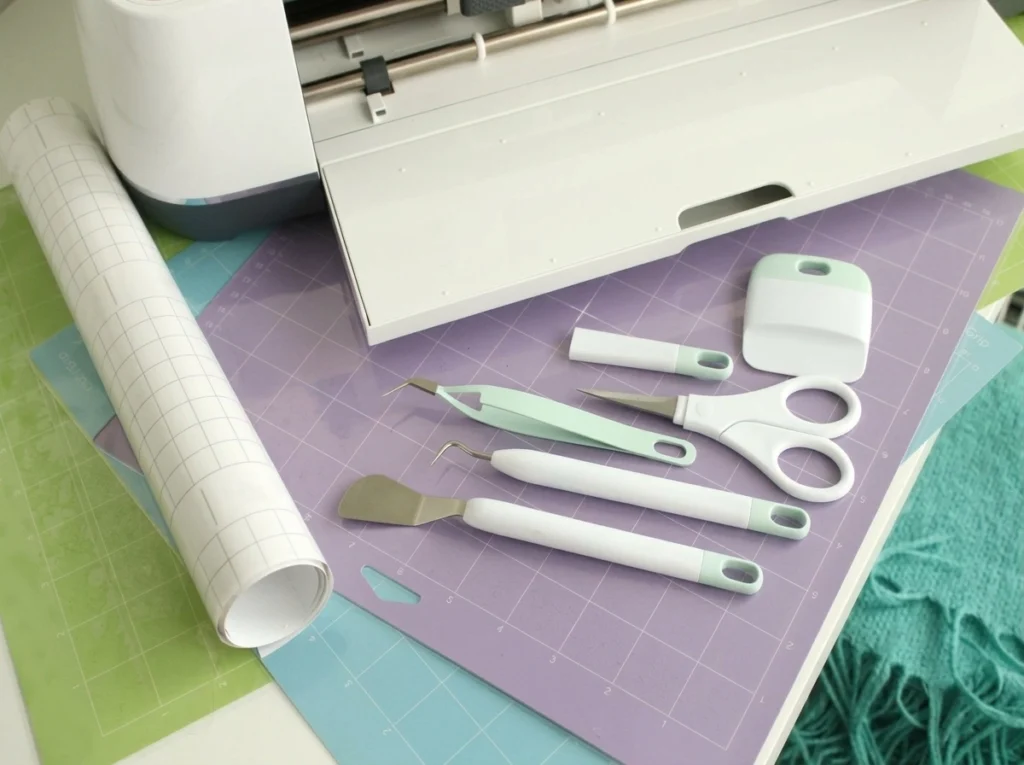
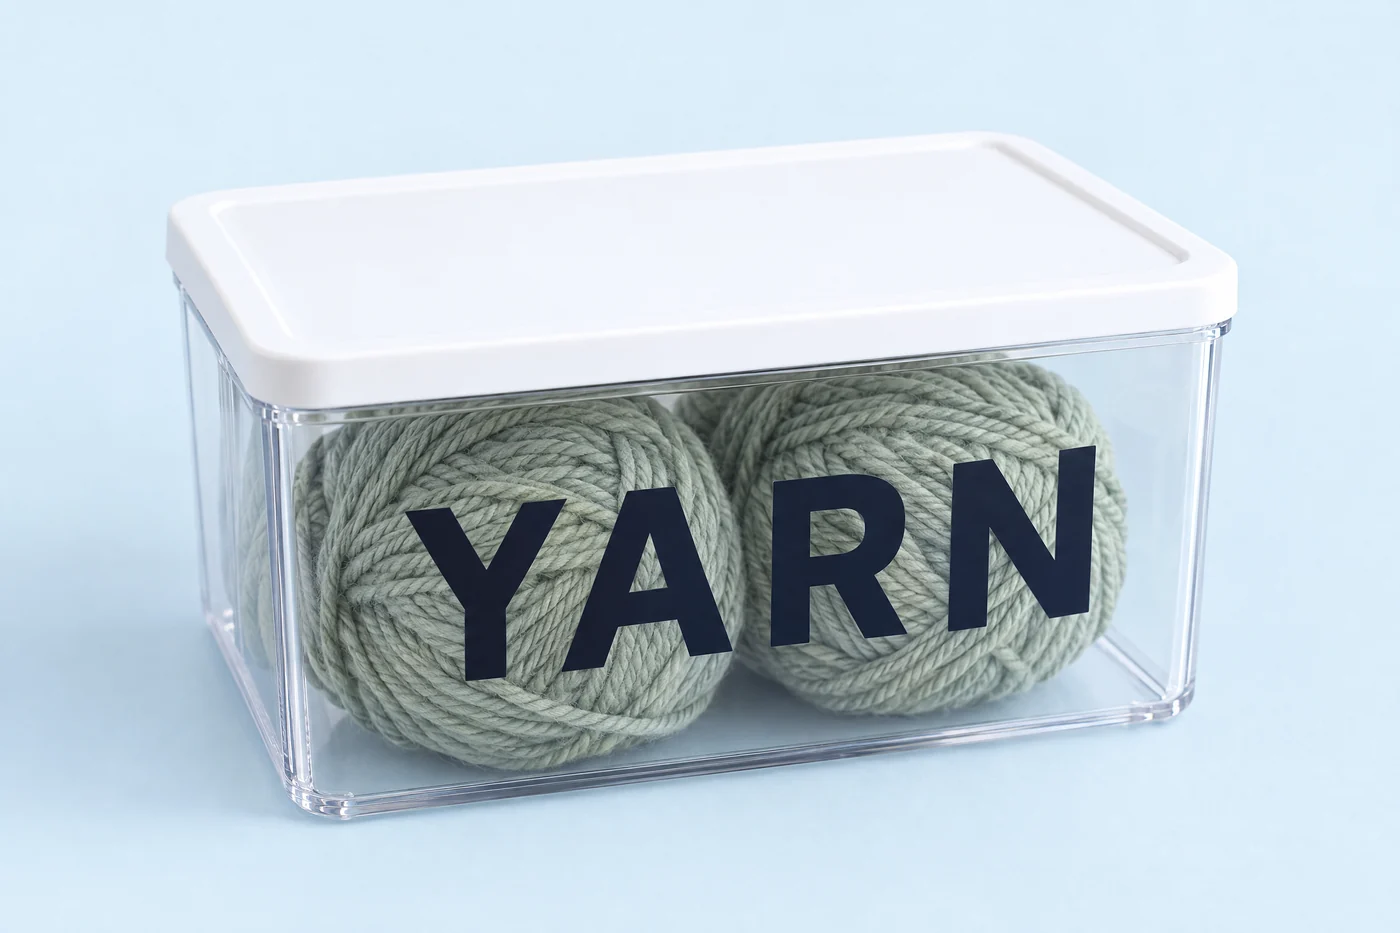
For a first Cricut project, make a small adhesive-vinyl label for a storage jar or craft box. You will learn the complete workflow: prepare a cut design, size it, select the material, run a test cut, remove unwanted vinyl, and transfer the remaining design onto a clean surface.
This project uses ordinary adhesive craft vinyl on a compatible cutting mat. It does not use iron-on vinyl, heat pressing, a printer, or Print Then Cut. A free starter YARN label is included, so you can practice without buying a design or choosing a font.
The workflow is based on Cricut’s current material and transfer-tape instructions. The site author has not physically tested this project on a Cricut machine. Menu names and connection steps can differ by model, platform, and Design Space version. The cover is an editorial illustration, not a product photograph or software screenshot.
Before you start
- Choose adhesive vinyl, not heat-transfer vinyl.
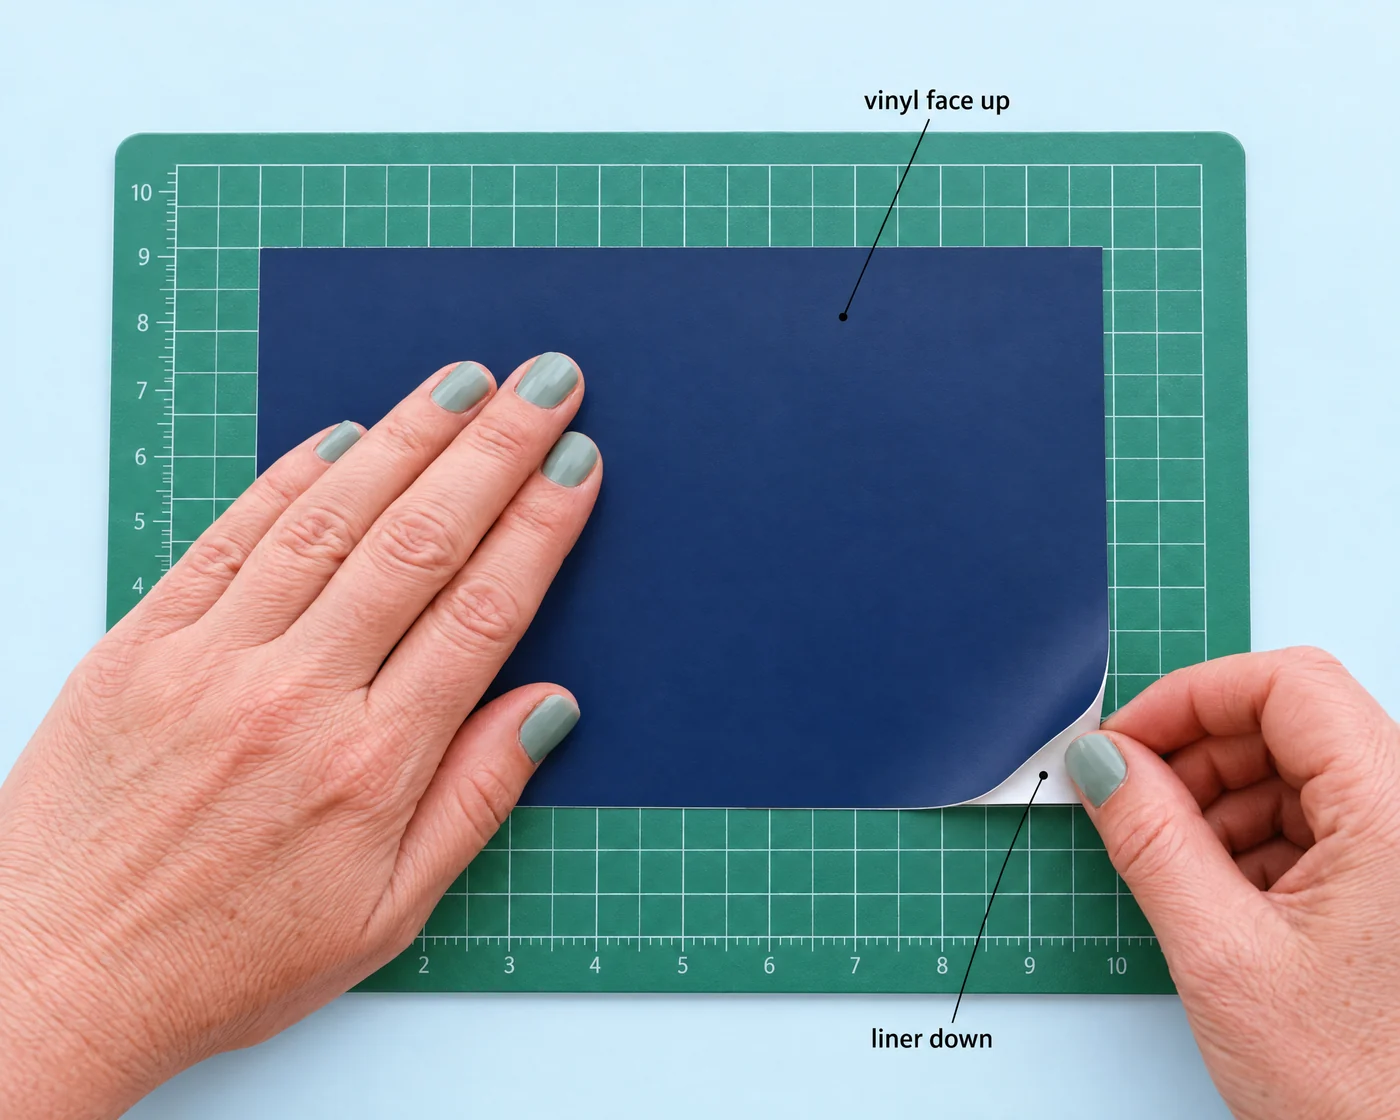
- Place ordinary vinyl on the mat with the backing liner facing down.
- Do not mirror an ordinary front-facing adhesive-vinyl label.
- Make a small test cut before committing your full design.
- Use transfer tape suited to the vinyl’s finish.
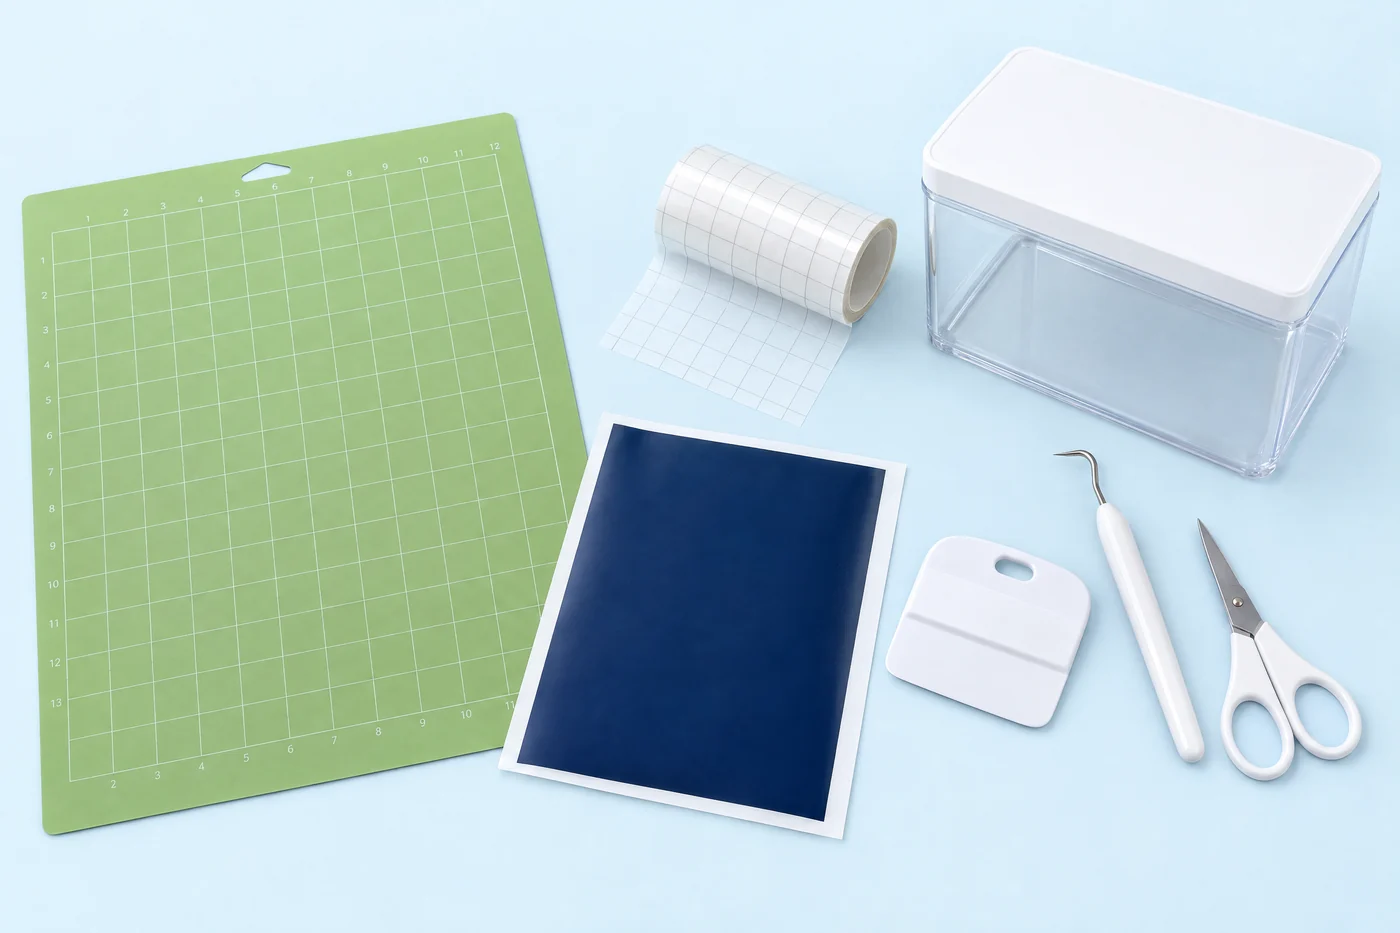
Gather the supplies for one small label
- A Cricut cutting machine that supports the vinyl and mat you will use, with its compatible blade installed.
- Cricut Design Space on a supported computer or mobile device, and the machine connection required by your model.
- Smooth adhesive craft vinyl with a backing liner.
- A compatible cutting mat. Follow your material’s recommendations; Cricut’s regular vinyl instructions specify a StandardGrip mat.
- Regular transfer tape for smooth vinyl, plus a scraper or similar burnishing tool.
- A weeding tool and scissors.
- A clean, dry jar or storage box with a reasonably smooth label area.
For this lesson, avoid textured glitter vinyl and very small decorative lettering. They introduce extra decisions about tape grip and delicate cuts. Choose a flat or gently curved surface; a sharply curved jar or textured basket can make the transfer harder.
An adhesive label is decorative. Keep it away from a food-contact surface, a dishwasher, or a heat source unless your chosen material and surface are approved for that use. Read the vinyl maker’s application and care instructions.
Get the free starter cut file
Download the I Heart DIY YARN label SVG. It contains original block-letter vector shapes, so you do not need to install a font for this design.
Save the file to a location you can find. If your browser displays the drawing, use its save or download command to keep the SVG file itself. Do not take a screenshot of the drawing; a screenshot changes it into a raster image rather than preserving the ready-to-cut paths.
In Design Space, start a new project and use Upload to select the saved SVG. Add the uploaded design to the canvas. Check that you are using the file named iheartdiy-yarn-label.svg, rather than an image of the file’s preview.
If you prefer your own word, add text and choose a font available to you. Check whether the font is free or has a purchase requirement before continuing. Paid Cricut fonts and images are optional; they are not required for the supplied starter SVG. Cricut explains the subscription in What is Cricut Access?, and its image-upload instructions cover bringing your own SVG into the app.
Size the label for your surface
Measure the usable width of the jar or box. Leave space at the edges so you can position the label without wrapping it around a sharp curve.
For a practice example, a label around 3 inches wide can fit a suitable craft-storage container, but your container may need a different width. Set the design’s width with proportions locked so the letters retain their shape. Check the resulting height as well as the width.
The starter file keeps the letters together as one path. If you make your own design from separate letters or objects, use Attach when you need to preserve their arrangement on the mat. Attach controls placement; it does not join overlapping cut paths. For connected script lettering, use an appropriate joining operation rather than assuming Attach will fuse the letters. Cricut’s Canvas guide explains Attach and the tools that combine shapes.
Keep the operation as a basic cut for this project. A printable operation would send you into a different workflow that requires a printer.
Set up the mat and make a test cut
The vinyl’s colored face goes upward and the backing liner goes against the mat. Place it inside the usable cutting area and smooth it down so it lies flat.
- In Design Space, continue to the make/cut screen.
- If prompted, choose the compatible On Mat loading method for this ordinary-vinyl project.
- Check the preview and leave Mirror off.
- Choose the setting that matches your actual vinyl, not just a generic setting that happens to contain the word vinyl.
- Load the mat according to the instructions for your machine.
- Run a small test shape on a scrap piece or unused area before cutting the full label.
On machines with a physical material dial, follow the model-specific instructions for accessing the required material setting. On other models, the setting is selected in Design Space. Avoid copying one pressure number across all machines and vinyl brands.
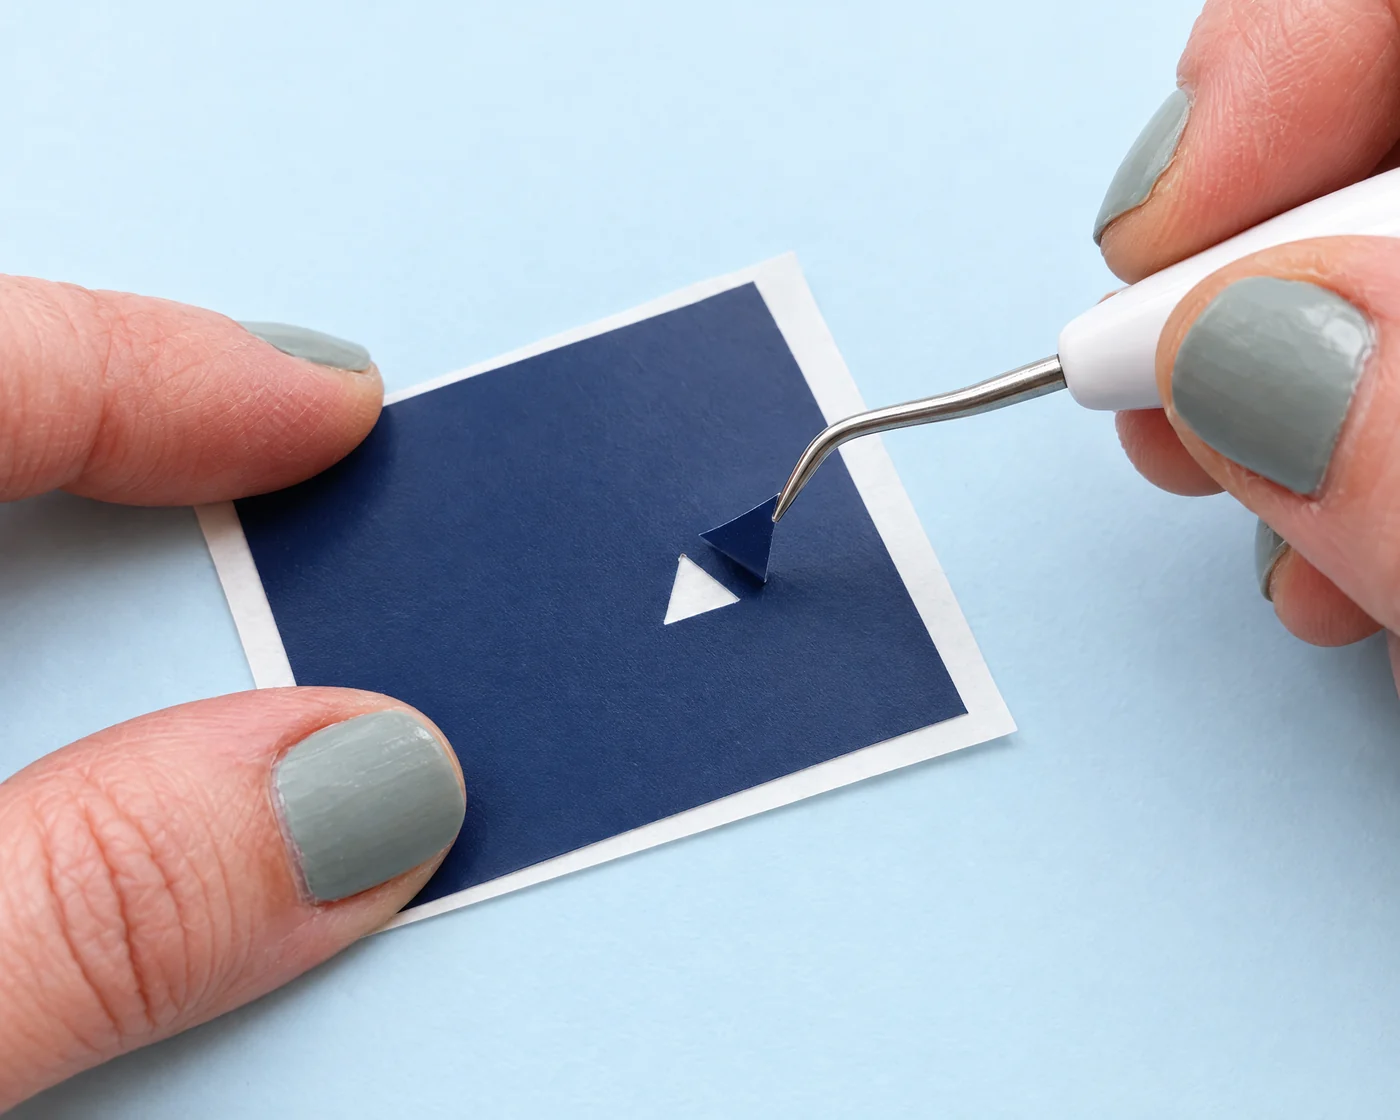
A useful test cut lets the unwanted vinyl lift away while the backing liner remains intact. If it does not separate cleanly, check the setting, blade installation, and material adhesion before repeating. Do not increase pressure blindly through several full-size designs.
Cricut recommends a small test shape in its regular vinyl cutting instructions. Those instructions also describe the material selection and loading sequence for different machine generations.
Cut and weed the full design
Once the test is satisfactory, send the label to cut. Keep the material flat and the machine’s moving parts clear. Unload the mat when the cut is finished.
Remove the vinyl piece carefully. When a sheet starts curling as you lift it, try turning the mat over and bending the mat away from the sheet rather than sharply bending the vinyl itself. Keep the label on its liner while weeding.
Weeding means removing the vinyl you do not want on the final surface. Peel away the outer background, then remove the enclosed pieces inside letters such as A and R. Use the point of the weeding tool gently; it can damage a letter if you dig through the design.
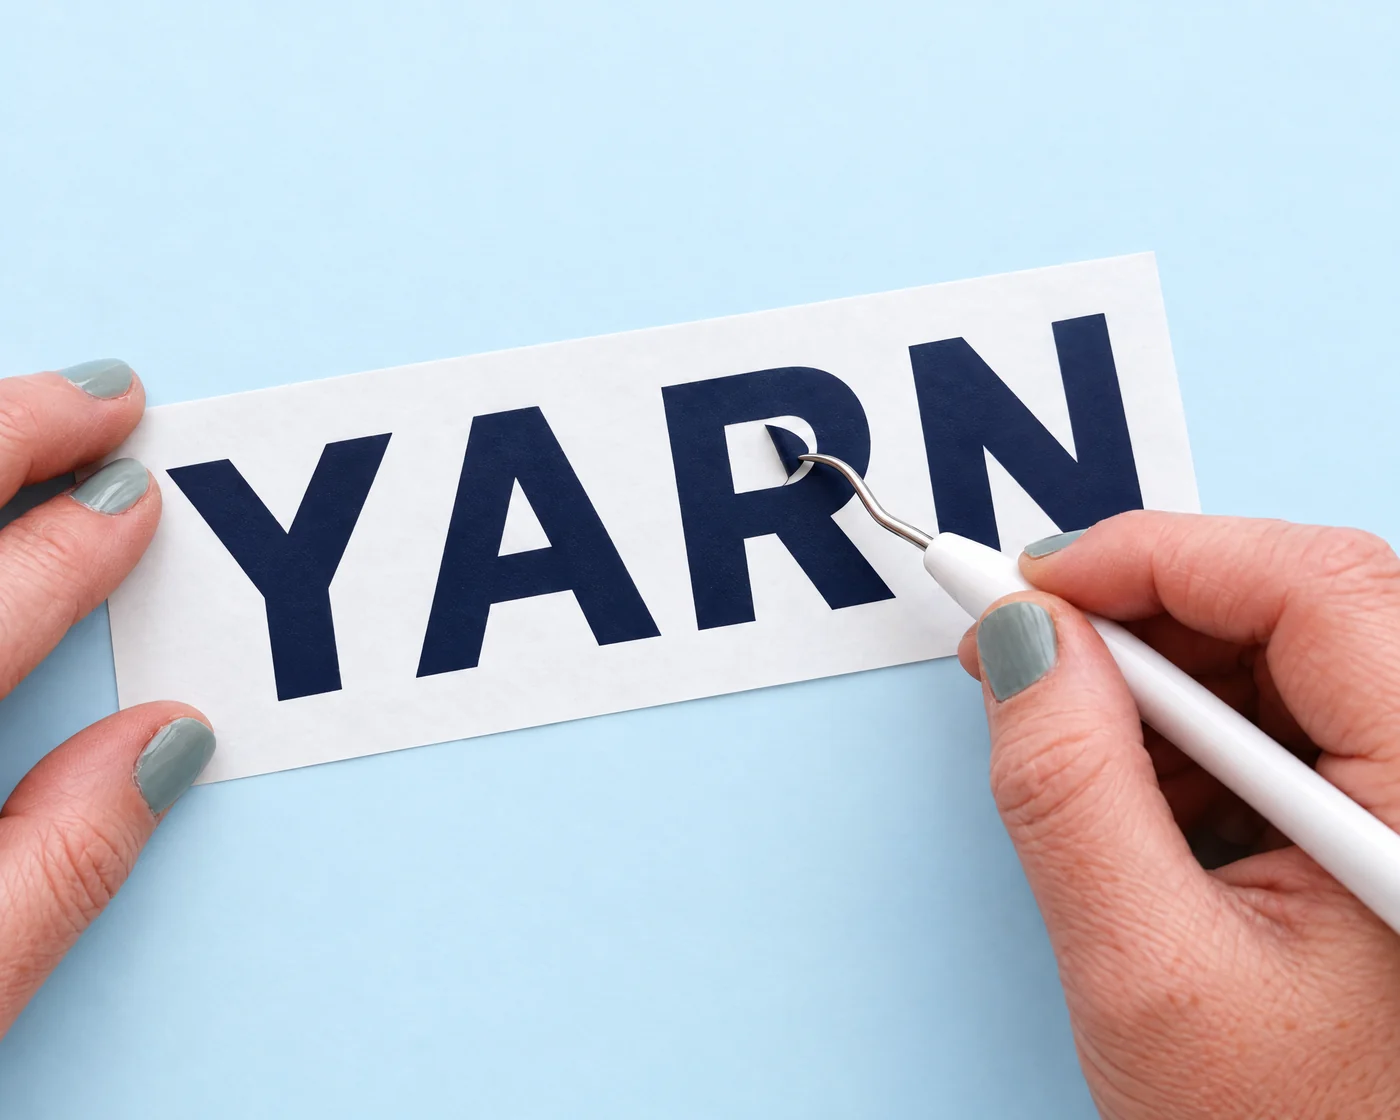
Work slowly around narrow sections. If a letter lifts with the background, pause, guide the letter back onto the liner, and adjust the direction of the pull. Good lighting helps you see the cut lines.
Move the label onto transfer tape
Regular transfer tape is suitable for most smooth vinyl. Cricut reserves StrongGrip tape for certain textured finishes, such as glitter and shimmer; it can be too strong for ordinary smooth vinyl. Check both your vinyl and tape instructions.
- Cut a piece of transfer tape that covers the entire weeded design.
- Remove the tape’s backing, if it has one.
- Lower the tape onto the design gradually, starting at one edge or a small area.
- Burnish with a scraper: press and smooth over the letters so they adhere to the tape.
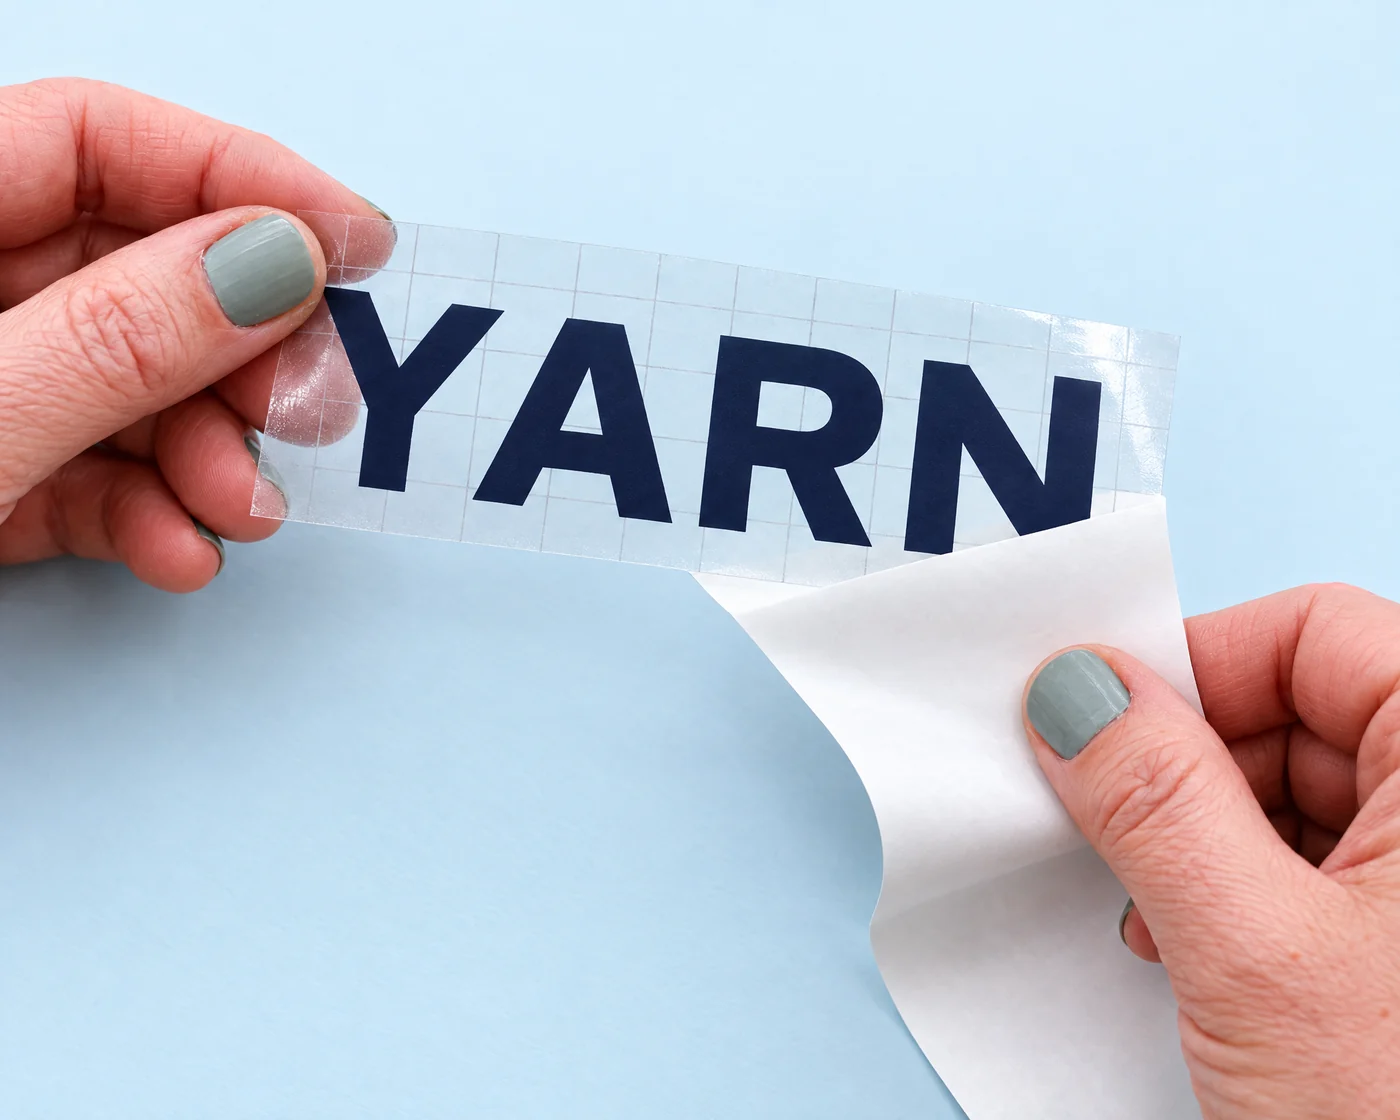
- Turn the assembly over and gently peel the vinyl liner away.
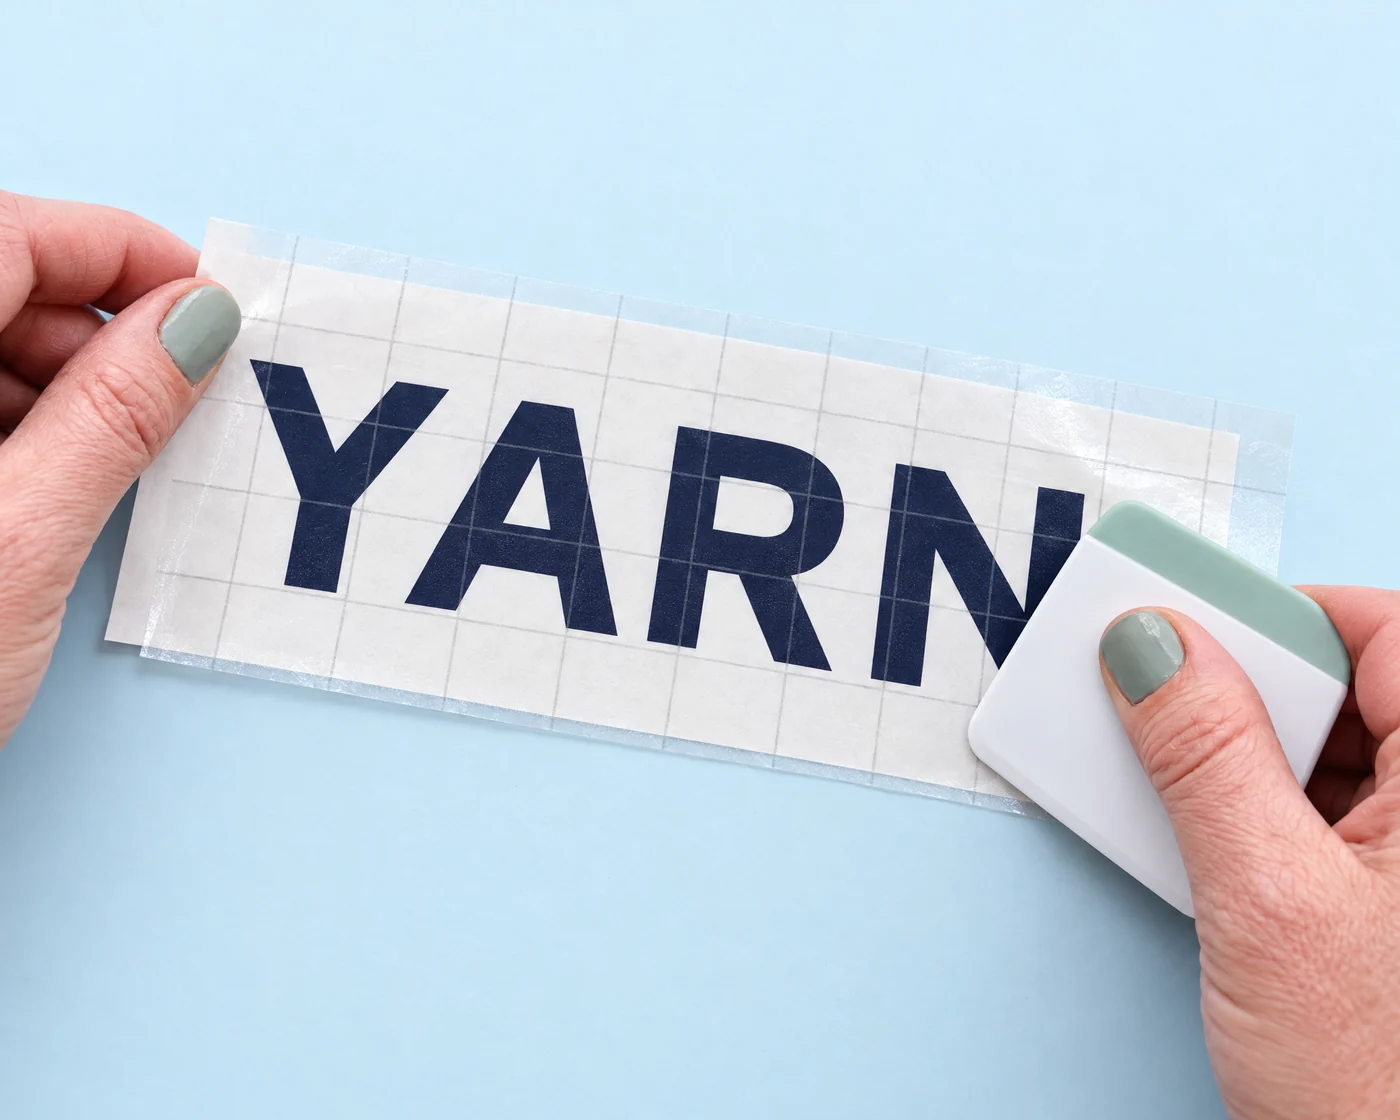
If a letter stays on the liner, return the liner to that area and burnish again. Pulling the liner back at a low angle often gives you more control than lifting the design straight upward. The manufacturer’s transfer-tape guide includes tape selection and application instructions.
Apply the label and remove the tape
Clean the surface using a method that is safe for its material, then let it dry completely. Cricut recommends rubbing alcohol for suitable plastic and glass surfaces; check the object’s finish first, because some coatings can be damaged by solvents.
Position the design before pressing it down. Start from one edge or the center and work outward to reduce trapped air. Burnish the letters against the surface, then peel the transfer tape back slowly at a low angle.
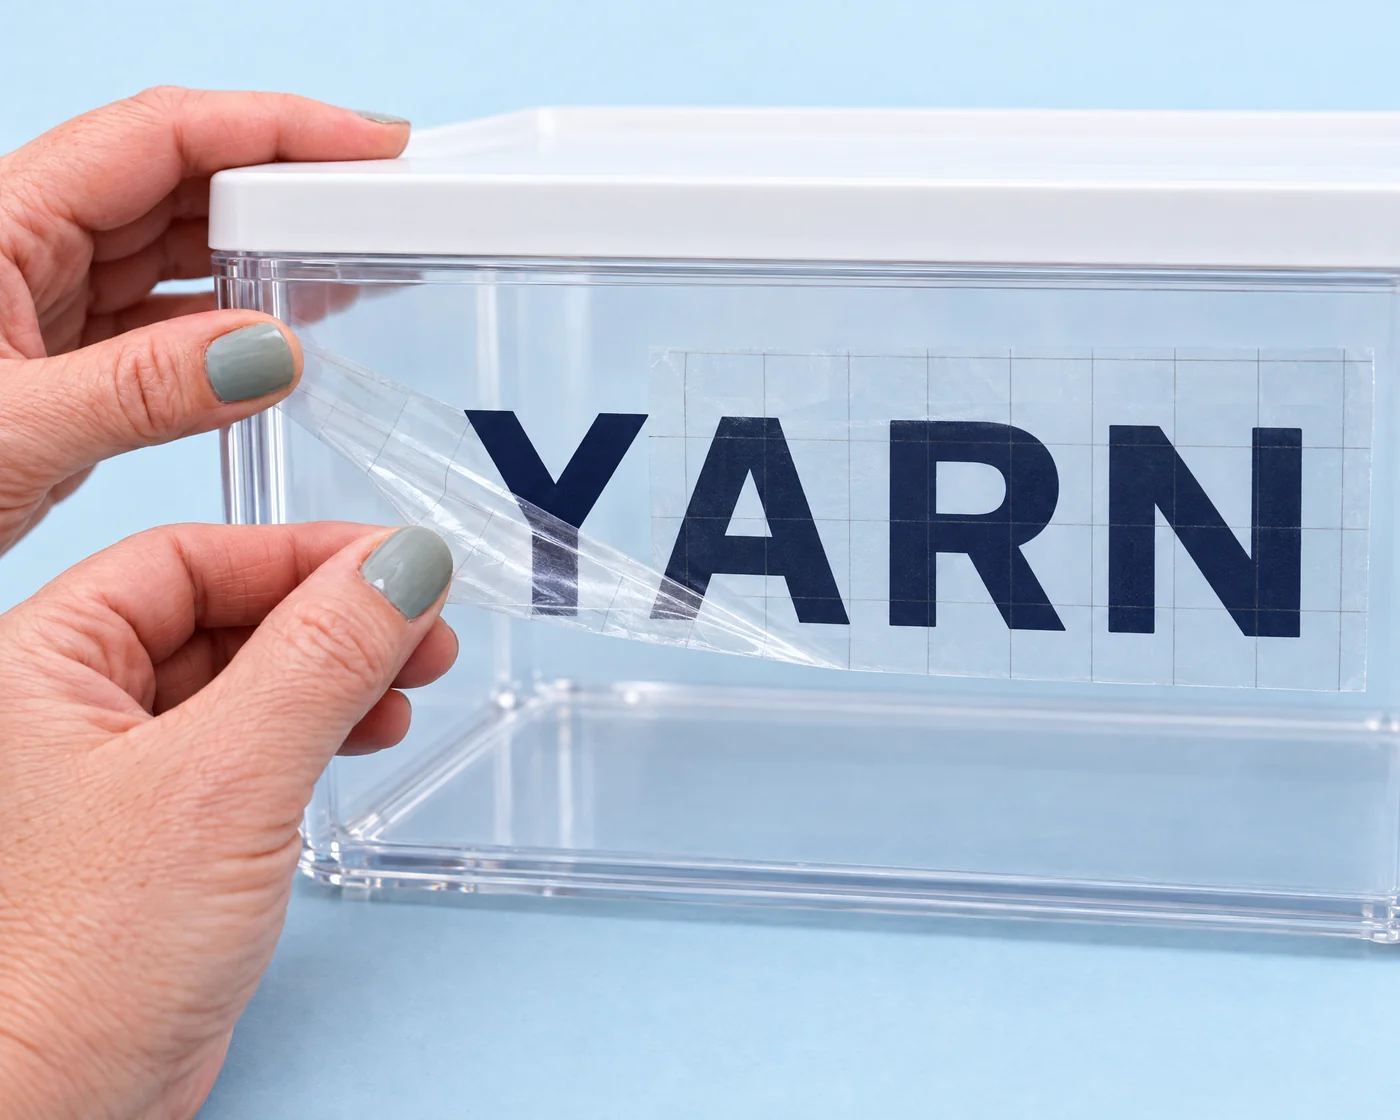
If a letter lifts, stop and press the tape back down. Burnish that spot again before continuing. Do not keep pulling while the design is detaching.
Follow the vinyl manufacturer’s instructions for any curing time and later cleaning. “Permanent” describes an adhesive category; it does not automatically mean dishwasher-safe, food-safe, or suitable for every outdoor surface.
Troubleshoot the first attempt
| Problem | Check first | Try this |
|---|---|---|
| The machine cuts through the liner | Material setting or excessive pressure | Return to the correct material setting and repeat a small test. |
| The vinyl does not separate cleanly | Wrong setting, blade trouble, or poor adhesion to the mat | Check the blade and flatness, then make another test cut. |
| Separate letters move on the preview | They were not attached | Return to the canvas and attach the arrangement before cutting. |
| Letters will not lift onto the tape | Too little burnishing or an unsuitable tape | Burnish both sides and confirm tape compatibility. |
| Letters lift from the container | Surface contamination, moisture, texture, or excess tape grip | Clean and dry appropriately, then burnish and peel slowly. |
| The word is backward | Mirror was enabled unnecessarily | Cut a new front-facing label with Mirror off. |
Questions beginners ask
Do I need a printer for vinyl labels?
No. Ordinary adhesive-vinyl designs are cut from colored material. Printed stickers are a separate Print Then Cut project.
Should I mirror the design?
Not for this ordinary front-facing adhesive-vinyl label. Iron-on and some reverse-application projects use different conventions. Follow the instructions for your material and intended application.
Do I need Smart Vinyl?
No. This lesson uses ordinary vinyl on a compatible mat. Smart Materials have model-specific loading requirements; consult your machine’s documentation if you choose that alternative.
Can I reuse the transfer tape?
Use a fresh piece for this lesson. Cricut advises against reusing transfer tape, because reduced adhesion can stop the tape from picking up the design reliably.
Choose your next small project
Start by making one successful label before trying a full set. The Cricut learning hub will collect the site’s current machine and material lessons.
Labeling a yarn-storage container also pairs well with the Crochet practice-square lesson or the Knitting cast-on lesson if you are organizing supplies for a new craft.
Written by Stacy for I Heart DIY. Visit the About page for site information, or send a question if an instruction needs clarification.

Have a question? Use the form above to submit your question or comment.
I love hearing from you and seeing what you made!