
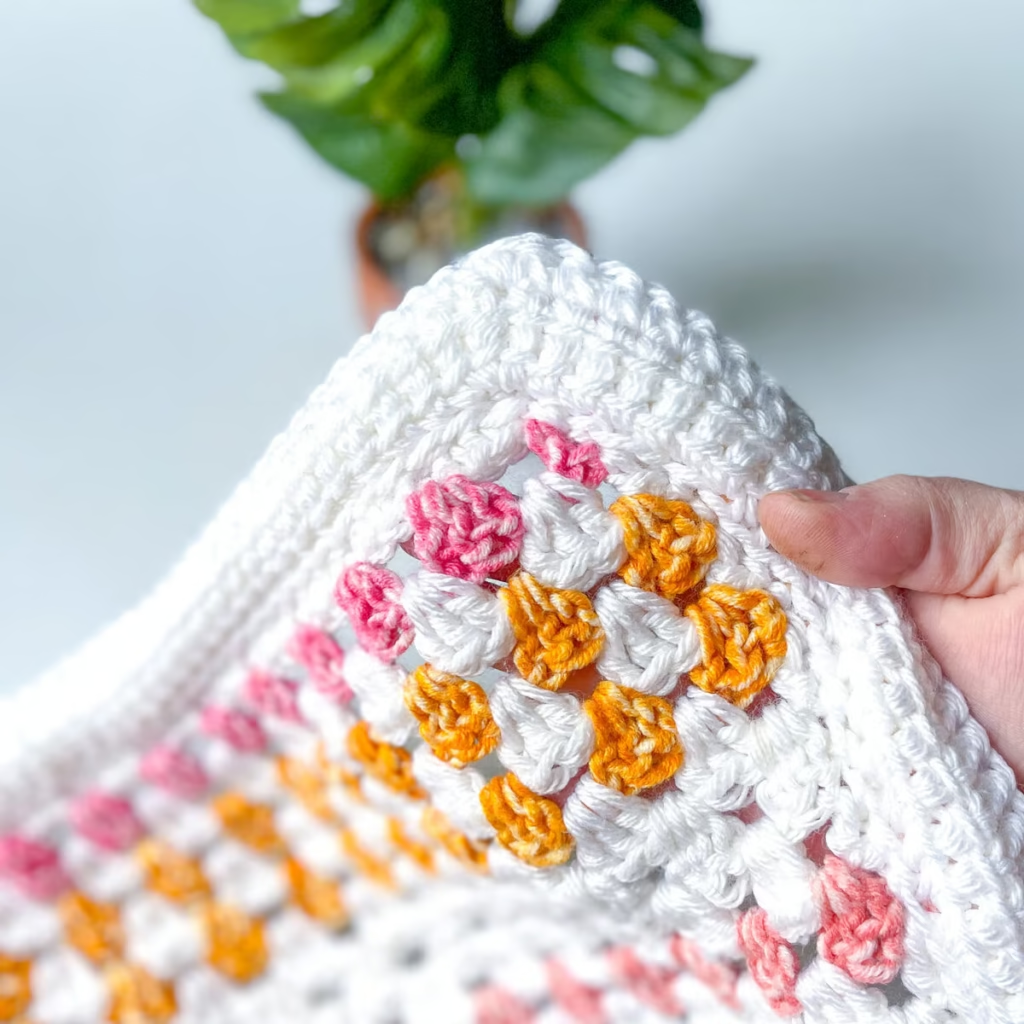
You can start crocheting with one hook, smooth yarn, and two skills: a chain stitch and a single crochet stitch. This lesson brings them together in a small practice square. You will learn how to start a row, find its last stitch, keep the same stitch count, and finish the yarn ends.
There is no need to make a wearable or buy a large kit for your first lesson. A small swatch gives you room to practice without committing to a blanket. Keep it as a progress sample, or use it as a coaster if its material and size suit that purpose.
This guide uses US crochet terms. US single crochet is called double crochet in UK terminology. The directions describe right-handed working; a left-handed crocheter can reverse the direction across the row. The cover is an editorial illustration, not a stitch-placement photograph.
Before you start
- Chain 23 to make a practice row with 22 single crochet stitches.
- The turning chain does not count as a stitch in this exercise.
- Count each row before continuing; every row should have 22 stitches.
- Stop when the height matches the width to make a square. Your row total will depend on tension.
Tutorial photo credit: Adapted from Make & Do Crew; backgrounds edited with AI. The photos illustrate the motions. Follow this article’s chain and stitch counts for your practice square.
Gather a small set of supplies
Choose smooth, light-colored, medium-weight yarn so you can see the loops. Avoid very dark, fuzzy, or highly textured yarn for this first exercise. Acrylic or cotton can both work; choose a yarn that feels comfortable to handle.
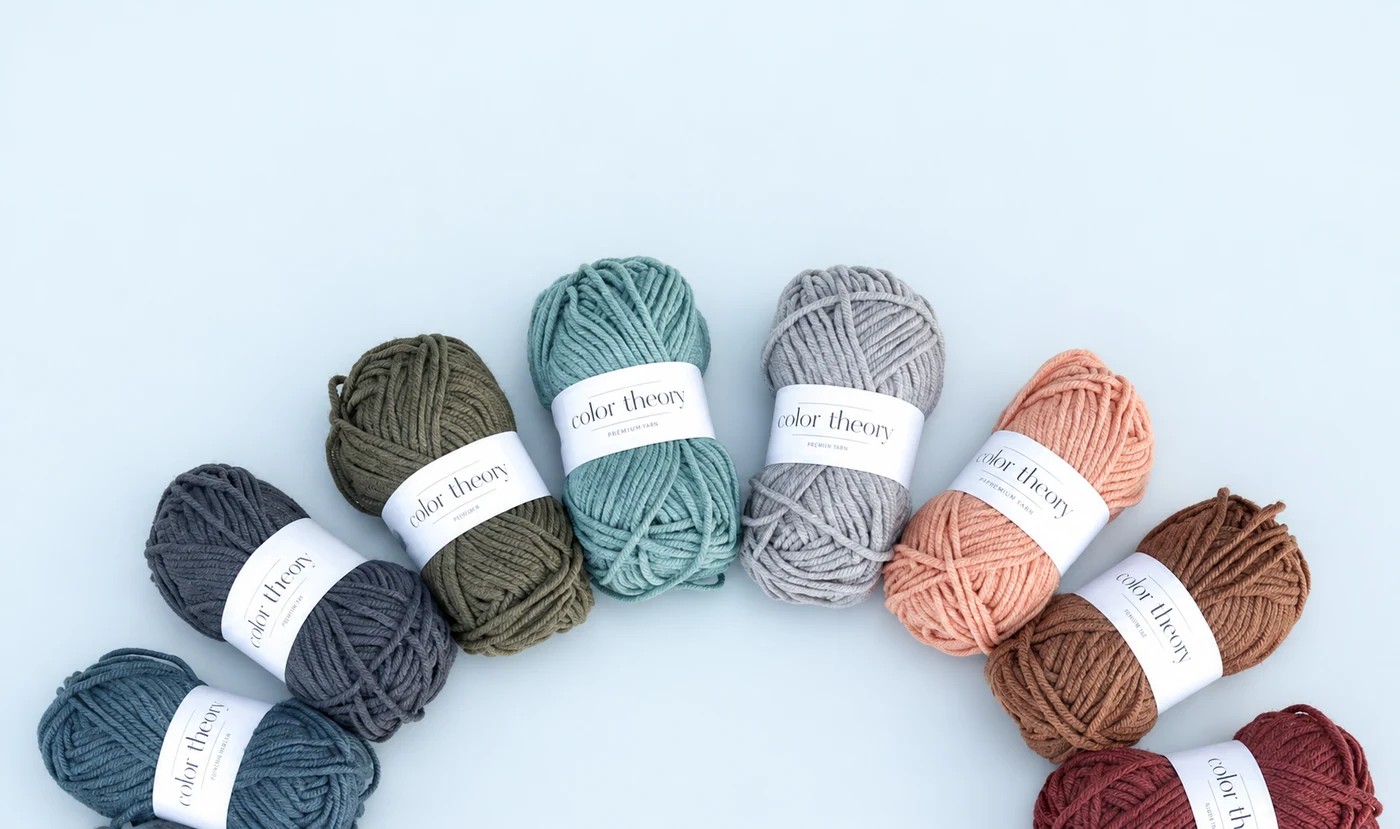
- Yarn: a small ball of medium-weight yarn, often labeled category 4 or worsted weight.
- Hook: use the size suggested on the yarn label. A 5 mm hook is a common starting point for this weight, but the label and your tension matter.
- Two removable stitch markers: to mark the first and last stitches.
- Scissors and a blunt yarn needle: for finishing.
- A ruler: to compare the width and height.
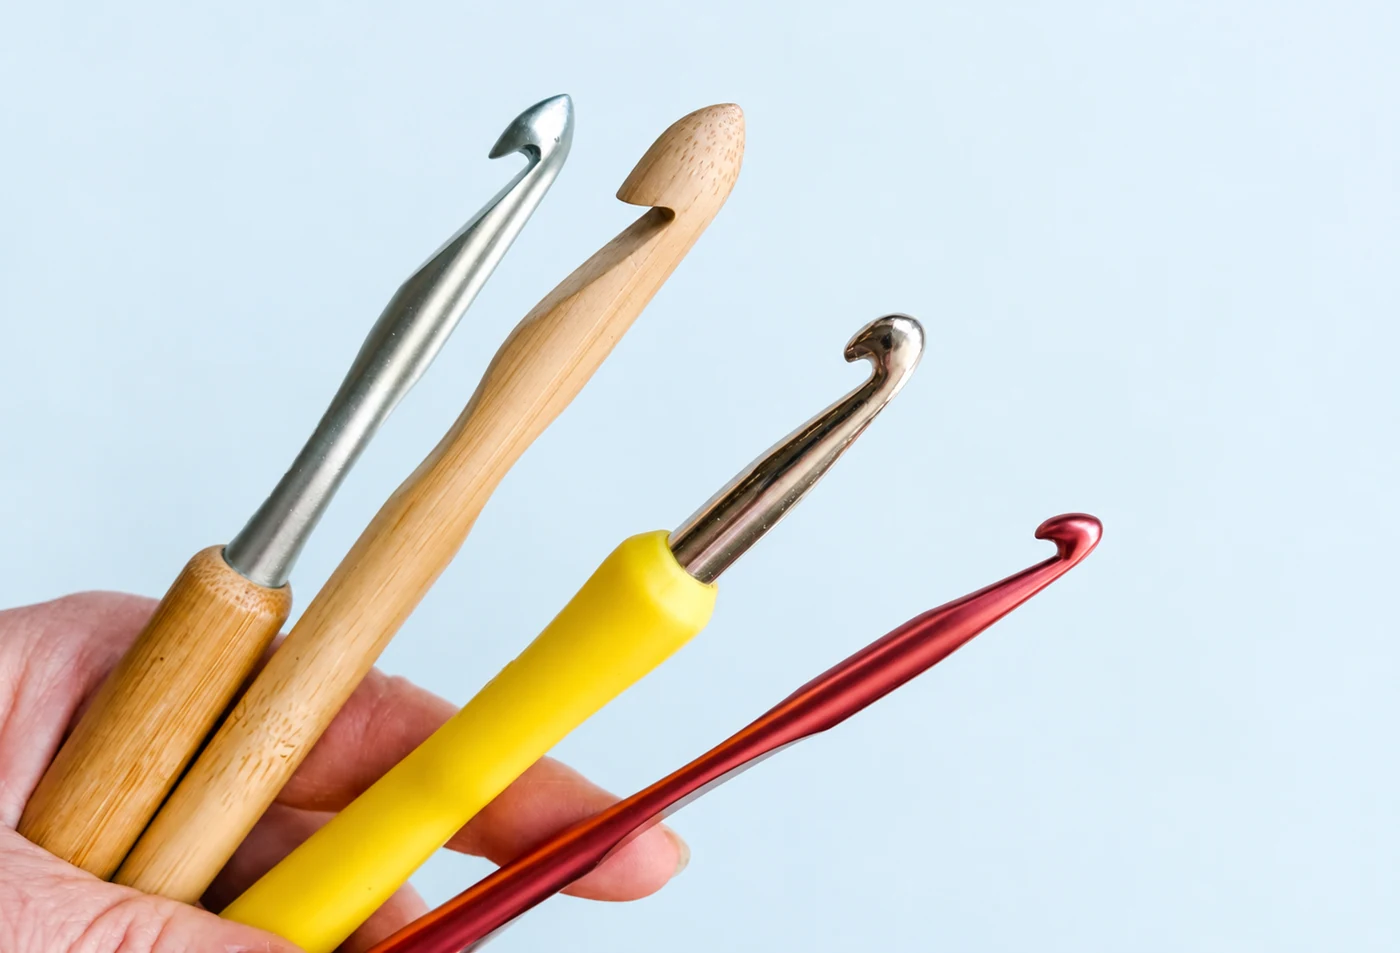
This is a learning swatch, so matching a particular gauge is unnecessary. If you later follow a pattern with a specified size, check that pattern’s gauge before starting. The Craft Yarn Council’s yarn-weight guide explains the numbered yarn categories and recommended tool ranges.
Sit where there is good light. Rest your shoulders, and take breaks if your hands feel tense. Keep the working yarn connected to the ball; the shorter loose end is the tail.
Start with a slip knot
A slip knot gives you an adjustable first loop on the hook. Leave a tail of about 6 inches, or 15 cm, for weaving in later.
- Make a loose loop with the yarn, crossing the working strand over the tail.
- Pull a small loop of the working strand through that first loop.
- Put the hook through the new loop.
- Pull gently on the yarn ends until the loop rests around the hook’s shaft.
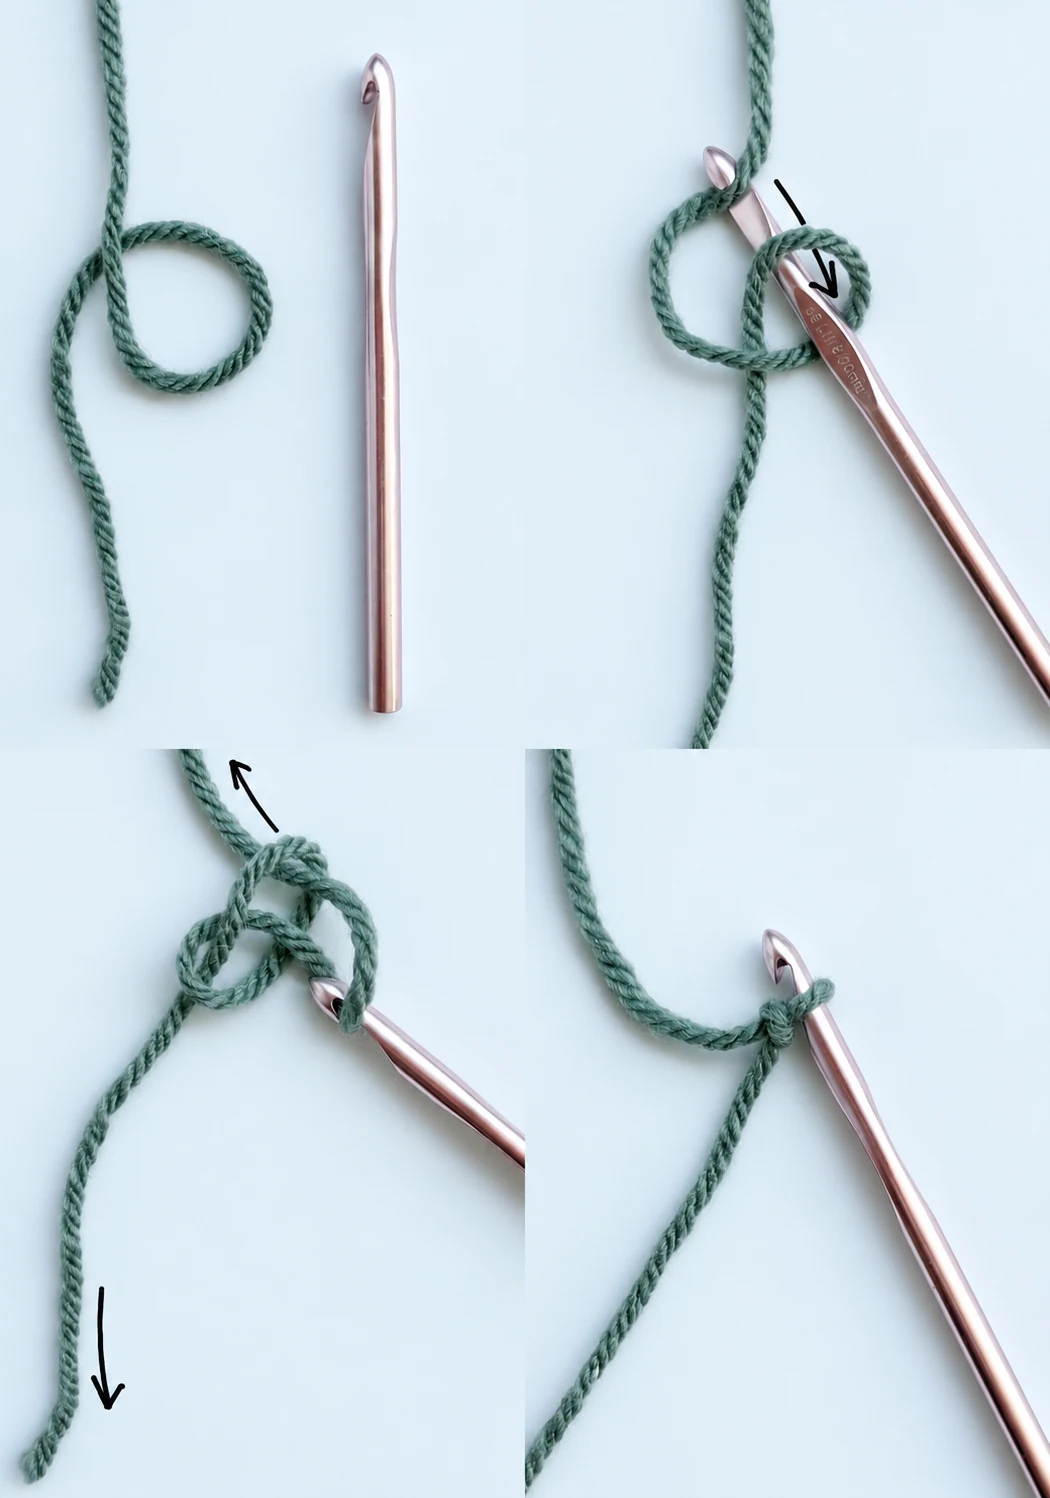
The loop should slide along the hook. If you tighten it against the narrow throat, it may become difficult to move.
Hold the hook in your dominant hand, using a pencil-like grip or an overhand grip. Guide the yarn with the other hand. There is no single required grip; choose one that lets you move the hook without squeezing it.
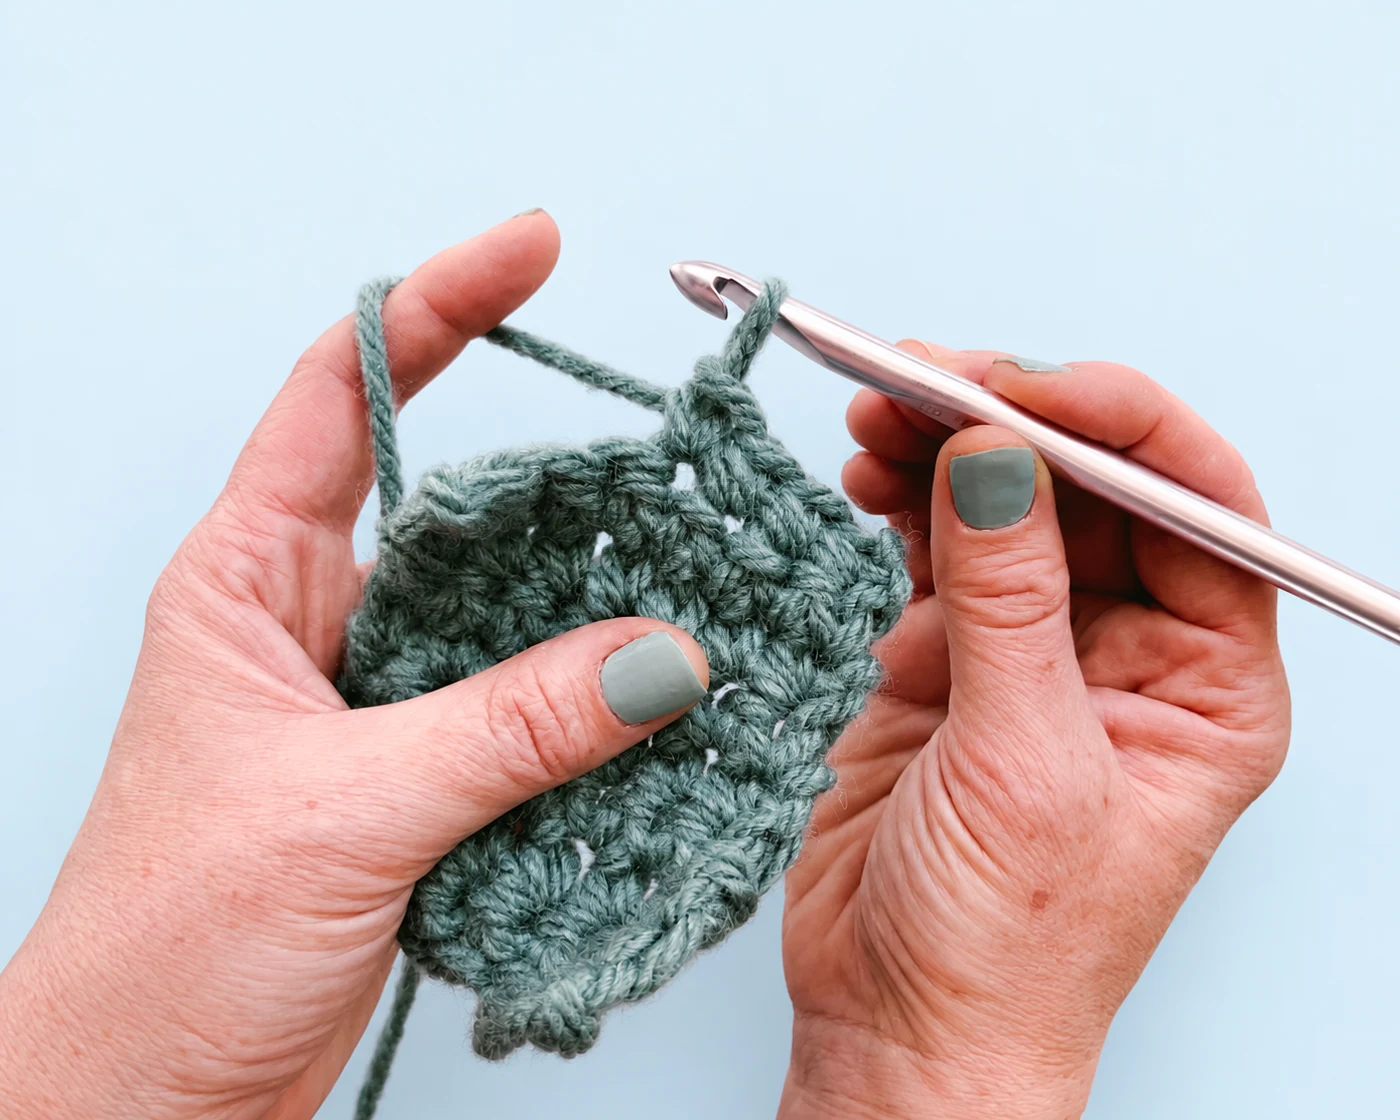
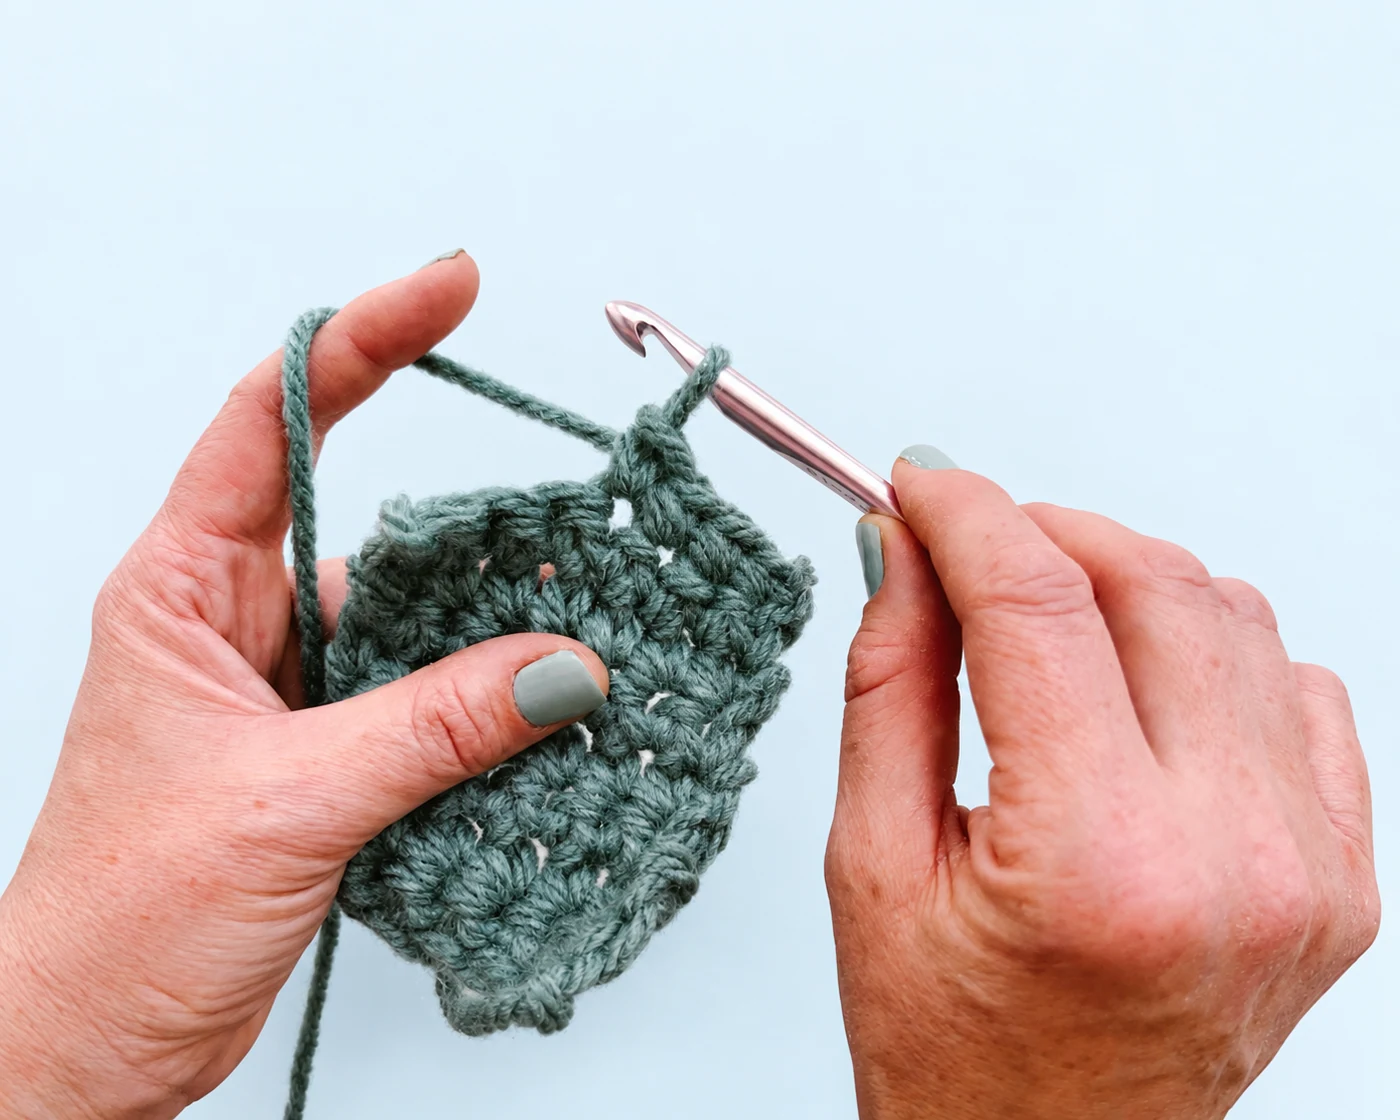
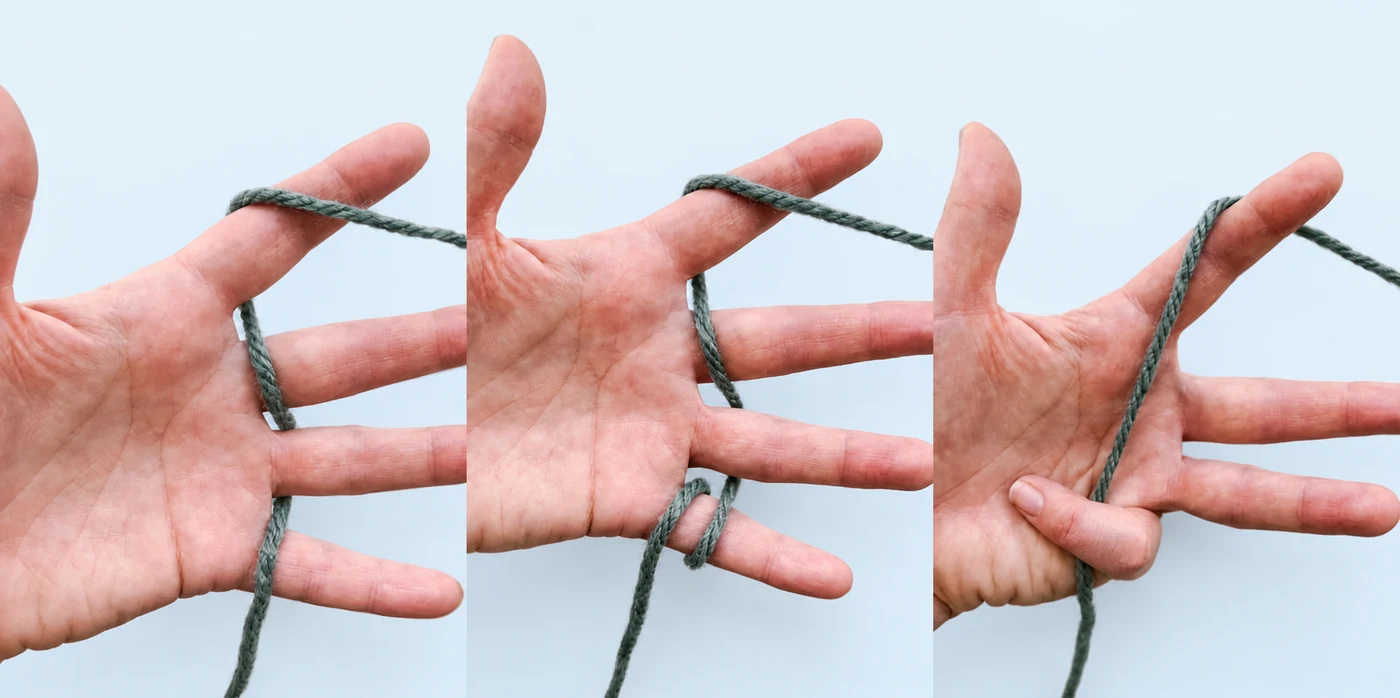
Count check: the slip knot is your starting loop, not one of the 23 chain stitches you will make next.
Make a foundation of 23 chains
A chain forms when you catch the working yarn and draw it through the loop already on the hook.
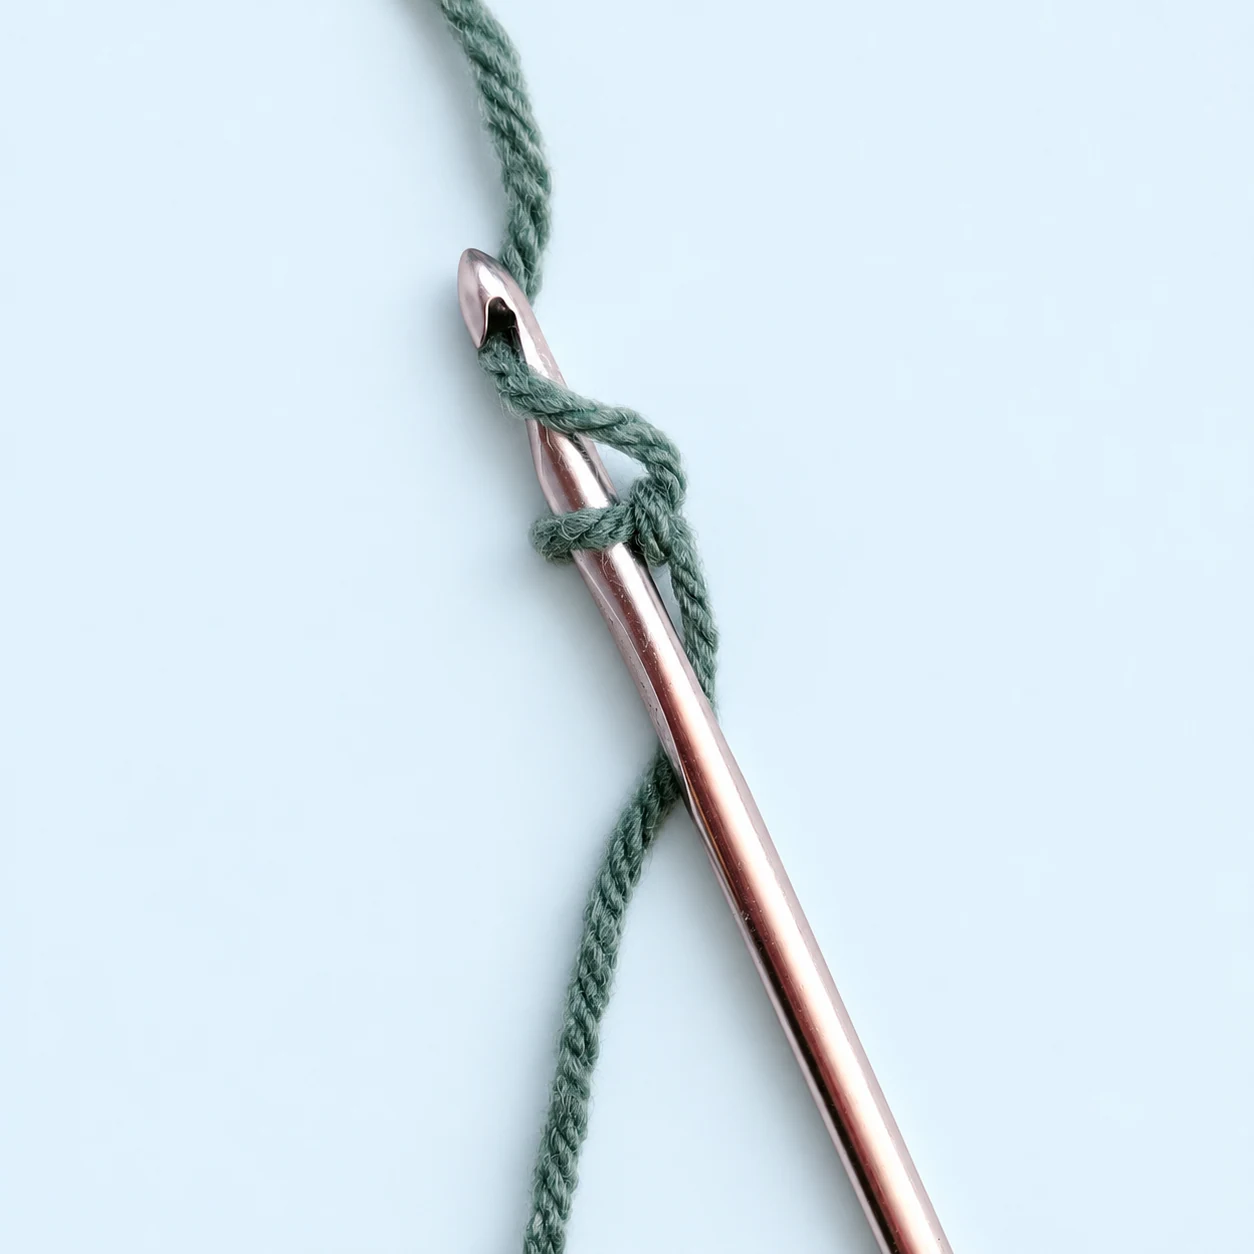
- Bring the working yarn over the hook from back to front. This is a yarn over.
- Turn the hook slightly so its tip can carry the yarn through the existing loop.
- Pull the caught yarn through. You have made one chain.
- Repeat until you have 23 chains.
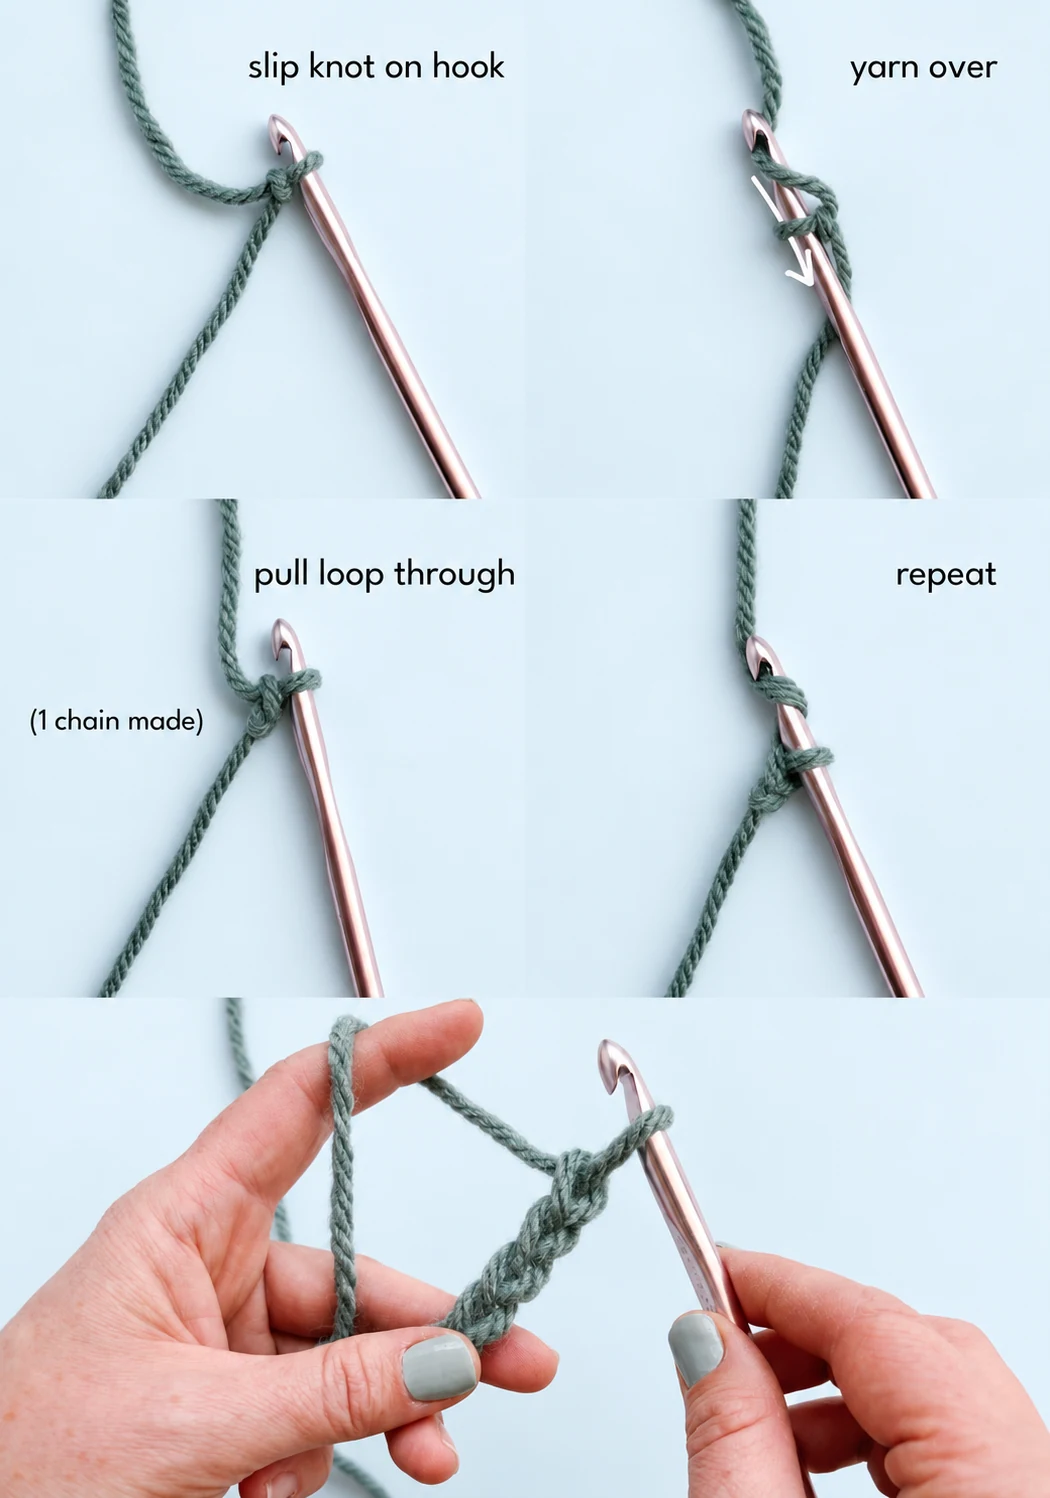
Each completed chain has a small V shape. Count those Vs, leaving out the loop currently on the hook. Move your supporting fingers along the chain as it grows so you are holding near the working area.
Keep the chain loose enough for the hook to enter it later. A foundation that is much tighter than the following stitches can make the lower edge pull inward. If that happens repeatedly, try making the chain with a slightly larger hook, then return to your original hook for the rows.
Work the first row of single crochet
Begin in the second chain from the hook. The first chain is skipped to allow room for the first stitch; the loop on the hook is not a chain.
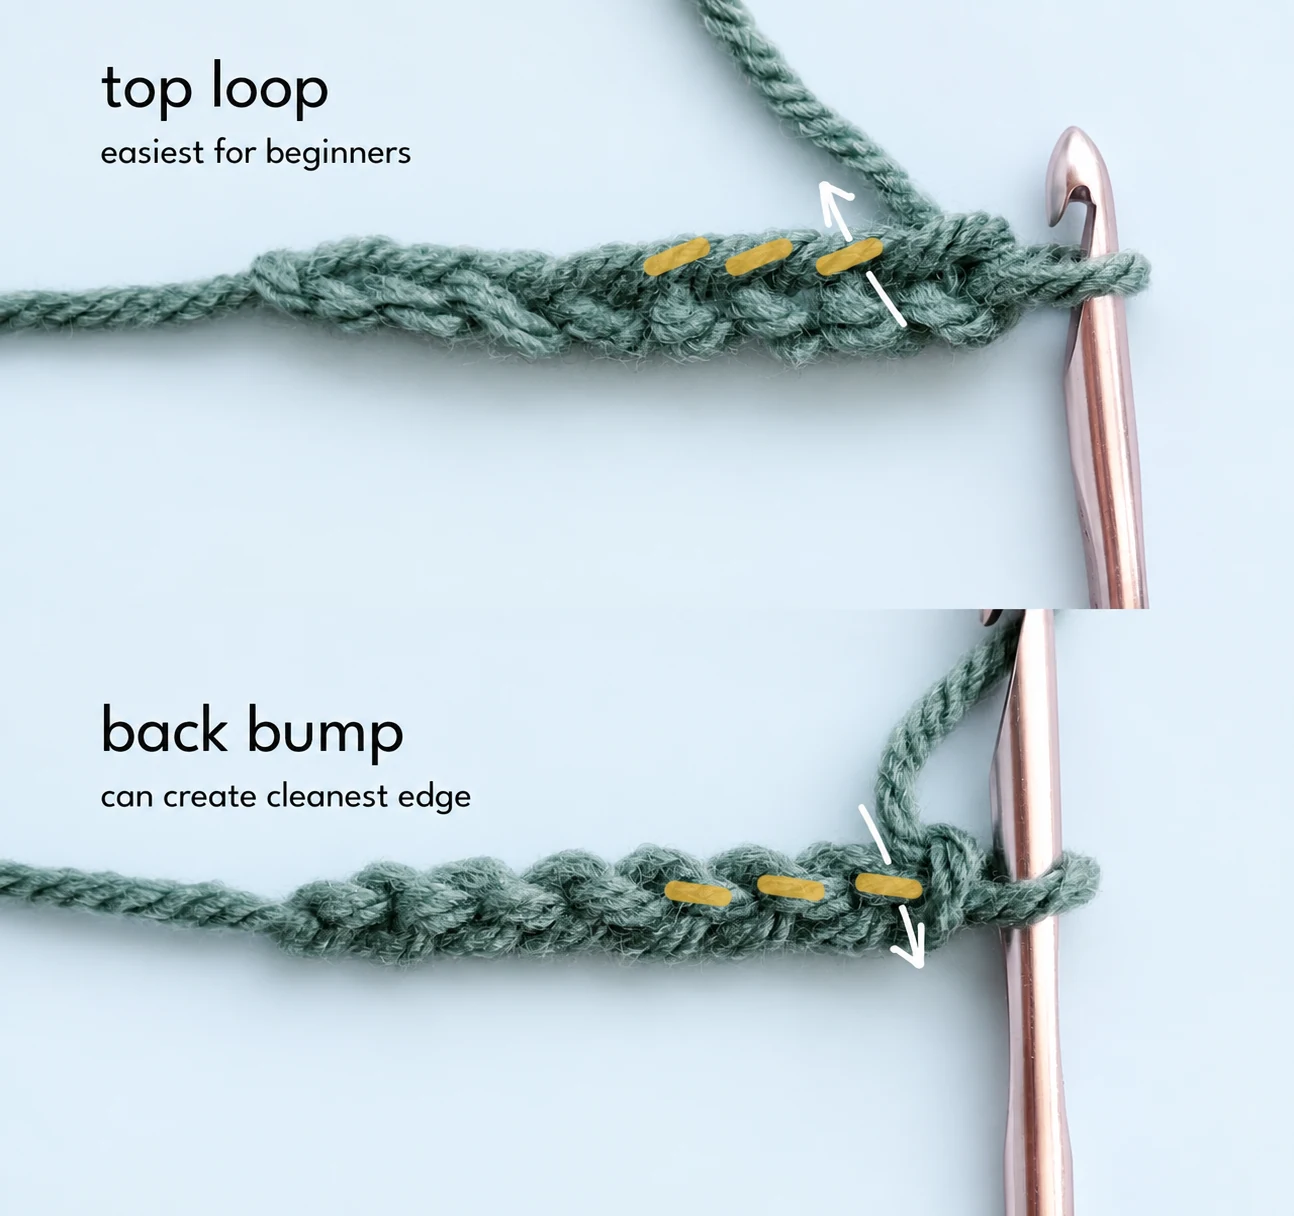
- Insert the hook into the second chain. For this exercise, working under the top strand of the chain is sufficient; use the same approach along the row.
- Yarn over and draw the yarn through the chain. There are now two loops on the hook.
- Yarn over again and draw through both loops. One loop remains: you have completed one single crochet.
- Make one single crochet in each remaining chain, including the last chain.
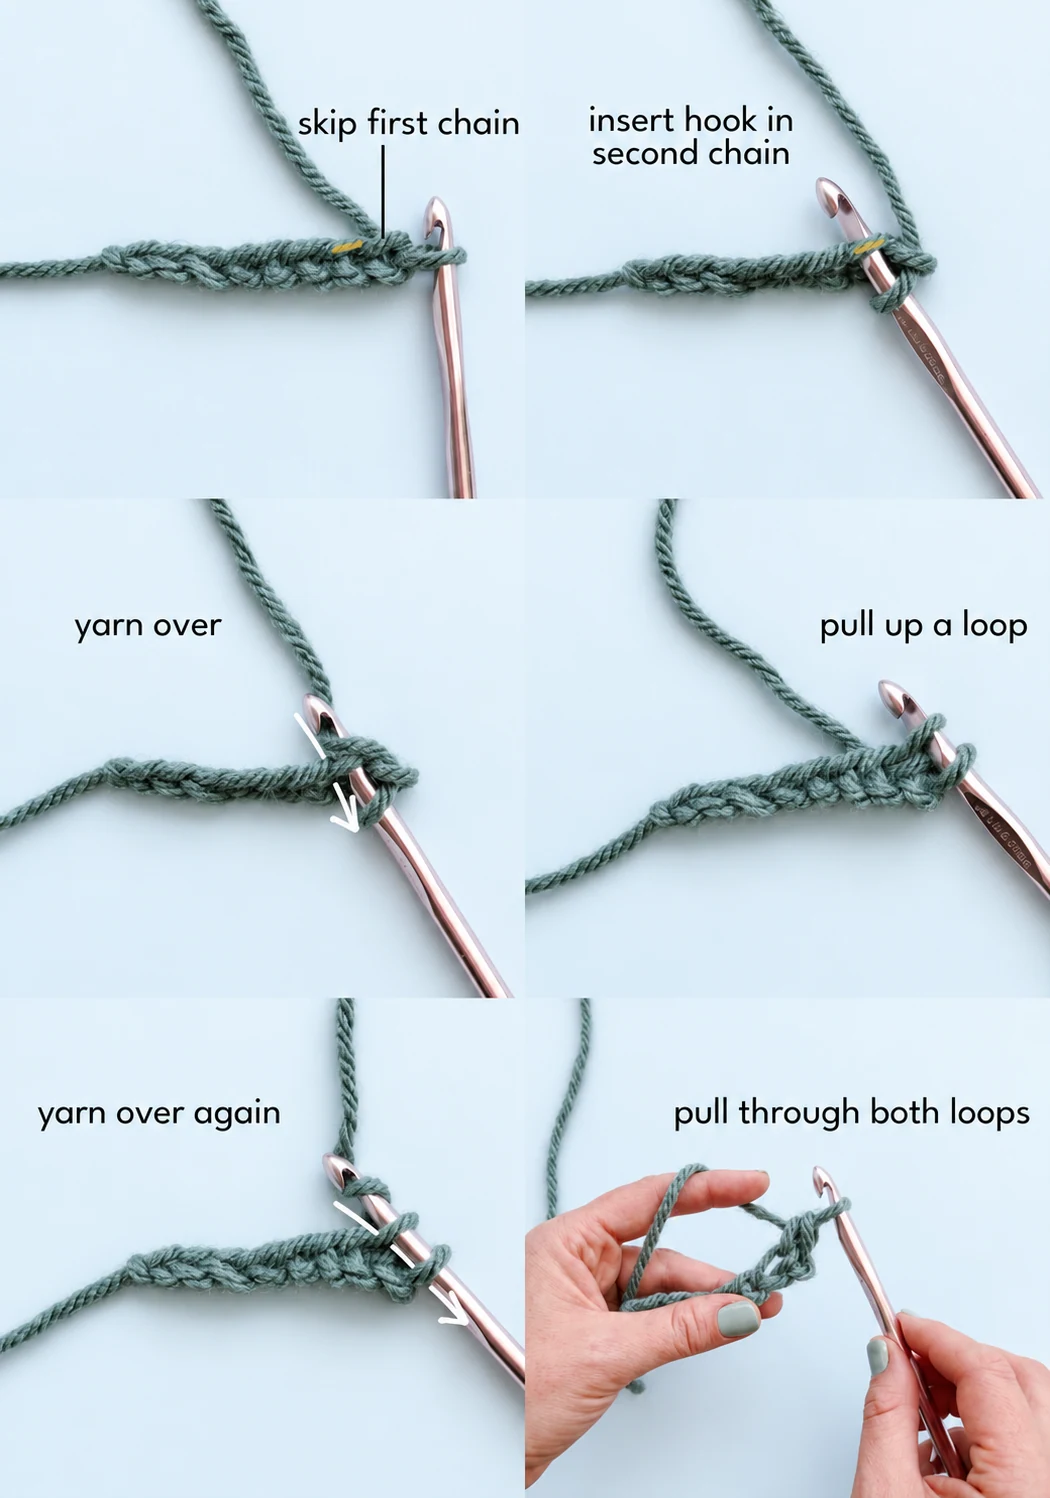
You should finish with 22 single crochet stitches. Place a marker in the first stitch and another in the last stitch. Move them into the corresponding stitches as you work each new row.
The Craft Yarn Council’s single-crochet lesson includes diagrams of the stitch motion. Your practice-square chain count differs from that lesson; use the counts in this article for this exercise.
Turn and keep 22 stitches in every row
Make one chain, then turn the work so the hook is ready to travel back across the row. In this exercise, that chain is not counted as a stitch.
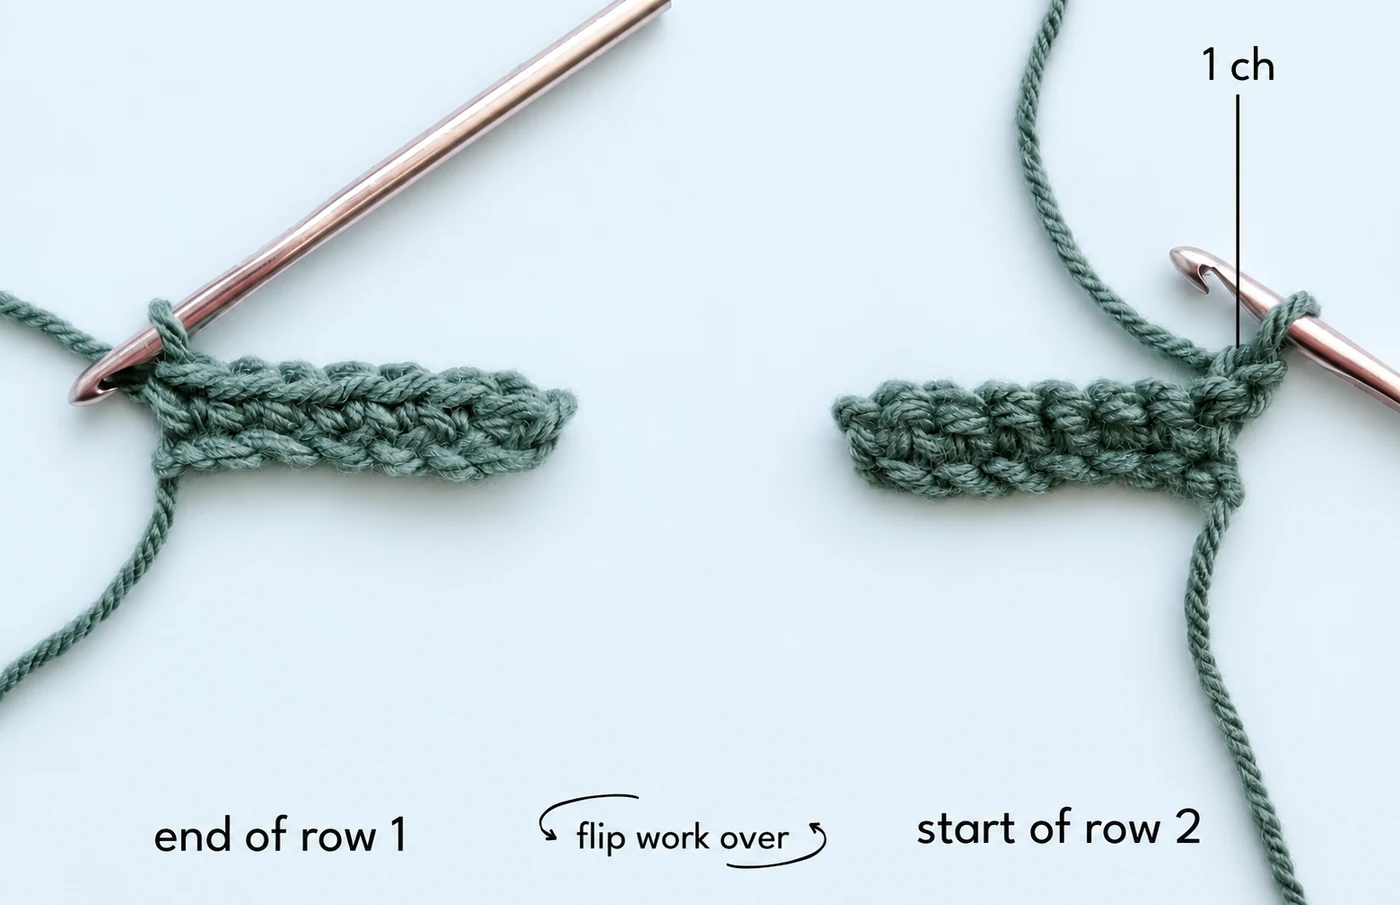
Look at the top of the previous row. Each stitch has a V formed by two loops. For ordinary single crochet, insert the hook under both loops of that V.
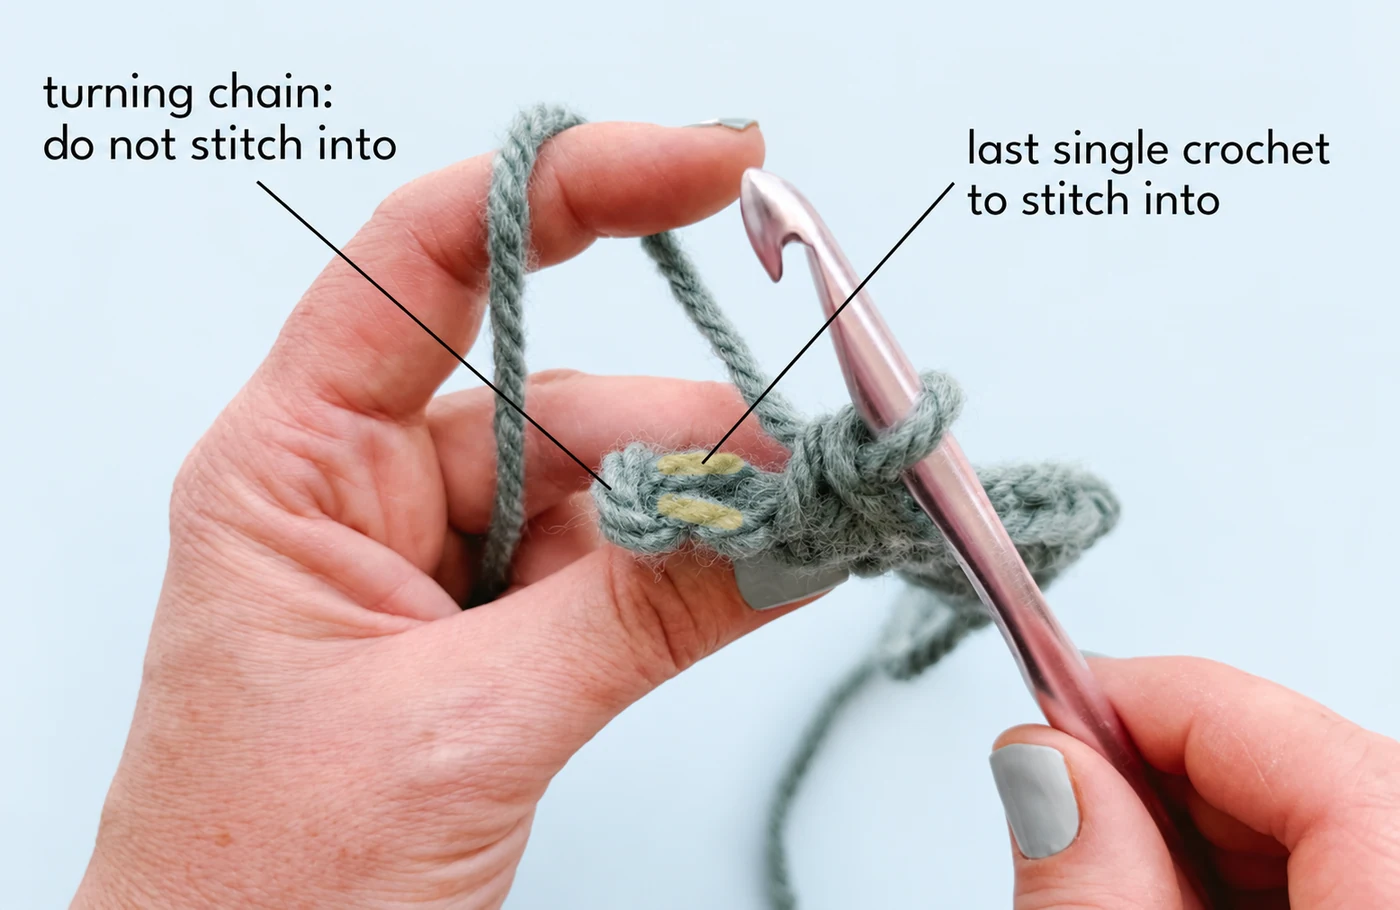
- Make a single crochet in the first stitch, beside the turning chain.
- Continue with one single crochet in each stitch across.
- Work into the marked last stitch, rather than stopping one stitch early.
- Count 22 stitches. Chain one and turn for the next row.
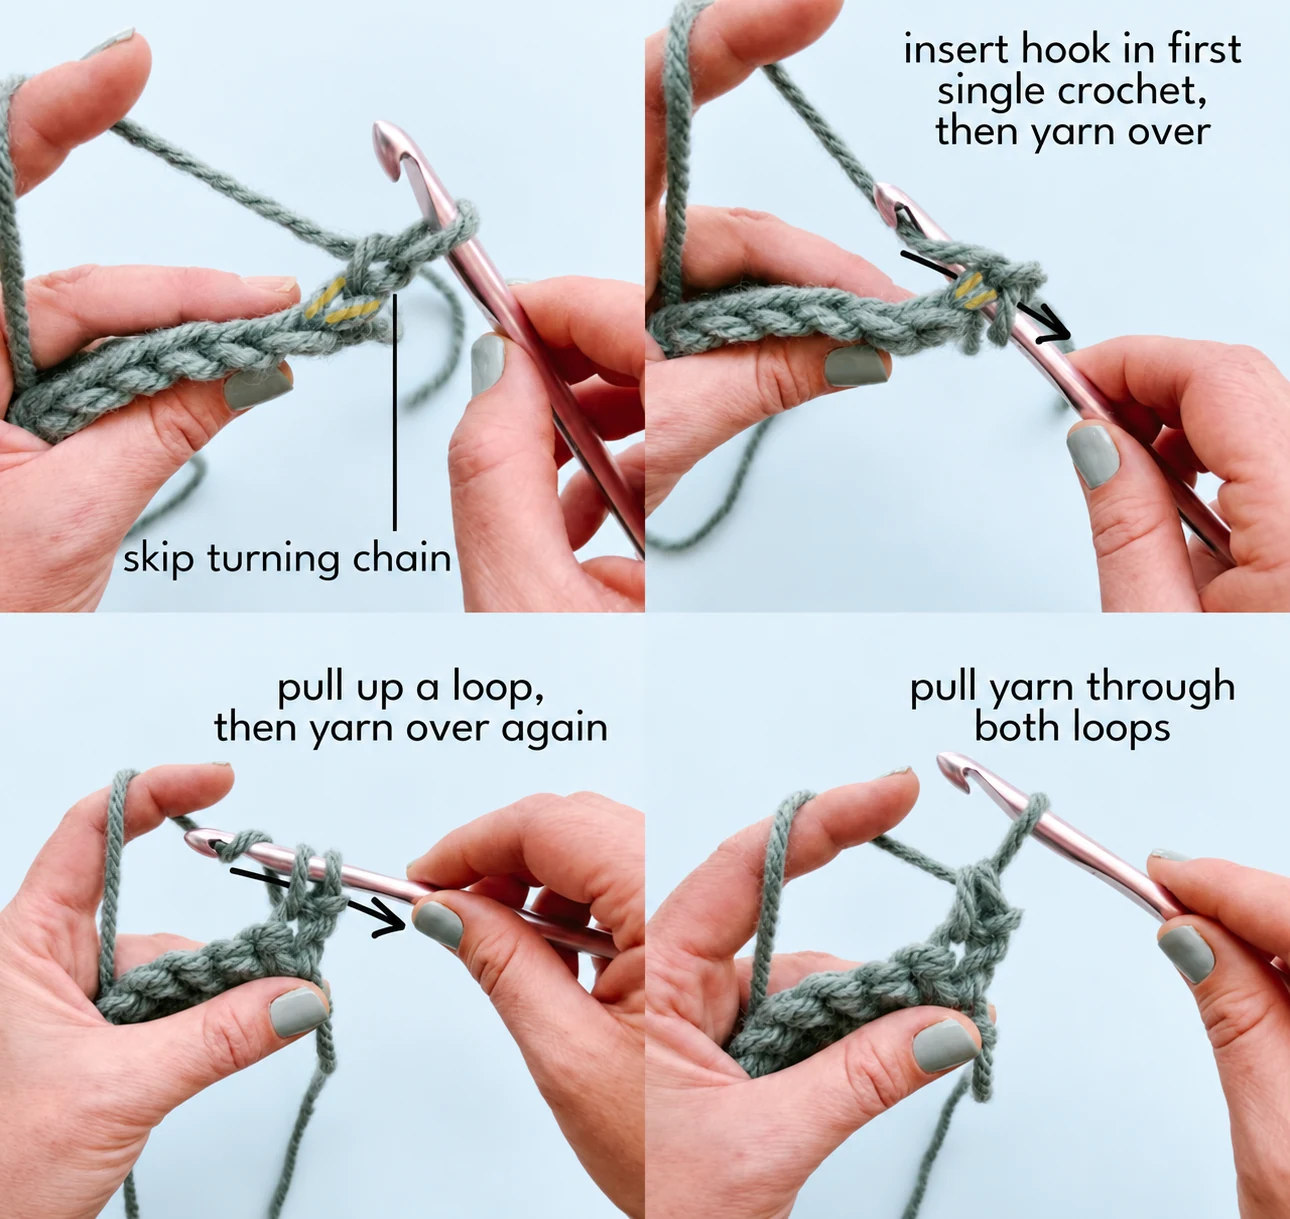
Do not add a stitch into the turning chain. That would create an extra stitch and can make the sides flare outward.
| Point in the exercise | Expected count |
|---|---|
| Foundation | 23 chains |
| End of the first row | 22 single crochet stitches |
| End of every following row | 22 single crochet stitches |
| Loop on the hook | Not included in the row count |
After a few rows, measure the width without stretching the fabric. Continue until the height is approximately the same as the width. Single crochet stitches are not necessarily as tall as they are wide, so 22 stitches across does not mean you need exactly 22 rows.
Finish and secure the yarn ends
After completing your final row, cut the working yarn, leaving another 6-inch tail. Pull the cut end fully through the loop on the hook and gently snug it down. This fastens off the work.
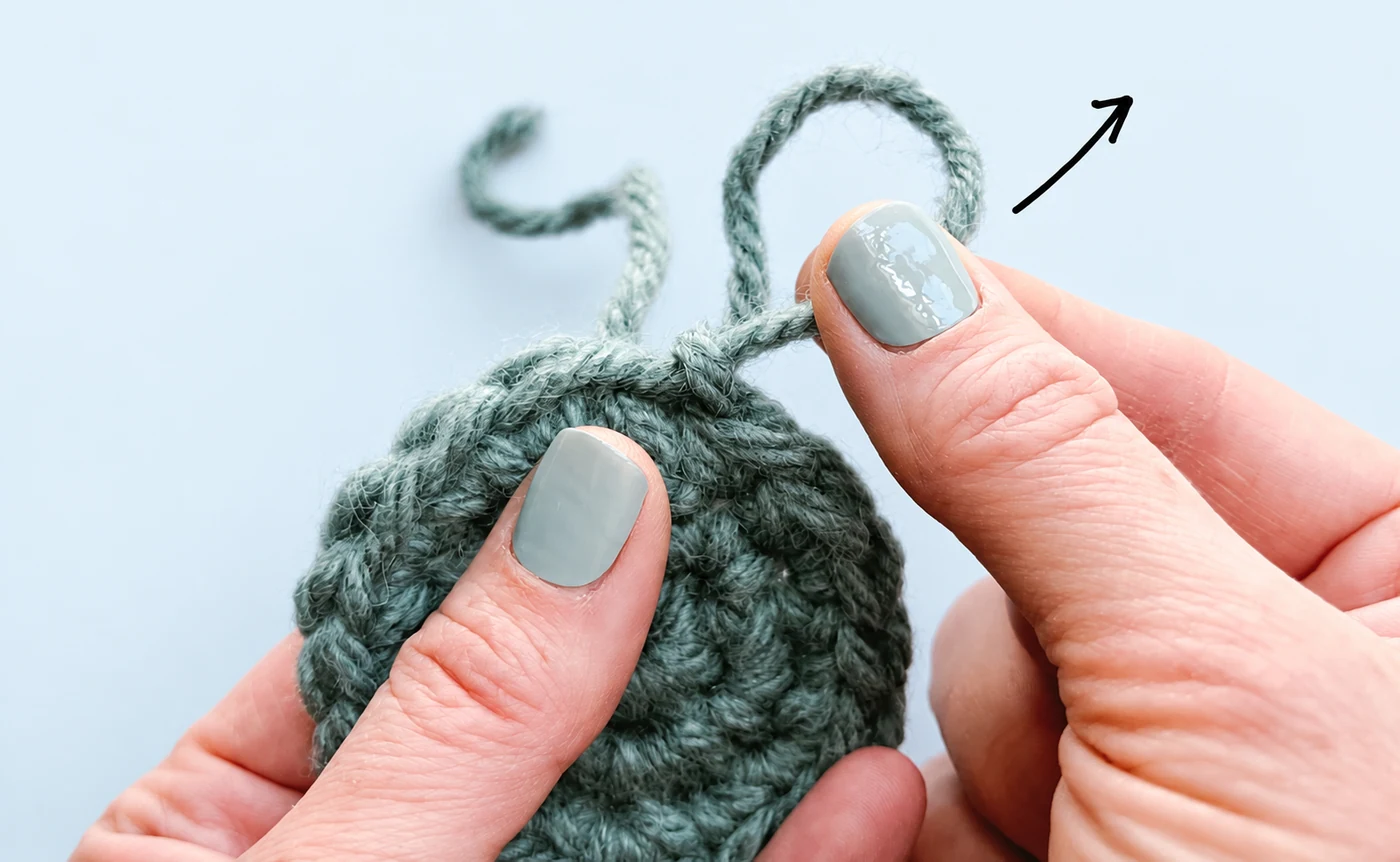
Thread a tail through the blunt yarn needle. Weave it through the fabric for several stitches, change direction, and weave back through a nearby path. Repeat with the starting tail. Keep the tails inside the fabric rather than leaving a loose knot at the edge. Trim only after the ends are secure.
Lay the square flat and compare its edges. It does not need to be perfect to be useful. Check whether you kept 22 stitches per row, whether the fabric is comfortable to handle, and whether the last rows are more even than the first.
Fix the problem you can see
| What you notice | Check first | What to try |
|---|---|---|
| The square gets narrower | A skipped first or last stitch | Mark both edges and count every row. |
| The square gets wider | An extra stitch in the turning chain or two stitches in one spot | Return to the last correct row and keep one stitch per V. |
| The bottom edge pulls tight | Tight foundation chains | Loosen the chain or try a larger hook for the foundation only. |
| The hook catches or splits the yarn | The hook went through the strand rather than the loop | Slow down and keep the hook inside the intended loop. |
| The stitches are hard to see | Fuzzy or dark yarn | Practice with a smooth, lighter yarn. |
To undo a mistake, remove the hook and gently pull the working yarn until you reach the last correct stitch. Put the live loop back on the hook before continuing. For this small swatch, correcting a row is part of the practice rather than a failed project.
Questions beginners ask
Should I count the loop on the hook?
No. Count completed chain Vs when making the foundation and completed stitch Vs when checking a row. The live loop stays outside that count.
Does the turning chain count as a single crochet?
Not in this exercise. Patterns can use different conventions, so check their notes. The Craft Yarn Council’s pattern-reading guide explains common abbreviations and turning-chain rules.
Why is my practice square a rectangle?
Its shape depends on both the number of stitches and the number of rows. Keep the width at 22 stitches and add rows until the measured height matches the width. Do not stretch the piece while measuring.
Can I make it with a different yarn?
Yes, but the finished dimensions and feel will change. Use a suitable hook for that yarn. This exercise teaches stitch placement and counting rather than a fixed-size pattern.
Keep building your yarn skills
Keep this square and compare it with your next swatch. Once you can hold 22 stitches across several rows, you have a foundation for learning another stitch or following a small project.
Visit the Crochet learning hub for the current lessons. If you want to try the other major yarn craft, the beginner knitting cast-on guide explains how loops are started on needles.
Written by Stacy for I Heart DIY. Learn about the site on the About page, or send a question if a step needs clarification.
Have a question? Use the form above to submit your question or comment.
I love hearing from you and seeing what you made!