


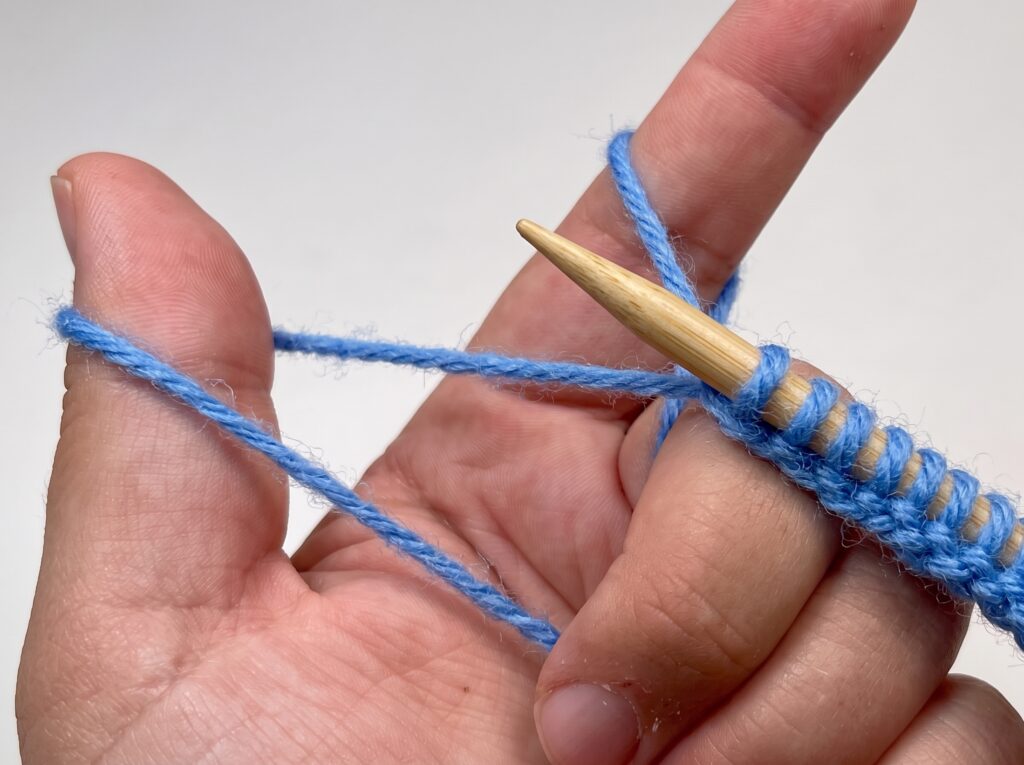
Casting on creates the first loops on a knitting needle. Those loops become the stitches in your first row and the starting edge of your fabric. You do not need to know a full pattern to practice: start with a small set of 20 stitches and check that each loop moves comfortably along the needle.
This guide explains two useful methods. The knitted cast-on builds new loops from the working yarn, without estimating a long tail. The long-tail cast-on uses a tail and the working strand together to form an even starting edge. Learn one method first, then try the other on a separate practice needle.
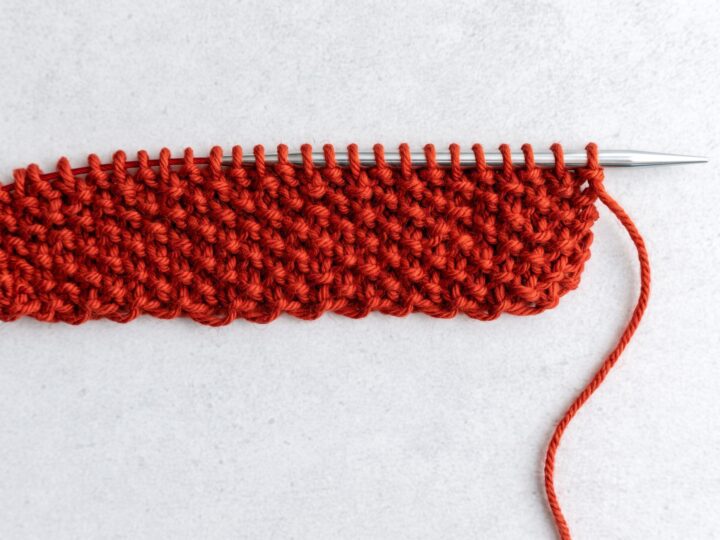
The directions below describe right-handed working. The cover is an editorial illustration, not a technical photograph of the hand positions.
Before you start
- Use smooth yarn and needles suited to the yarn label.
- For both methods shown here, the slip knot counts as stitch one.
- Keep loops around the needle’s full shaft, not tightened onto its point.
- For a practice count of 20, add 19 stitches after the slip knot.
Choose the cast-on for the task
| Method | Useful starting point | What to watch |
|---|---|---|
| Knitted cast-on | A first practice lesson, especially if estimating a tail feels confusing | Avoid pulling each new loop so tight that the needle cannot enter it. |
| Long-tail cast-on | Practicing an even, general-purpose starting edge | Leave enough tail and space the stitches as they are added. |
Neither method is automatically right for every project. Some patterns require a specific decorative or stretchy edge, or a cast-on that can later be undone. When following a pattern, use its recommended method unless you understand the effect of substituting another one.
For this first lesson, choose the knitted cast-on if you want to follow one loop at a time. Choose long-tail if you are comfortable arranging two strands around your fingers. Your goal is a usable edge, not speed.
Gather yarn and two needles
Use light-colored, smooth medium-weight yarn for practice. Two straight needles are convenient, although circular needles can also hold a flat-work practice row. Check the yarn label for a suggested needle size.
You will also need scissors, a tape measure, and a comfortable place to rest your work. There is no gauge target for a cast-on-only exercise. If you continue into a sized project later, that pattern’s gauge becomes important.
The Craft Yarn Council’s yarn-weight system gives general needle-size ranges. Treat those as guidance; a particular yarn label and pattern can recommend a different size.
Make a slip knot and count it as the first stitch
Leave a short tail for the knitted cast-on, long enough to weave in later. For long-tail, estimate the longer tail before forming the knot, as described below.
- Make a loose loop where the tail and working strand cross.
- Draw a loop of yarn through it to form an adjustable slip knot.
- Put that loop on a needle.
- Tighten gently around the shaft until the loop holds its shape but still slides.
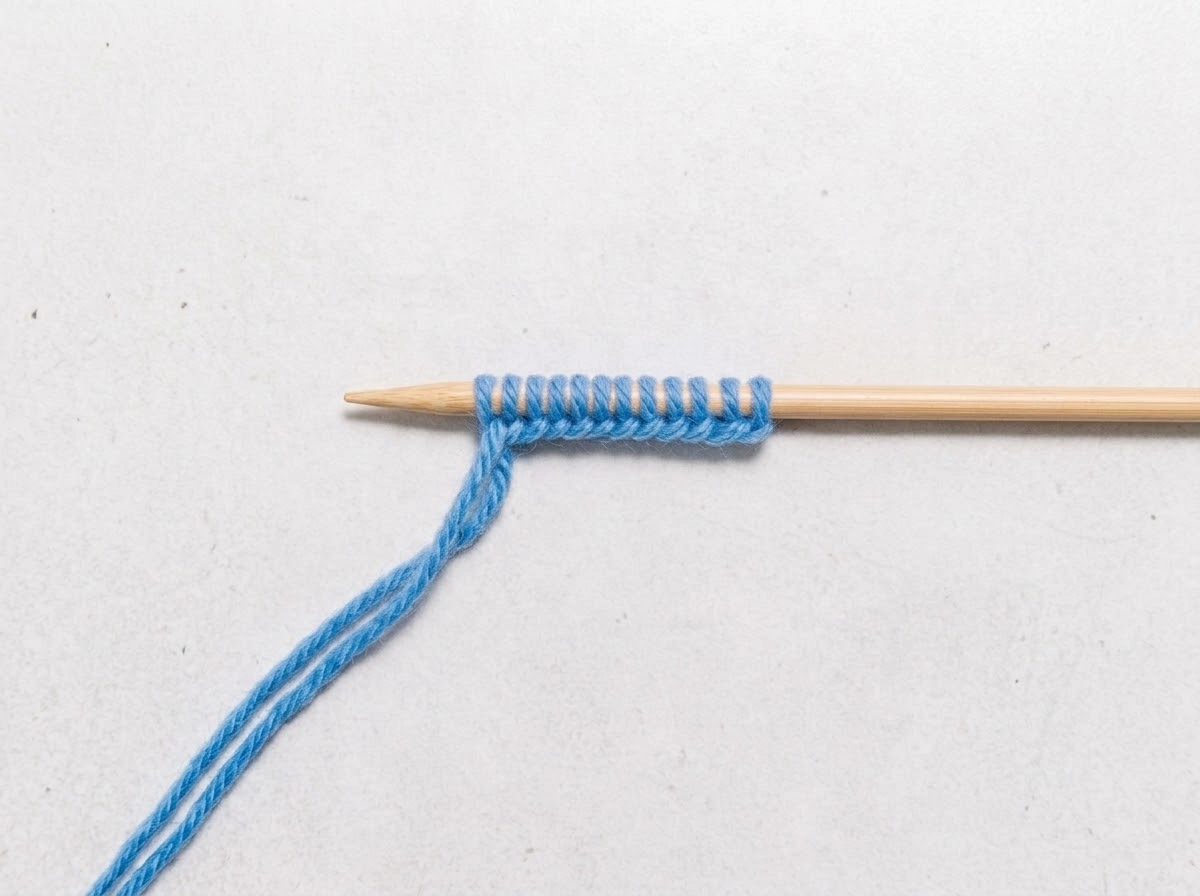
For the two methods in this article, the slip knot counts as your first cast-on stitch. This is a useful count check: if a pattern asks for 20 stitches, the slip knot is included in the 20. Other specialized cast-ons may use a different starting convention, so read their directions.
Method one: work a knitted cast-on
Hold the needle with the slip knot in your left hand and the empty needle in your right. The working yarn leads back to the ball. Let the shorter tail hang loose.
Form the second stitch
- Insert the right needle into the front of the slip-knot loop as if making a knit stitch. The needle tips cross, with the right tip passing through the loop.
- Bring the working yarn around the right needle tip counterclockwise, as viewed from the point of that needle.
- Draw the wrapped yarn back through the slip knot, forming a new loop on the right needle.
- Keep the original slip knot on the left needle. You are adding a stitch, not completing a normal knit stitch yet.
- Transfer the new loop from the right needle to the left needle without twisting it.
- Gently snug the new loop around the left needle’s shaft.
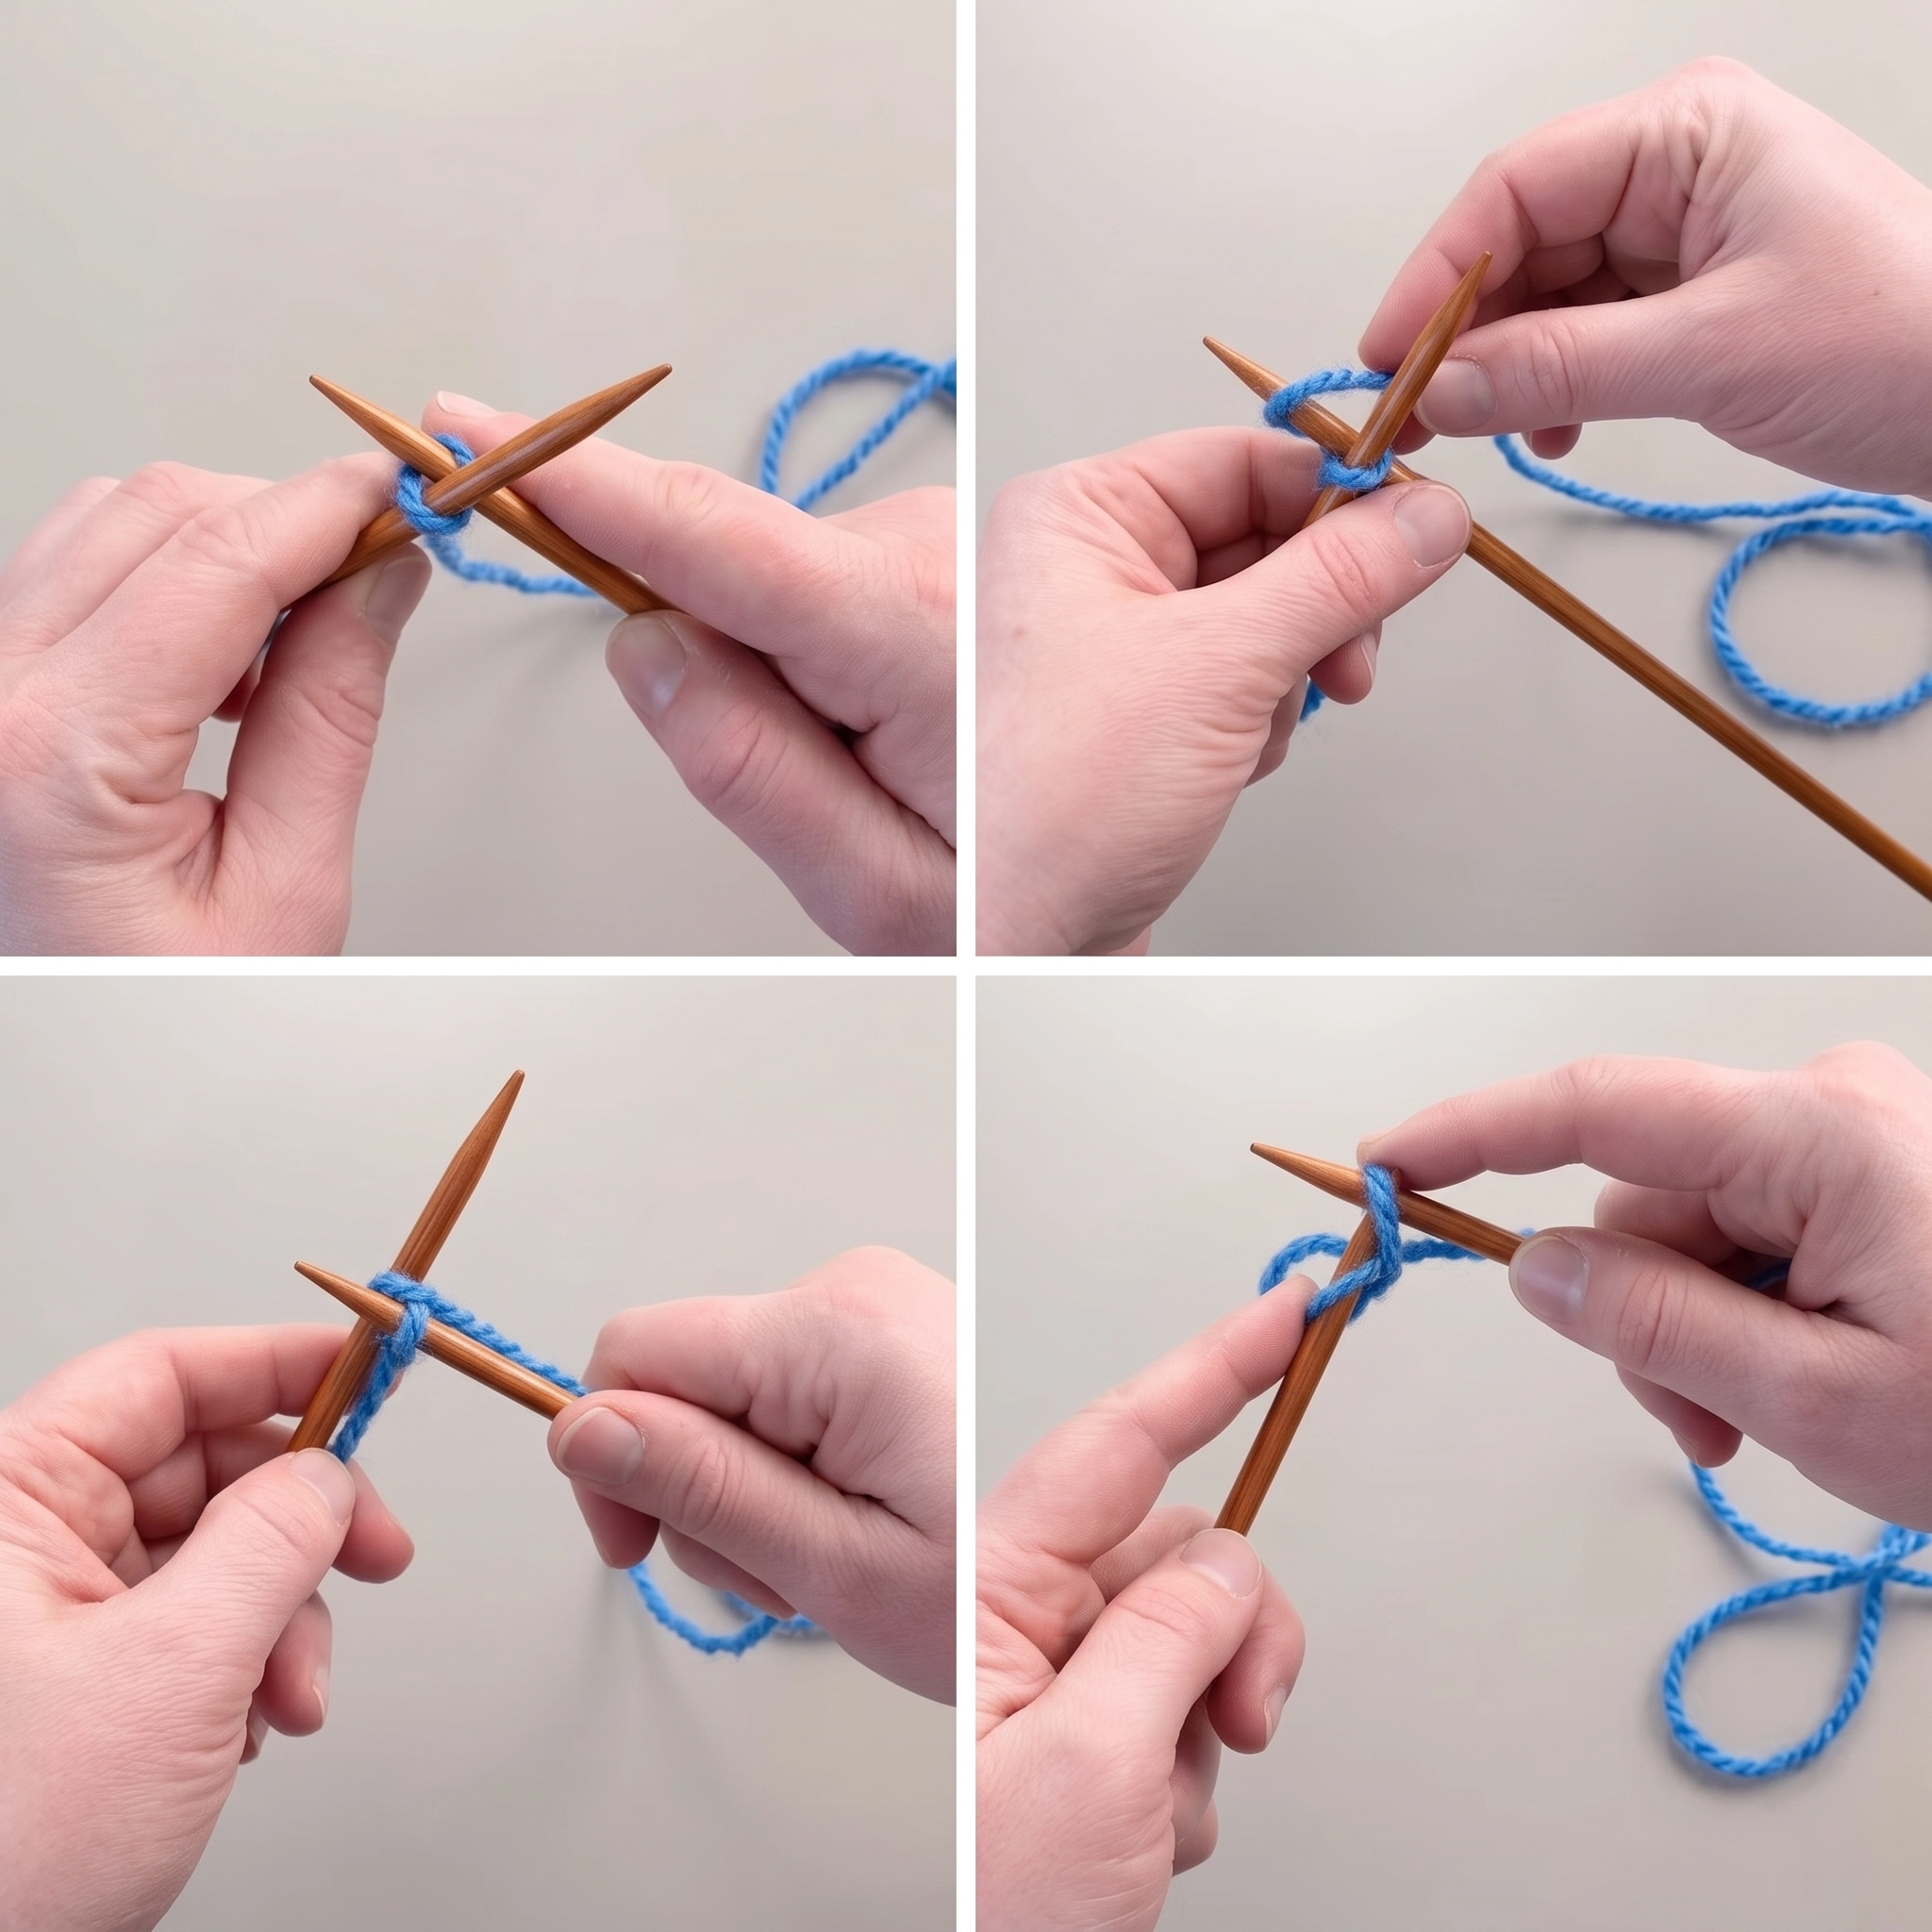
You now have two loops on the left needle. When transferring the new loop, insert the left needle tip into it from right to left and let the right needle slide out. Check that the new loop is open rather than crossed at its base. For the usual stitch mounting in this lesson, the leg nearest the needle tip lies at the front of the needle.
Add the remaining stitches
Repeat the process by inserting the right needle into the newest loop, which is nearest the left needle tip. Pull through another loop and return that new loop to the left needle. Leave the existing loops on the needle each time.
Continue until you have 20 loops in total. If the needle cannot enter the newest loop comfortably, loosen it before adding the next stitch. Packing very tight loops near the point makes the first row unnecessarily difficult.
The yarn manufacturer Knit Picks provides an illustrated knitted cast-on lesson showing the key transfer: the original stitch stays on the left needle while the new loop joins it. Use the practice count in this article for your exercise.
Method two: try the long-tail cast-on
Long-tail uses both the loose tail and the strand attached to the ball. You need enough tail for the entire cast-on, plus a length to weave in at the end.
One way to estimate is to loosely wrap yarn around the needle once for each stitch you plan to cast on, unwind it, and leave an extra finishing length. Designer Elizabeth Smith demonstrates this yarn-wrap estimate for long-tail cast-on. For this 20-stitch practice, make 20 loose wraps and add about 6 inches for finishing. This is an estimate, not a guaranteed formula; yarn thickness, needle size, and tension affect the amount used.
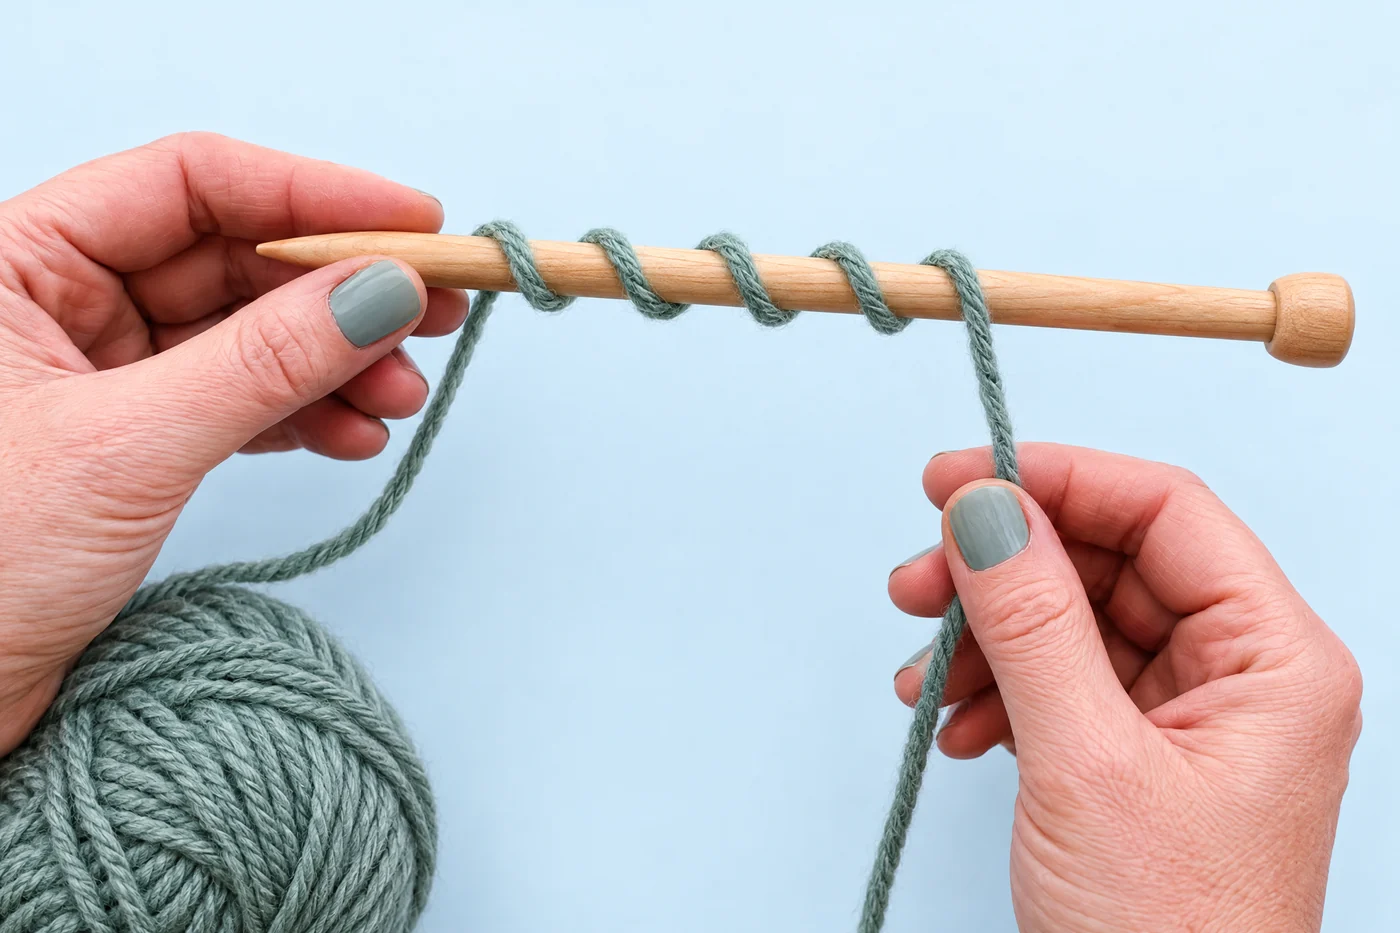
Arrange the two strands
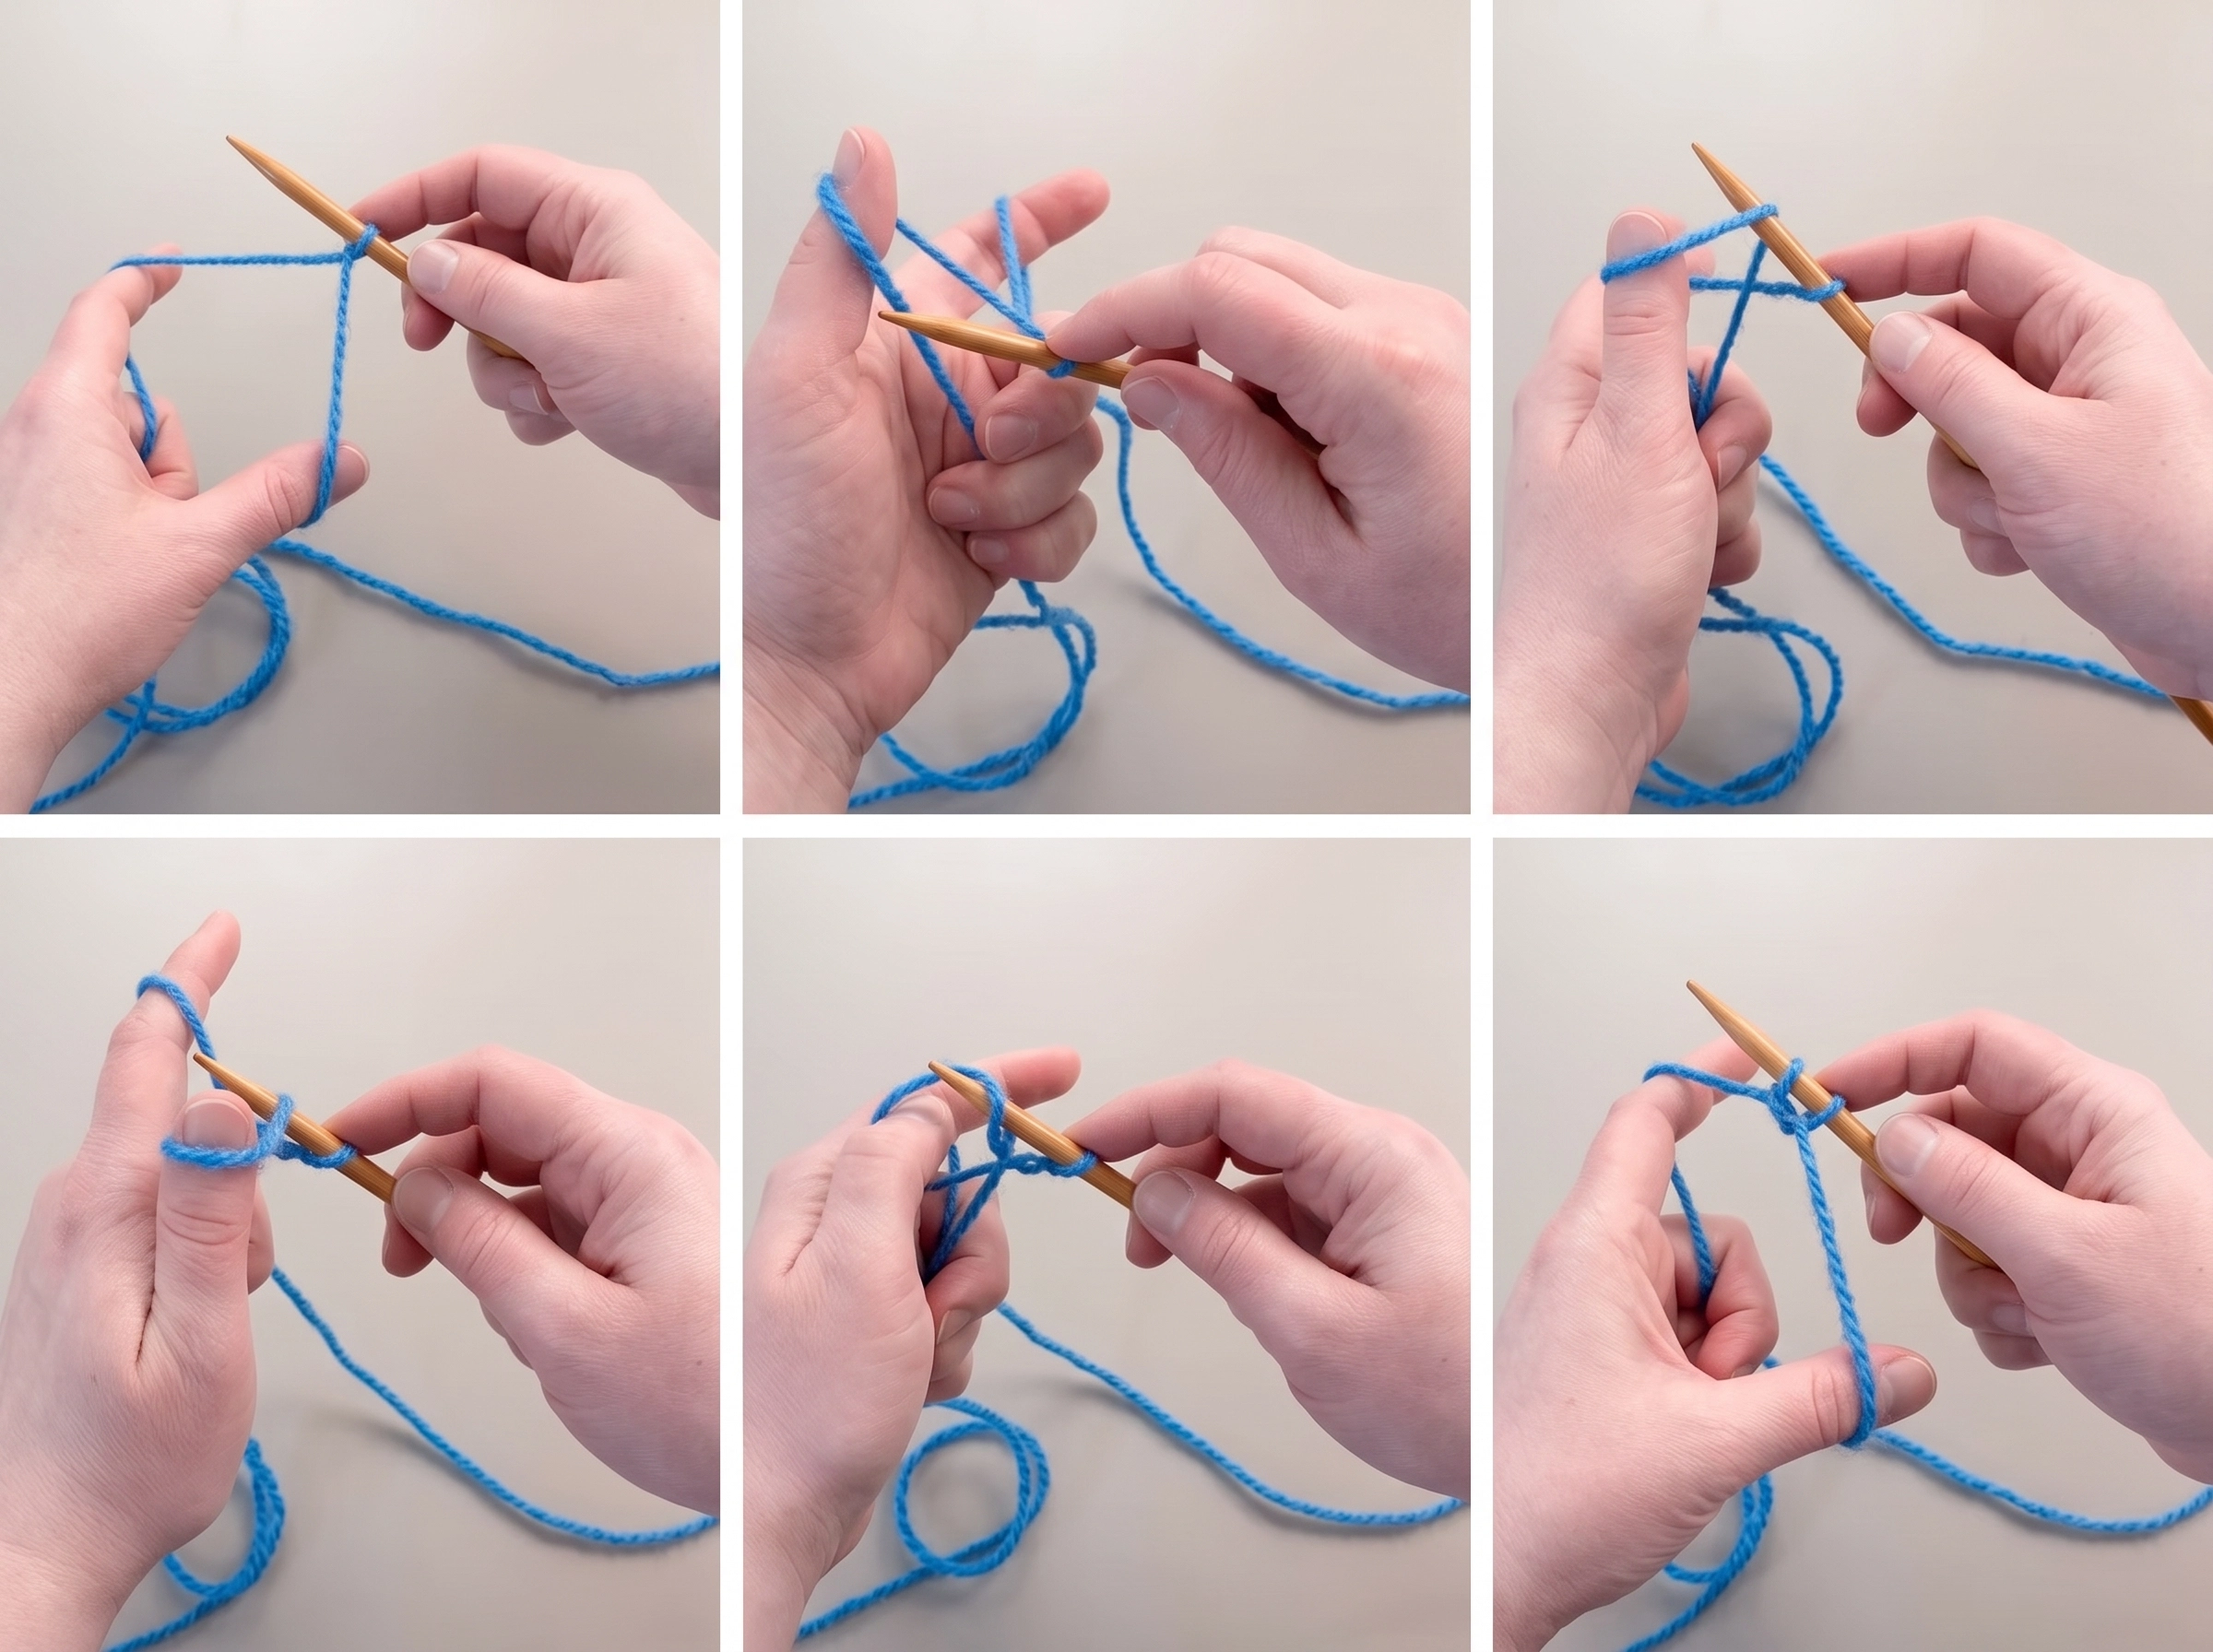
- Make the slip knot at your estimated tail length and place it on the right needle.
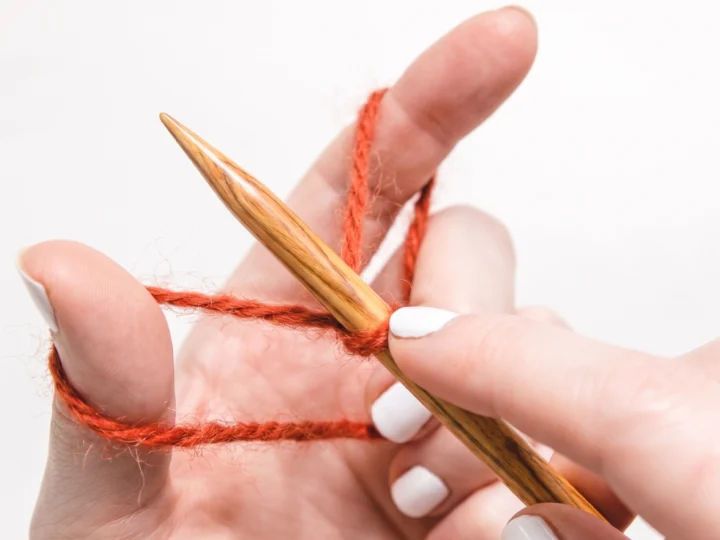
- Hold the tail toward your left thumb and the working yarn toward your left index finger.
- Use the remaining fingers of your left hand to control the two ends below.
- Spread the thumb and index finger to form an open V of yarn beneath the needle.
The tail-side yarn runs around the thumb. The ball-side yarn runs around the index finger. Keep them separate so you can identify which strand you are moving.
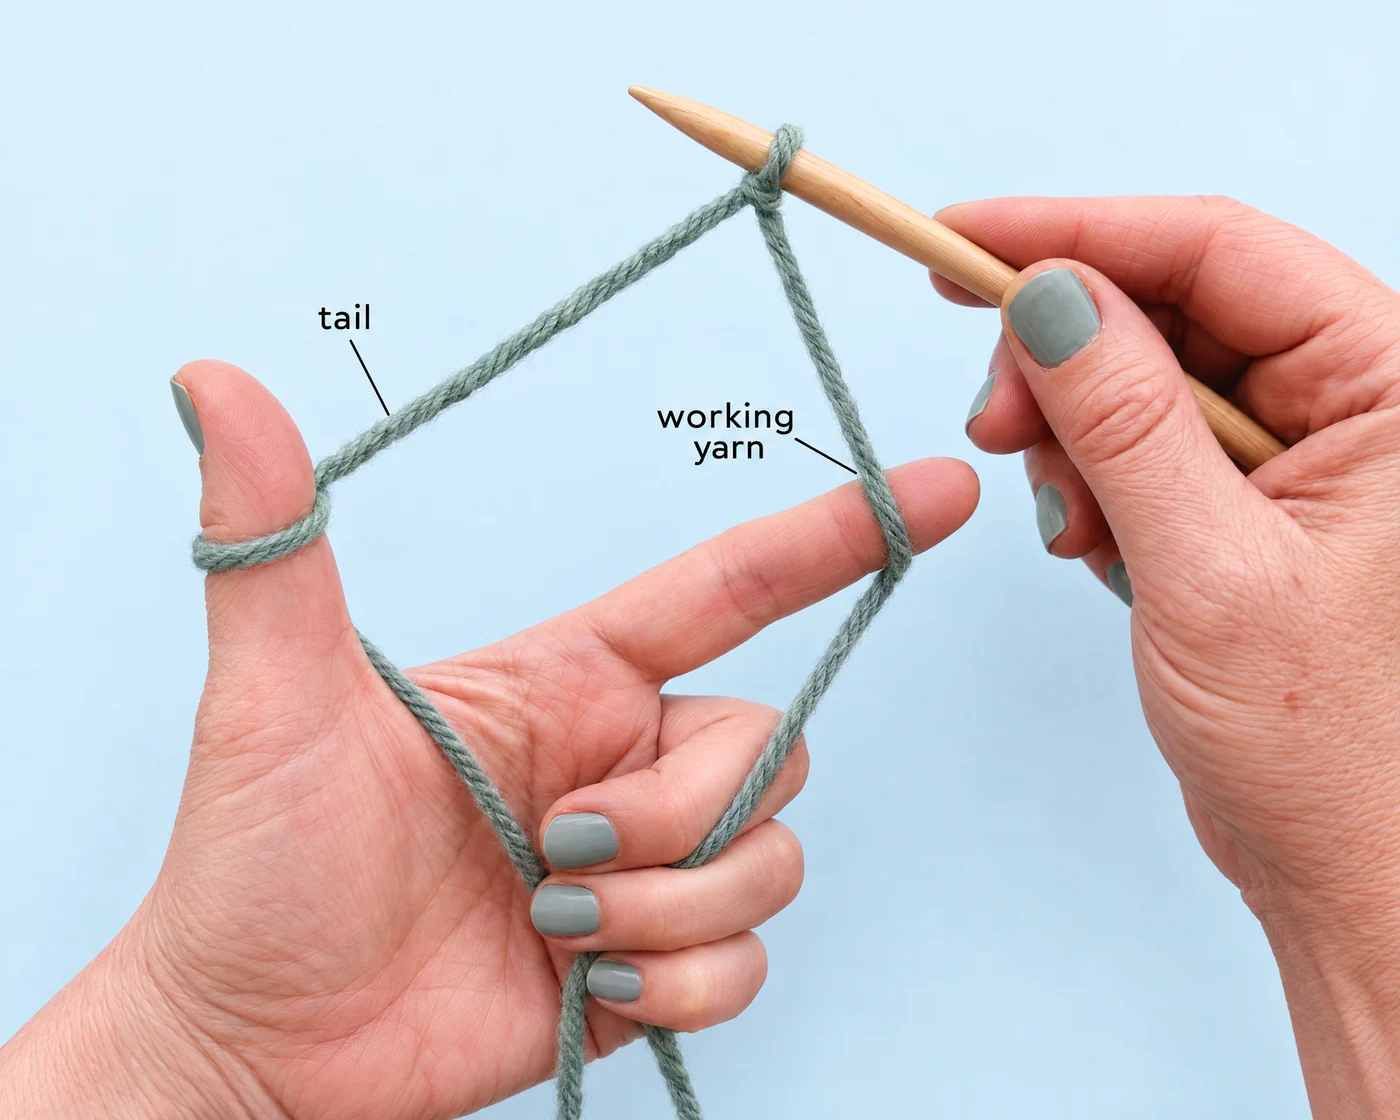
Add a long-tail stitch
- Take the needle tip upward under the front strand around your thumb, entering the thumb loop from below.
- Carry the needle tip over the index-finger strand nearest you, then scoop that strand onto the needle.
- Bring that strand back down through the thumb loop.
- Release the loop from your thumb.
- Move the thumb outward to gently snug the new stitch beneath the needle, then restore the open V.
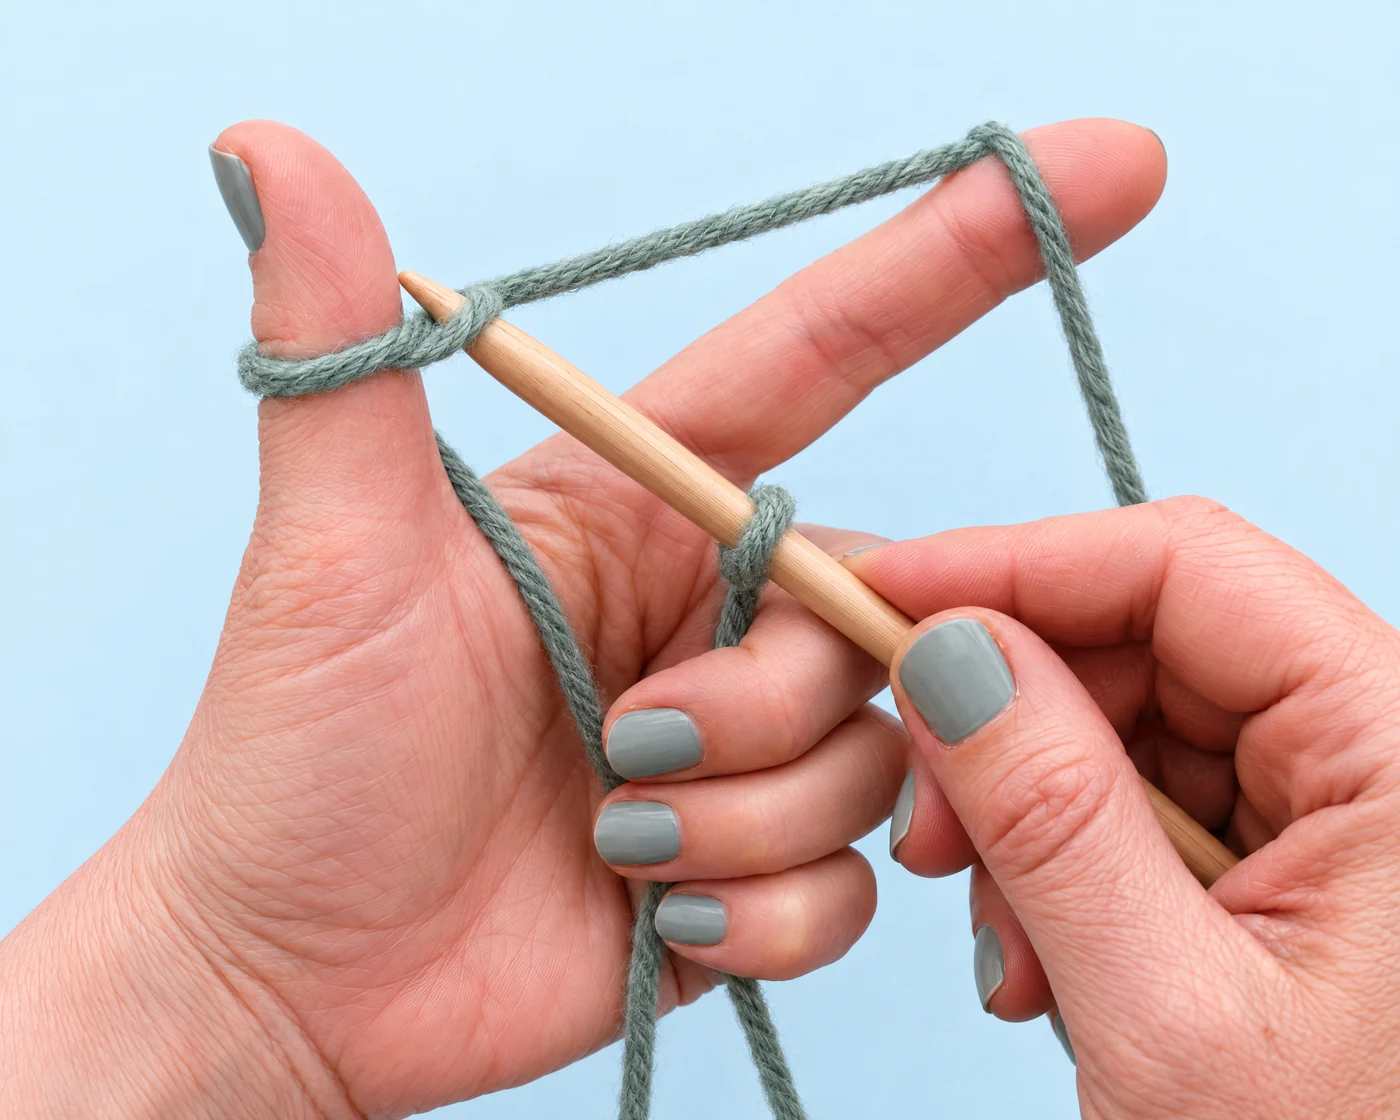
There are now two stitches, including the slip knot. Repeat until you have 20. Let each new stitch sit on the full needle shaft before tightening, and leave a little space between neighboring stitches. The edge can become tight even when the loops themselves look large if you pull the strand connecting them too firmly.
The Craft Yarn Council’s illustrated long-tail cast-on sheet shows the thumb-and-index-finger movements. Its suggested tail estimate differs from the wrap method above; both are estimates, so leave extra yarn for finishing.
Check the row before you start knitting
Count the loops in groups of five: 5, 10, 15, 20. You should have one slip-knot stitch and 19 additional stitches.
Slide the loops along the shaft. They should hold their shape and move with gentle pressure. They should not fall off loosely or grip the needle so firmly that they cannot shift.
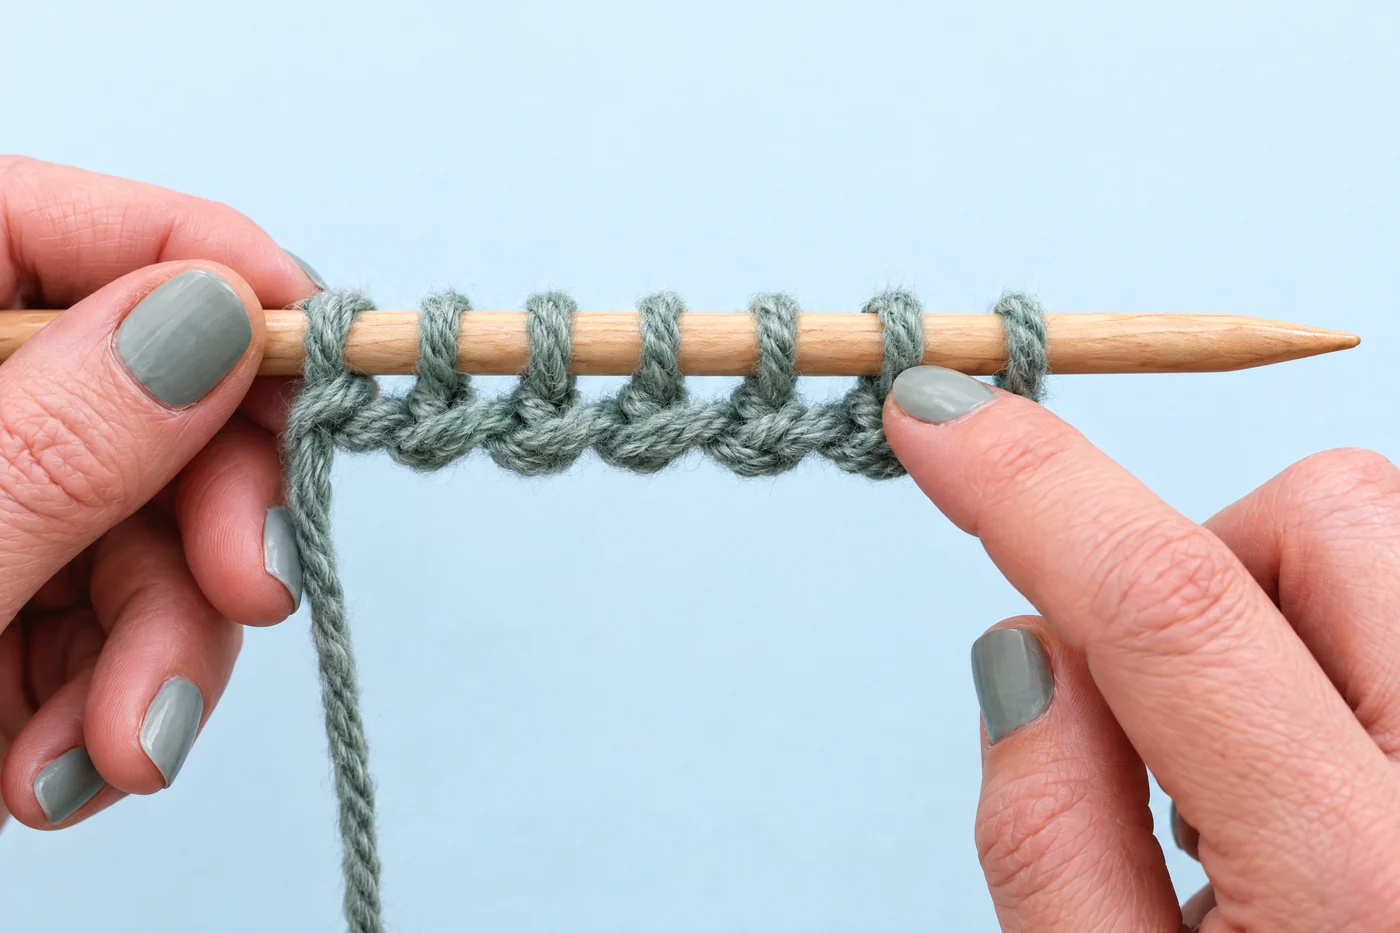
For flat knitting, hold the needle carrying the stitches in your left hand and the empty needle in your right. Place the working yarn behind the work to begin a knit stitch. Keep the tail separate so you do not accidentally knit the first row with the wrong strand.
If you are only practicing casting on today, count and inspect the loops, then pull them off and gently unravel the practice edge. You can repeat the exercise with the same yarn if it remains in good condition. Casting on is a skill worth practicing by itself.
Fix common cast-on problems
| Problem | Likely check | Practical fix |
|---|---|---|
| I cannot insert the needle into the first loop | The loop was tightened around the tip or pulled hard | Loosen it, or restart while snugging loops around the shaft. |
| I have 21 stitches instead of 20 | The slip knot was counted separately | Count all loops on the needle, including the slip knot. |
| I run out of tail | The long-tail estimate was too short | Restart with more tail, or use the knitted cast-on. |
| The long-tail edge feels tight | The strand between stitches was over-tightened | Add the stitches with more space and gentler tightening. |
| A loop looks crossed | It twisted during transfer | Remount that loop so it is open before continuing. |
| I used the wrong strand in the first row | The tail and ball strand were confused | Trace the working yarn back to the ball before knitting. |
Questions beginners ask
Which cast-on is easiest?
The knitted cast-on is a useful first method because it adds one loop at a time from the ball. Long-tail takes more hand coordination initially, but is also a common beginner method. Try a small sample of each rather than choosing by speed alone.
Does the slip knot count as a stitch?
Yes, for both methods taught here. Count every loop on the needle. The Craft Yarn Council’s pattern-reading guide explains how cast-on counts fit into knitting instructions.
Can I use one needle?
Long-tail uses one needle to build the cast-on. The knitted method uses two. You will need a second needle tip when you begin knitting the first row.
Can I use the same cast-on for every pattern?
Follow the pattern’s directions. A sock cuff, neckline, or temporary cast-on may need an edge with a different purpose. These two methods introduce general techniques rather than replacing every specialized cast-on.
Continue with a small, achievable lesson
Your first milestone is a comfortable set of loops with the correct count. Visit the Knitting learning hub for current beginner lessons. If you are comparing the two yarn crafts, the first crochet practice-square guide shows what starting with a hook looks like.
Written by Stacy for I Heart DIY. Read the About page for more about the site, or send a question if you need a step clarified.
Have a question? Use the form above to submit your question or comment.
I love hearing from you and seeing what you made!