



Punch needle uses a hollow needle to carry yarn through woven foundation cloth. Each downward stroke leaves a loop on the opposite face; repeated strokes build a textured design.
This beginner guide covers the setup, threading, first stitches, color changes, and finishing. Work a small practice piece before committing to a pillow or wall hanging so you can confirm that your particular needle, yarn, cloth, and frame work together.
What punch needle does
The tool has an eye near its point and a channel or shaft for the yarn. As the point enters the cloth, yarn travels down with it; when the point rises, the cloth grips the yarn and a loop remains below.
You normally punch from one side and inspect the raised loops on the other. The side with flat running stitches can also be used as a design surface, but decide which face you want to display before drawing an asymmetrical pattern.
The technique does not tie a knot after every punch. Fabric tension, yarn fit, and surrounding loops help hold the work, which is why an incompatible setup can seem to unravel.
Unlike ordinary embroidery, punch needle forms a pile of loops with repeated strokes. Rug hooking makes a similar textured surface with a tool that pulls loops up; punch needle pushes yarn through from the working side.
Two common punch needle systems
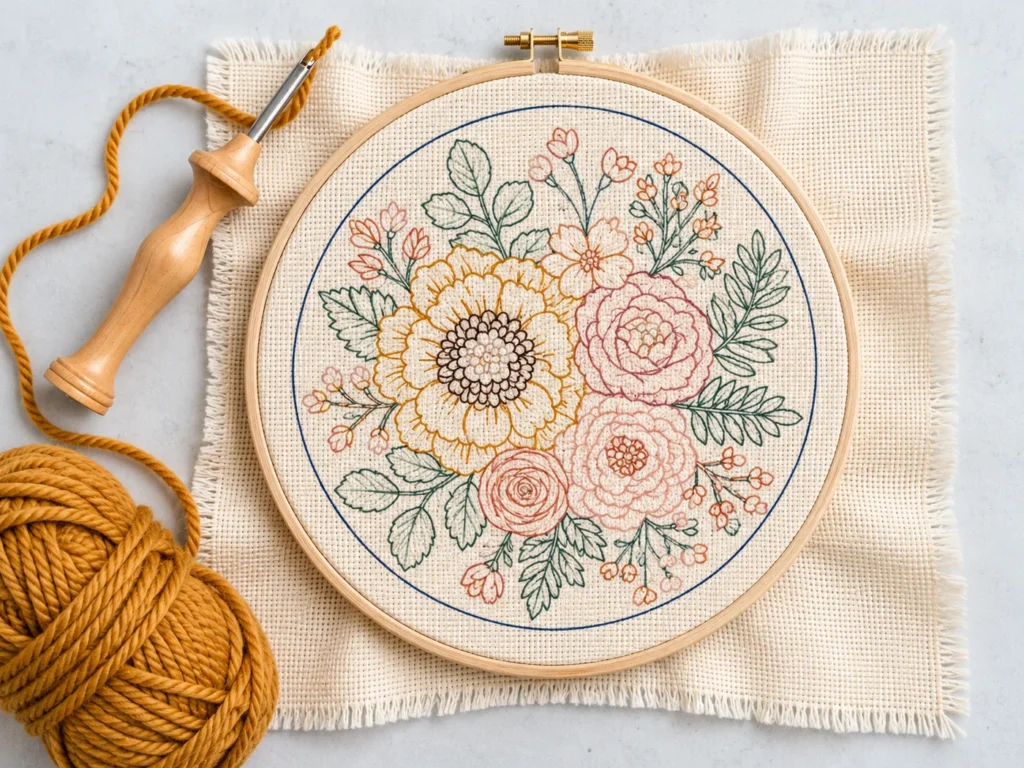
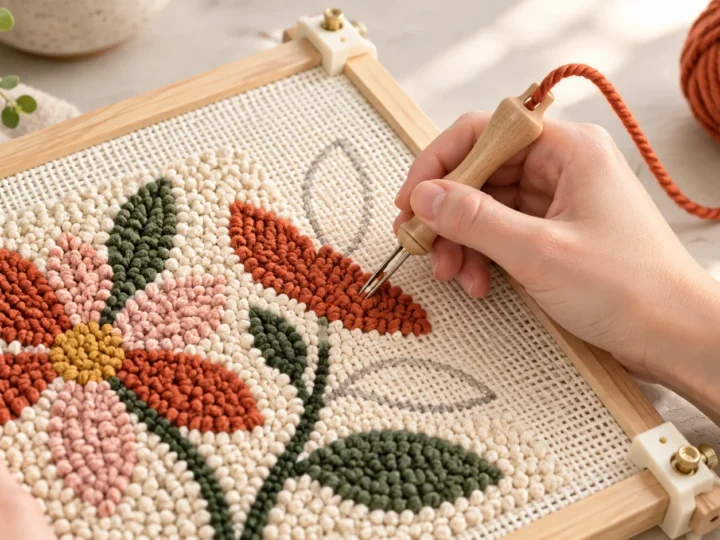
Yarn punch needle uses a wider point and yarn on a woven foundation such as cloth made for rug punching. This is the system used in the small sample below.
Fine punch needle embroidery uses a much smaller point and often embroidery floss on a tighter fabric. Its threading and backing choices can differ, so follow the instructions for the tool you own.
Even within the yarn system, needle widths and lengths vary. Width affects the fiber that fits; length or depth setting affects the height of the loop.
Choose one system for the practice piece. Mixing a fine needle with rug yarn, or a wide needle with very thin thread, makes it hard to judge whether a failed loop came from technique or incompatible supplies.
Gather a matched setup
Start with a punch needle, yarn the maker recommends for that needle width, compatible woven foundation cloth, and a frame or non-slip hoop that holds the cloth taut. Add scissors and a marker for a simple outline.
For example, Oxford describes its Regular Point tools for bulky or rug-weight yarn and its Fine Point tools for narrower yarn. Its monk's cloth is made for those tools; this is a matched example rather than a rule for all brands.
Choose a smooth, contrasting yarn for your first test. You should be able to see each stitch and pull the strand through the tool without resistance.
Give yourself extra cloth beyond the design area. The frame needs material to grip, and a finished piece may need a margin for hemming or sewing.
The punch needle supplies guide covers tool, yarn, cloth, and frame choices in more detail if you have not assembled a set yet.




Plan a small first design
Draw a simple 4-inch square or a broad leaf outline on the side of the cloth you will punch. Avoid tiny lettering and narrow points until you know how wide your yarn loops look.
Keep the design inside the frame's usable opening. If the outline reaches the clamps or gripping strips, you will have trouble inserting the needle at the edge.
An asymmetrical design appears mirrored on the loop side after punching from the back. If direction matters, reverse the drawing before transferring it to your working side.
Use a fabric-safe marker whose line can be covered by the yarn. Check any heat or wash instructions before using a transfer product on your chosen fiber.


Stretch the cloth
Center the cloth on the frame and tighten it evenly. It should resist the needle rather than sink away, while the threads remain intact and not distorted.
Run a hand across the middle to find slack. Retension now; a loose center is difficult to fix once several rows of loops cover the area.
On a gripper frame, keep fingers away from the sharp strips and cover unused exposed grips. On a hoop, verify that the inner and outer rings hold the cloth without creeping after a few test strokes.
If the cloth edge is already fraying, leave a larger margin or secure the raw edge outside the future design and seam area. Do not put adhesive into the region you plan to punch.
Thread the punch needle
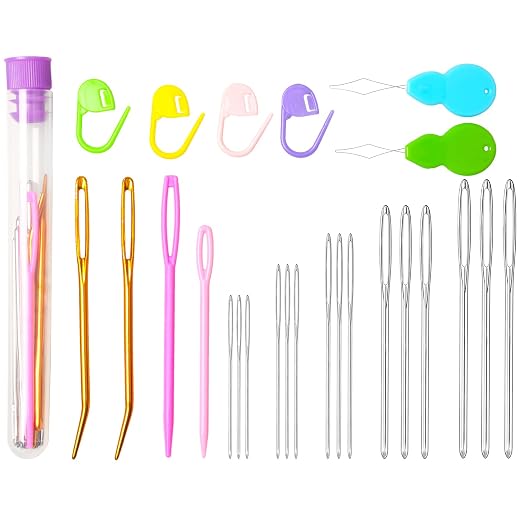
Follow the path printed for your tool: yarn must travel through the shaft or open channel and then through the eye near the point. If it bypasses the eye, the tool cannot lay a normal loop.
An open-channel needle may let you feed yarn by hand. Place it through the eye and guide it into the handle's channel, checking the maker's direction of entry.
A closed-shaft tool usually comes with a wire threader. Pass the threader through the shaft, catch the yarn, draw it through, then use the threader again at the eye as instructed.
Pull a short tail through the point, then let more yarn run freely from the ball. The ball should not be trapped under the frame, your elbow, or a nearby tool.
Test the feed by drawing several inches of yarn through the needle. It should move smoothly; if it jams, reduce yarn bulk or use a needle designed for that thickness.
Make the first line of stitches
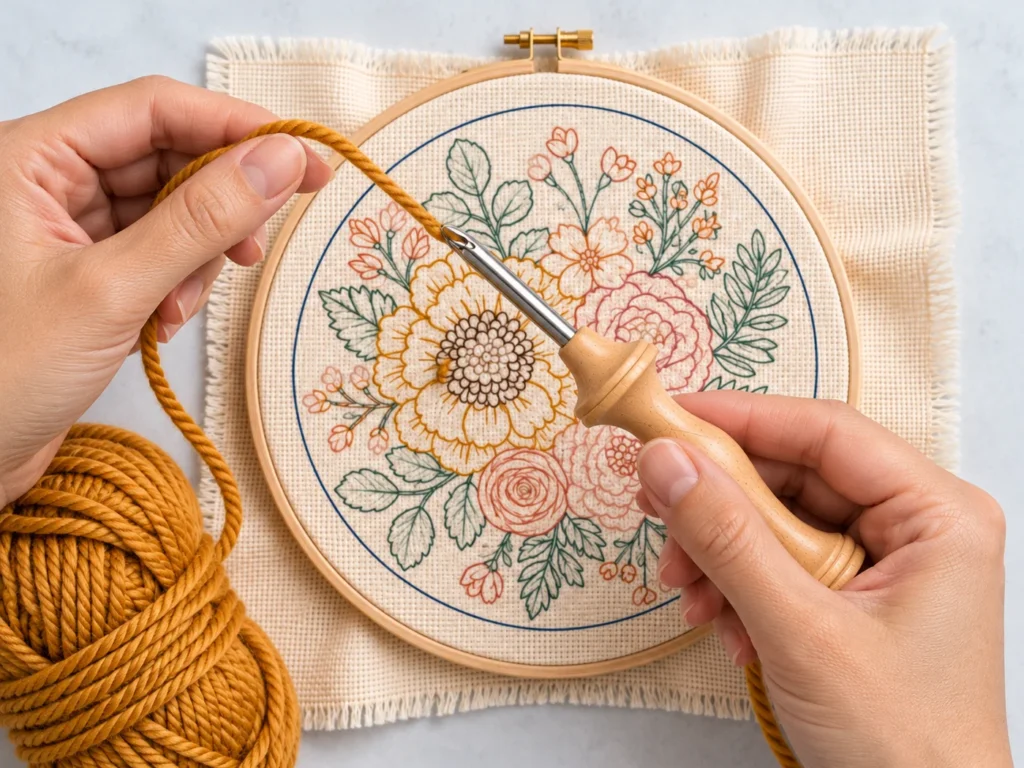
Hold the tool like a pencil with its open channel facing the direction you want to travel. Put the point into the cloth at the start of your outline.
Push the needle to its designed depth stop. Bring the short starting tail through to the loop side if your tool directions call for it; keep it loose until neighboring loops hold the area.
Raise the point only until it meets the fabric surface. Slide or skim the tip a short distance along the line instead of lifting it into the air.
Punch again to the same depth. A row of small running stitches appears on the working side, while loops form on the opposite side.
Repeat a few strokes, then turn the frame over. If the loops fall out, stop and check fabric tension, yarn feed, needle size, and whether you lifted the point too high.
Use spacing that gives the loop side the coverage you want without bunching the cloth. The ideal distance changes with yarn thickness and loop height; the test patch is more useful than a universal stitch count.
At a curve, turn the tool or frame so the channel continues pointing along the path. At a sharp corner, pause with the point in the fabric while you reorient.
Oxford's punch needle technique tips stress three habits: keep the point low between strokes, face the channel forward, and let the yarn flow freely.

Fill the shape
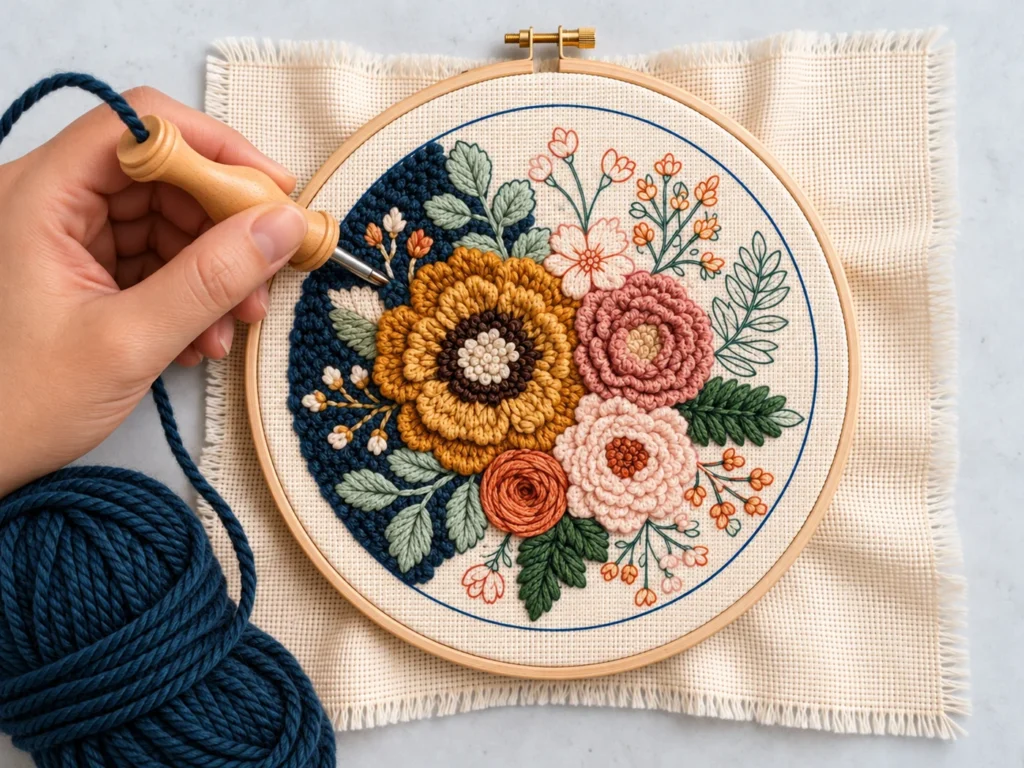
Outline the area first so you have a clear boundary. Fill its middle in short, orderly rows rather than jumping from one distant spot to another.
Turn the frame over after a few rows to look for backing fabric showing between loops. Add stitches only where a gap needs them, avoiding so much crowding that the backing puckers.
Keep the punch depth constant through the whole color area. A change in needle setting or hand motion can produce a visible step in pile height.
If you are filling beside another color, punch close enough to meet its edge without stabbing through the existing yarn. A blunt needle can later nudge a few stray loops back across the boundary.
If the outline shows through the pile, check whether the yarn contrast is too low or the spacing too wide. Complete a small region before deciding to add more stitches.
Work with the loop side you intend to display in mind. The line of flat stitches you see while punching does not always predict how the rounded pile will define a narrow detail.
Change yarn colors
Cut the working yarn and leave a short tail on the loop side. Remove it from the tool without pulling on the line you just finished.
Thread the new color, leave another short tail, and begin its first punches beside the previous area. Maintain the same tool depth if the two colors should have an even pile.
Do not knot the colors together unless your chosen pattern or tool maker requires a special finishing method. Dense, well-matched loops and the foundation weave provide the normal hold.
After the surrounding area is finished, trim the color tails to the nearby loop height. Cutting too soon makes it harder to identify and correct a loose start.
Undo a mistake
Pull the unwanted yarn out gently in the direction it was punched. Do not yank across a finished color boundary or tear the foundation threads.
Rub the empty holes lightly with a fingernail or blunt tool to move the woven threads back into place. Retension the cloth if it relaxed during the repair.
Punch the corrected section again with free-flowing yarn and a low needle lift. A small removed area usually disappears under the replacement loops.
If the cloth has ripped or the hole is permanently enlarged, move the motif or start on sound fabric. More stitches alone will not restore a damaged foundation.


Finish the first sample
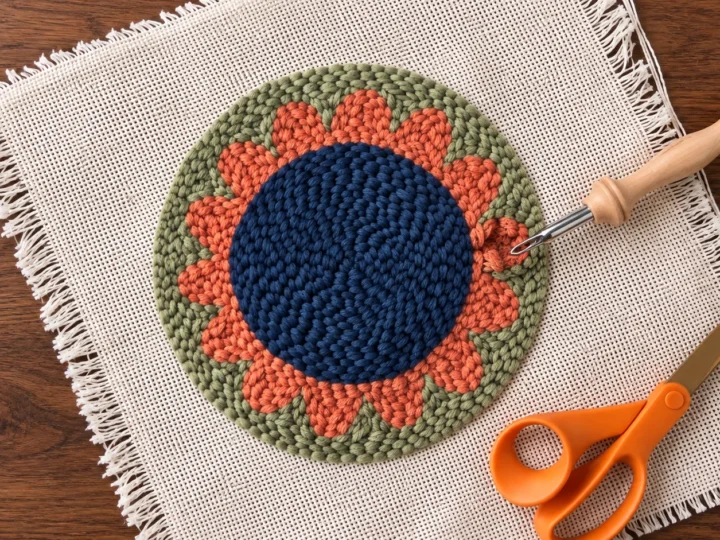
Fill your small design, then cut the yarn and bring the last tail to the loop side. Check that the final few loops remain in place before taking the fabric out of the frame.
Trim loose tails to the height of their neighbors. Leave intact loops alone unless your chosen design deliberately mixes loop pile and cut pile.

Use a blunt tool to move a few wandering loops back inside a clean outline. Do not pull individual loops from the front as a shortcut; that can loosen an entire stitch line.
Remove the fabric carefully from the frame. Keep enough unpunched margin for whatever finish you want: a folded wall-hanging edge, a pillow seam, or a mounted panel.
For an original wall project, follow our free measured mountain pattern. To sew a finished panel into a removable cover, use the punch needle pillow guide.
Troubleshooting while you learn
If loops come out with the needle, lower the lift between punches and check that the yarn ball is not pulling backward. These are fast checks before you replace materials.
If those changes do not help, inspect the foundation cloth's weave and the match between needle width and yarn thickness. A very open cloth can fail to grip a thin strand.
If loop height varies, reach the same stop on each stroke and make sure the fabric stays taut across the center. Do not try to correct a slack frame by driving the tool harder.
If the backing shows, bring neighboring stitches closer or use a fuller compatible yarn. Add density gradually while checking for buckling.
If the tool feels hard to push, make sure you are entering gaps in the weave rather than splitting its threads. The point, fabric, and yarn may also be mismatched.
If a straight line seems twisted, check that the open channel faces the direction of travel. Rotate at turns instead of dragging a backward-facing point around a corner.
Our punch needle troubleshooting page walks through the main symptoms in more detail.
Where to go next
Keep the first sample as a reference for the yarn and needle setting you used. Write those details on a note so you can repeat an even loop height in a larger piece.
Try a second sample with two colors and one curved edge. That small change practices both rethreading and channel direction without requiring a long project.
Once the loops stay secure, choose a finishing method before cutting your cloth. A wall hanging, pillow, and rug each need different margins and edge treatment.
Use the ten punch needle tips as a short checklist before a new session. Most visible problems are easier to prevent while the cloth is still taut on the frame.
What’s Next?
Pin this post: Save this tutorial to your Pinterest boards so that you can come back to it later.
Leave a comment: We love to hear your feedback. Tell me in the comments below!
Share on Instagram or Facebook: When you make this project, share it on social media and tag me @iheartdiybystacy. We love to see what you make!
Have questions? Join the Facebook Group!
We hope this article was useful for you! If you have any additional questions, feel free to join my Facebook Group. We created this group for you to share pictures, ask questions, and help each other out.
I hope this article was useful for you! If you have any additional questions, feel free to join my Facebook Group.
Join the group to share pictures, ask questions, and help each other out.

Have a question? Use the form above to submit your question or comment.
I love hearing from you and seeing what you made!