


A punch needle panel can become a removable pillow cover when you give it a sturdy backing and protect the edges of its foundation cloth. This tutorial takes you from a completed panel to a finished envelope-back pillow.
The worked example fits a 12-inch square pillow insert. You can change the size with the cutting formula below, and you can leave off the decorative yarn edging if you prefer a plain seam.
If you are still learning to make the loops, start with our how to punch needle guide. Finish the punched panel first, then return here for the sewing steps.
Plan the pillow before you punch
Choose a square design that will cover the front of the pillow without putting important details inside the seam allowance. For a 12-inch finished face, mark a 12-inch square for the visible design.
Leave extra foundation fabric outside that line while the cloth is on the frame. You need enough to grip the frame and, later, at least 1 inch beyond each side of the punched square for sewing.
Punch needle loops are held by the fabric weave and neighboring stitches. A pillow is handled more than wall art, so use a compatible cloth and yarn combination and fill open areas densely enough for the intended look.
This guide uses an envelope closure: two backing pieces overlap at the center back. The insert can be removed without installing a zipper.
Gather the materials
Set out the finished punch needle panel, a 12-inch pillow insert, two pieces of stable woven backing fabric, coordinating sewing thread, and yarn for an optional edge wrap. Use the same yarn family as the punched background if you want a quiet edge.
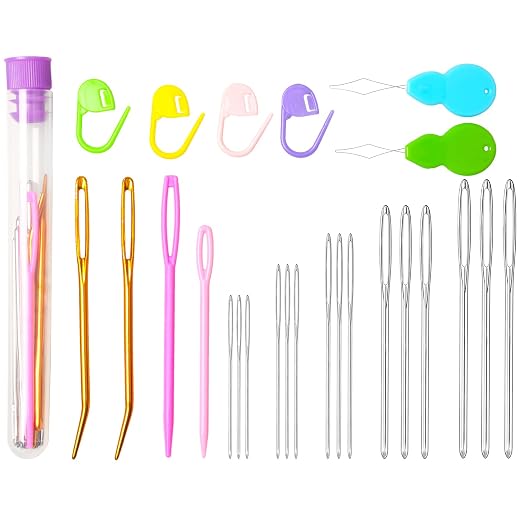
You will also need a ruler, fabric scissors, clips or pins, a sewing machine, an iron for the backing fabric, and a blunt tapestry needle. A zigzag stitch or serger is useful for finishing the raw seam allowance.
Check the fiber labels before pressing or cleaning anything. Steam and heat can change some yarns and backing fabrics, so the preparation here does not depend on steaming the punched loops.




Prepare the punched front
Complete the design while the foundation cloth is taut. Work the outlines, fill the shapes, and inspect the loop side for gaps before removing the panel from its frame.
Trim loose yarn tails to the height of the surrounding loops. Do not cut across the tops of the intact loops unless your chosen design intentionally has a cut-pile area.
If a color boundary looks fuzzy, push stray loops gently back into their own area with a blunt needle or chopstick. Tugging individual loops can loosen neighboring stitches.
Lay the panel flat with the looped face up and confirm that its punched square measures 12 inches from edge to edge. Measure the design itself, not the full piece of foundation fabric.
If the punched area is slightly smaller than planned, use its actual measurement in the cutting formula. Do not stretch the loops to force a nominal insert size; a differently sized insert or wider unpunched border is easier to manage.
Mark a cutting line 1 inch outside every side of the 12-inch design. The front piece will then be a 14-inch square, with the extra inch on each edge serving as the seam allowance.
If the cloth frays as you handle it, stay well outside the marked cutting line until you are ready to assemble. The seam will later secure the edge; avoid pulling out loose foundation threads near the design.
Cut an envelope back that overlaps
Cut two backing rectangles, each 14 inches high by 10 inches wide. The 14-inch height matches the cut front; the two 10-inch widths allow a hem and an overlap at the center.
For another finished square size S, cut the punched front to S + 2 inches in both directions. Cut two back rectangles S + 2 inches high and S ÷ 2 + 4 inches wide when using the same 1-inch seam and 1-inch double-fold hem.
For example, a 16-inch finished cover needs an 18-inch square front and two backing pieces that each measure 18 by 12 inches before hemming. Keep the same allowance on all four outer edges.
Make a quick paper or scrap-fabric check if you change the seam or hem widths. The formula assumes both back pieces lose 1 inch at their inner hem and 1 inch at their outer side seam.
Use a stable cotton canvas or other upholstery-weight woven for the back. Very stretchy fabric can make the envelope opening sag against the relatively firm punched front.


Hem the two inner edges
On one short vertical edge of the first backing rectangle, fold ½ inch toward the wrong side and press. Fold another ½ inch in the same direction so the raw edge is enclosed.
Stitch close to the inner fold. Secure the start and end of the line so the hem will not loosen when you remove the pillow insert.
Hem one short edge of the second backing rectangle in the same way. These two finished edges will face each other and overlap across the back of the completed cover.
Lay the pieces on the table before sewing the outer seam. Their combined coverage should exceed the pillow front, leaving a substantial center overlap rather than a gap.


Stack and sew the cover
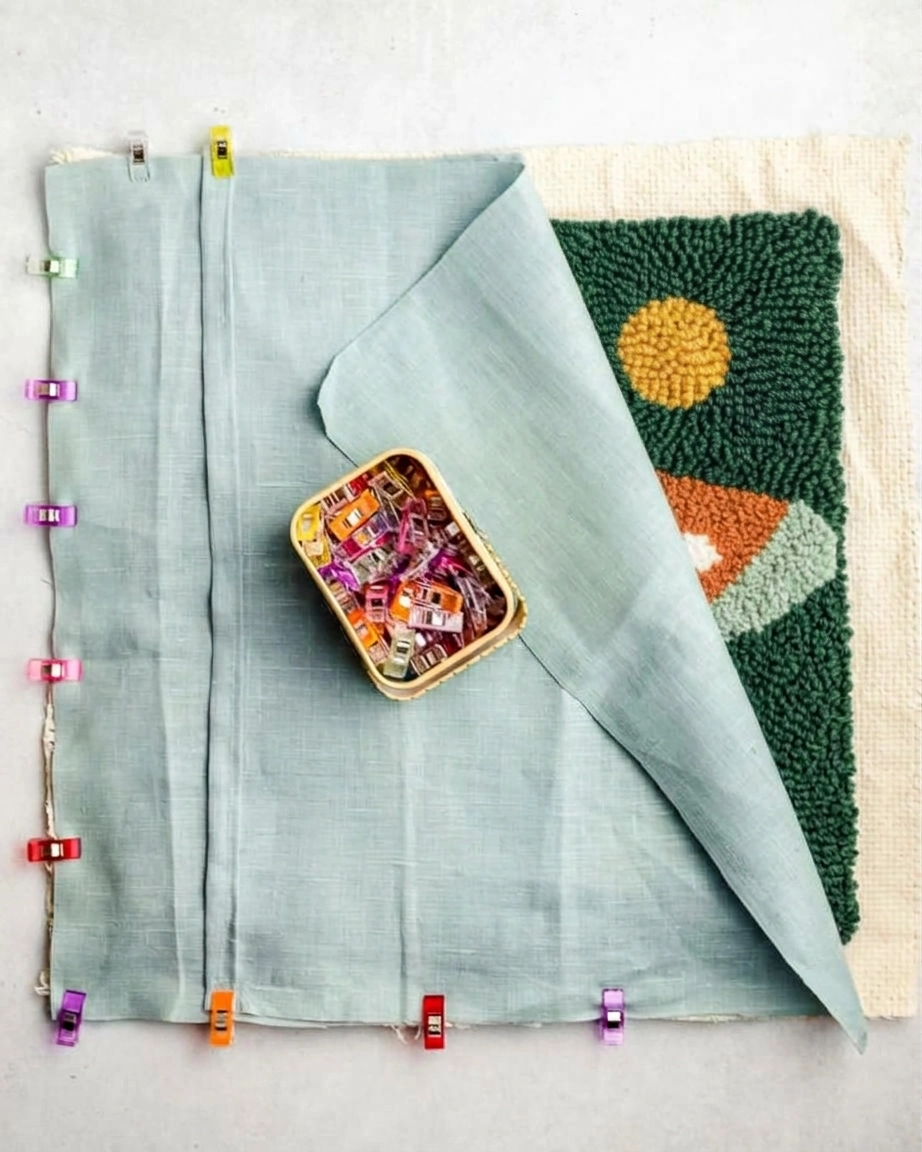
Place the punched front loop side up. Put one backing piece on top, right side down, with its unhemmed outer edge aligned to one side of the front.
Lay the second backing piece right side down over the other half of the front. Align its unhemmed outer edge to the opposite side; the two hemmed edges should overlap in the middle.
Clip through all layers around the perimeter. Keep the foundation cloth flat, and make sure no loose yarn tails are caught in the seam area.
Sew around all four outside edges with a 1-inch seam allowance. Move slowly near the punched boundary so the needle stays in the foundation fabric beside the loops rather than cutting across the textured face.
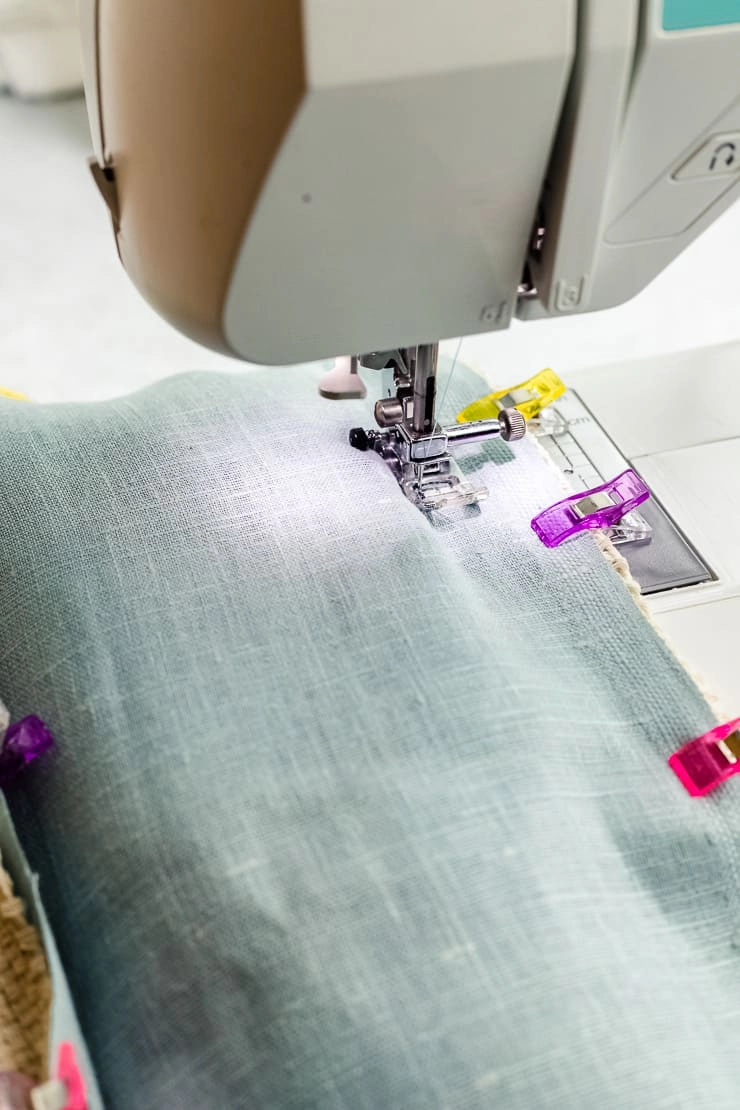
Backstitch at the start and finish. At each corner, stop with the needle down, raise the presser foot, rotate the pillow, and continue along the next side.
Check the seam before trimming. A small strip of foundation cloth may be visible beside the punched surface; it can be covered with the optional yarn edge in the next section.
Finish the seam allowance with a zigzag stitch or serger if your fabric permits. This helps contain the cut edges of the monk's cloth and backing fabric during use.
Trim the corner bulk without clipping the stitch line. Leave enough material beyond the seam to keep the corner secure, then turn the cover through the envelope opening.
Gently push out the corners from inside with a blunt tool. Avoid forcing a sharp point through the seam or the punched cloth.
Add an optional wrapped edge
The wrapped edge hides the narrow line of foundation cloth that may show between the punched face and the backing. It is a decorative finish; the machine seam is what holds the cover together.
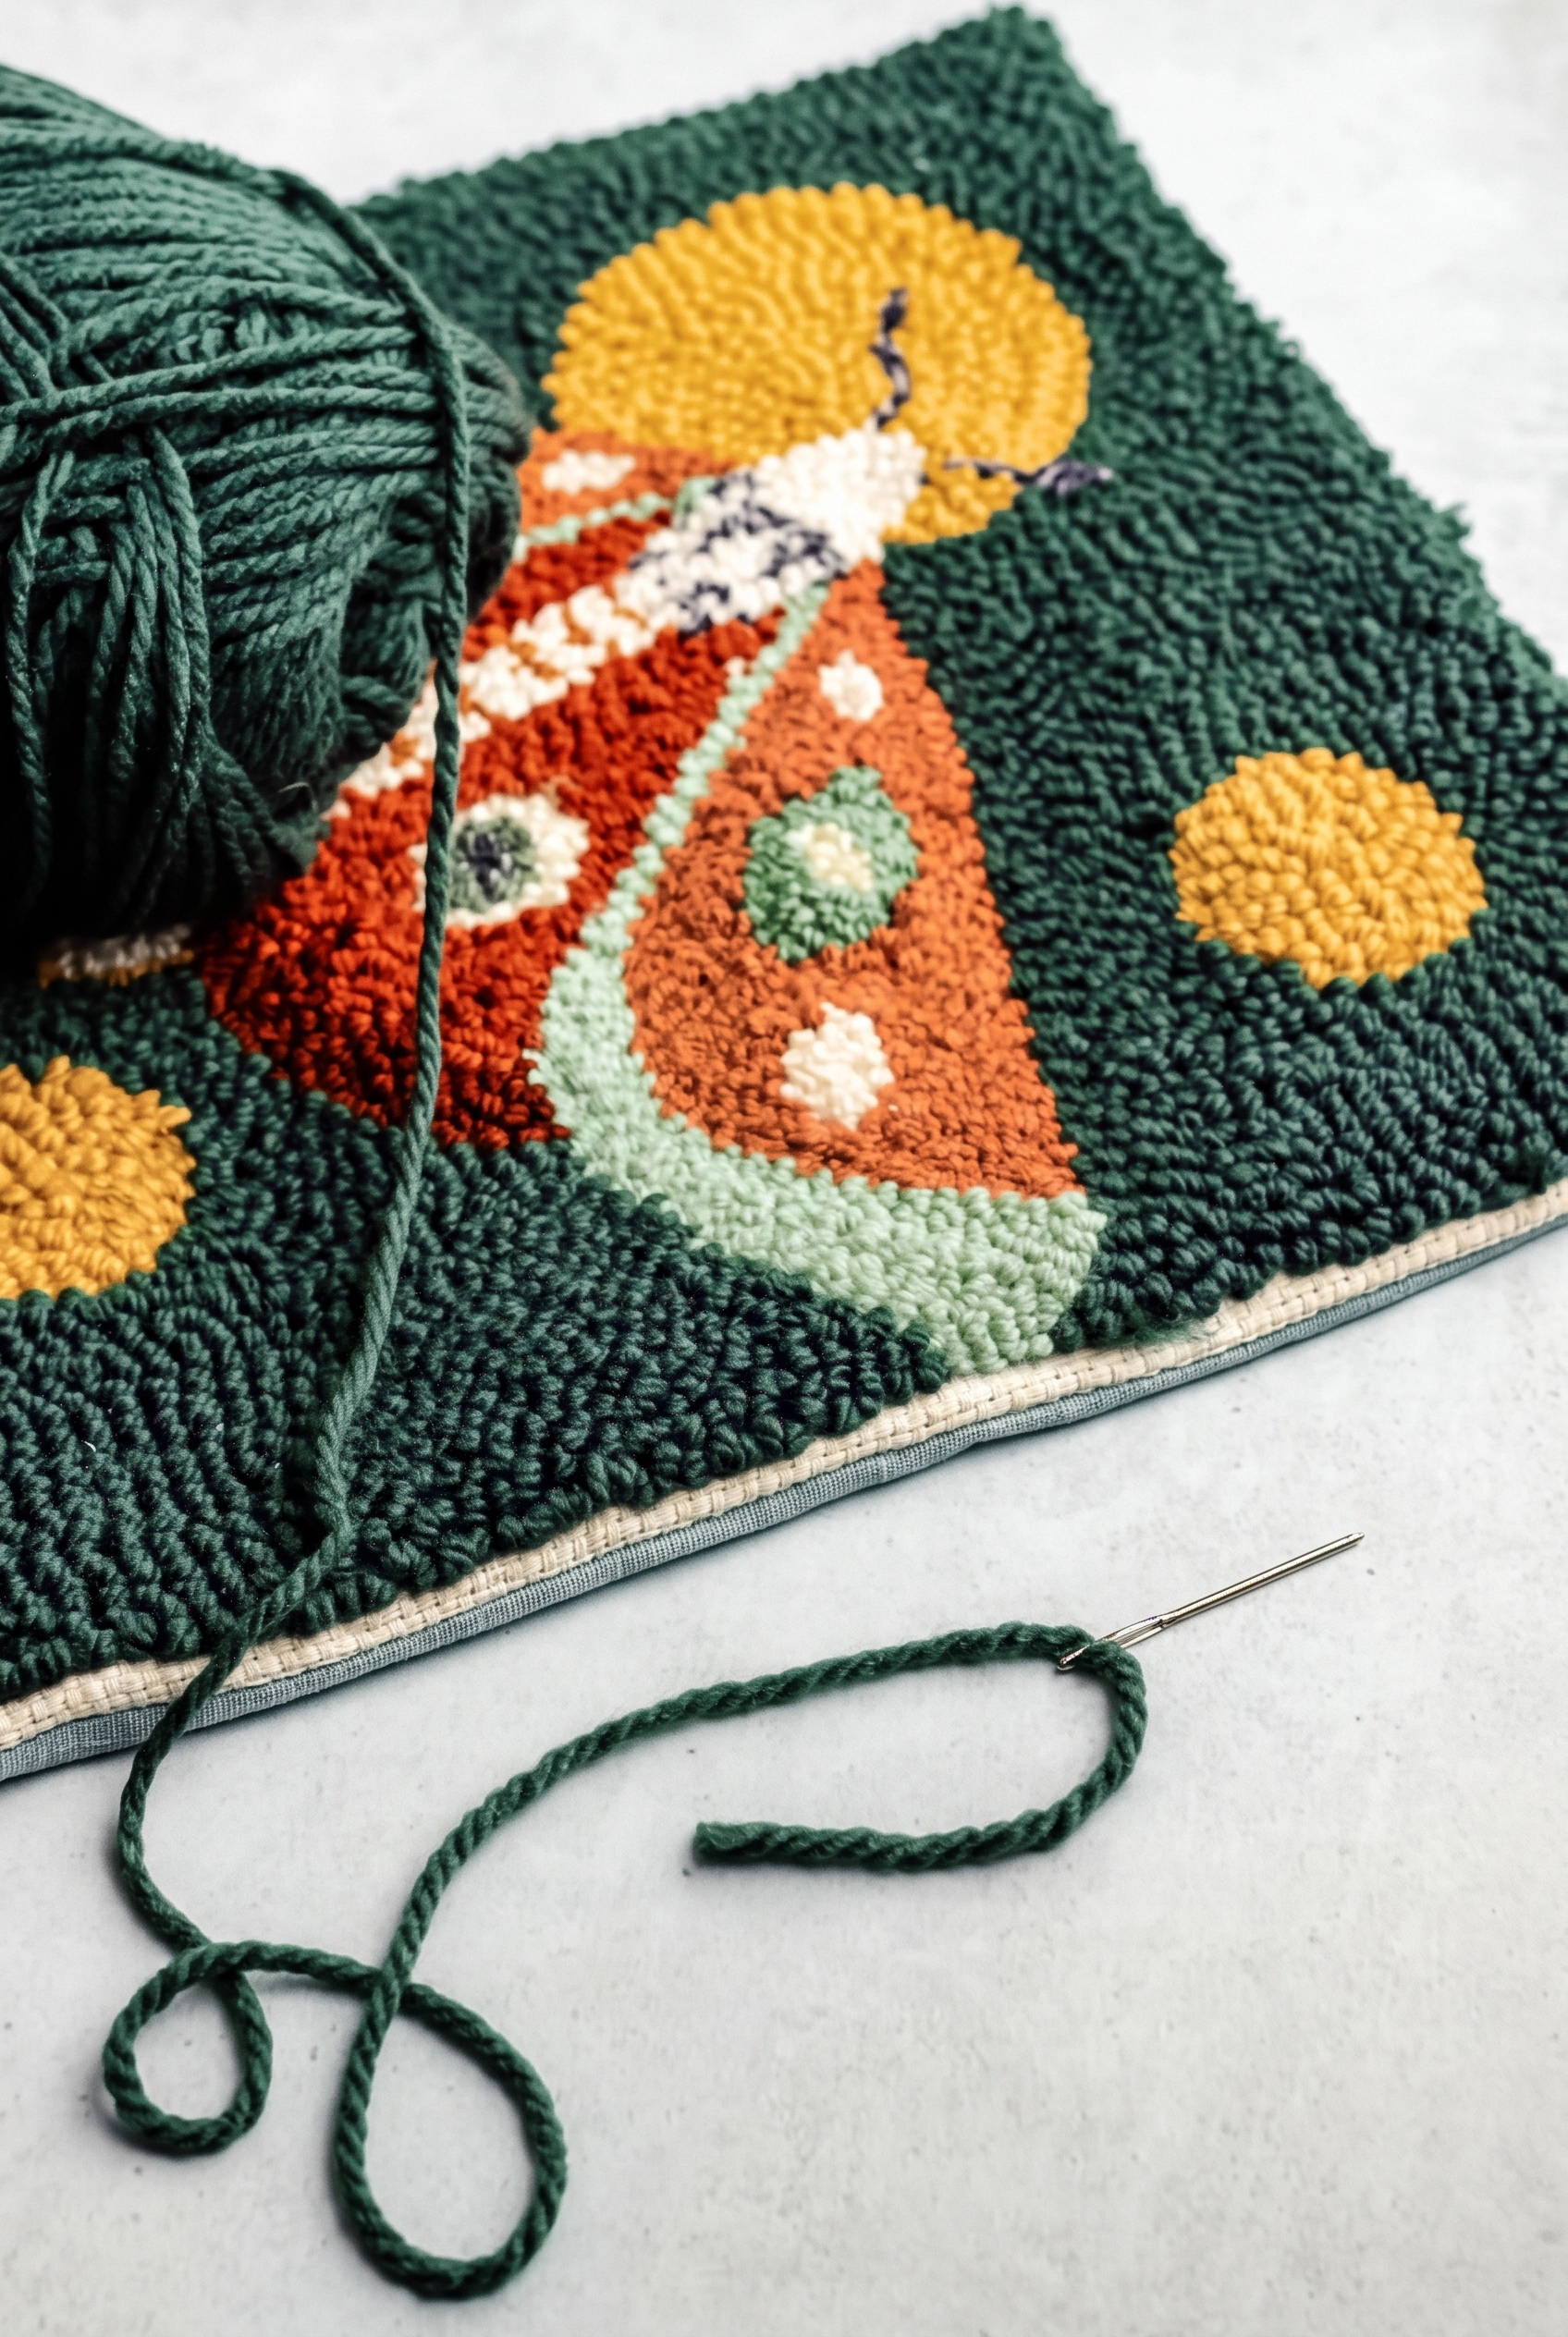
Thread a blunt tapestry needle with a comfortable length of coordinating yarn. Start near the envelope opening so the yarn tail can be tucked into the seam allowance.
Bring the needle from the back toward the front beside the punched loops. Wrap the yarn over the visible fabric edge and return the needle through the backing close to the previous exit point.
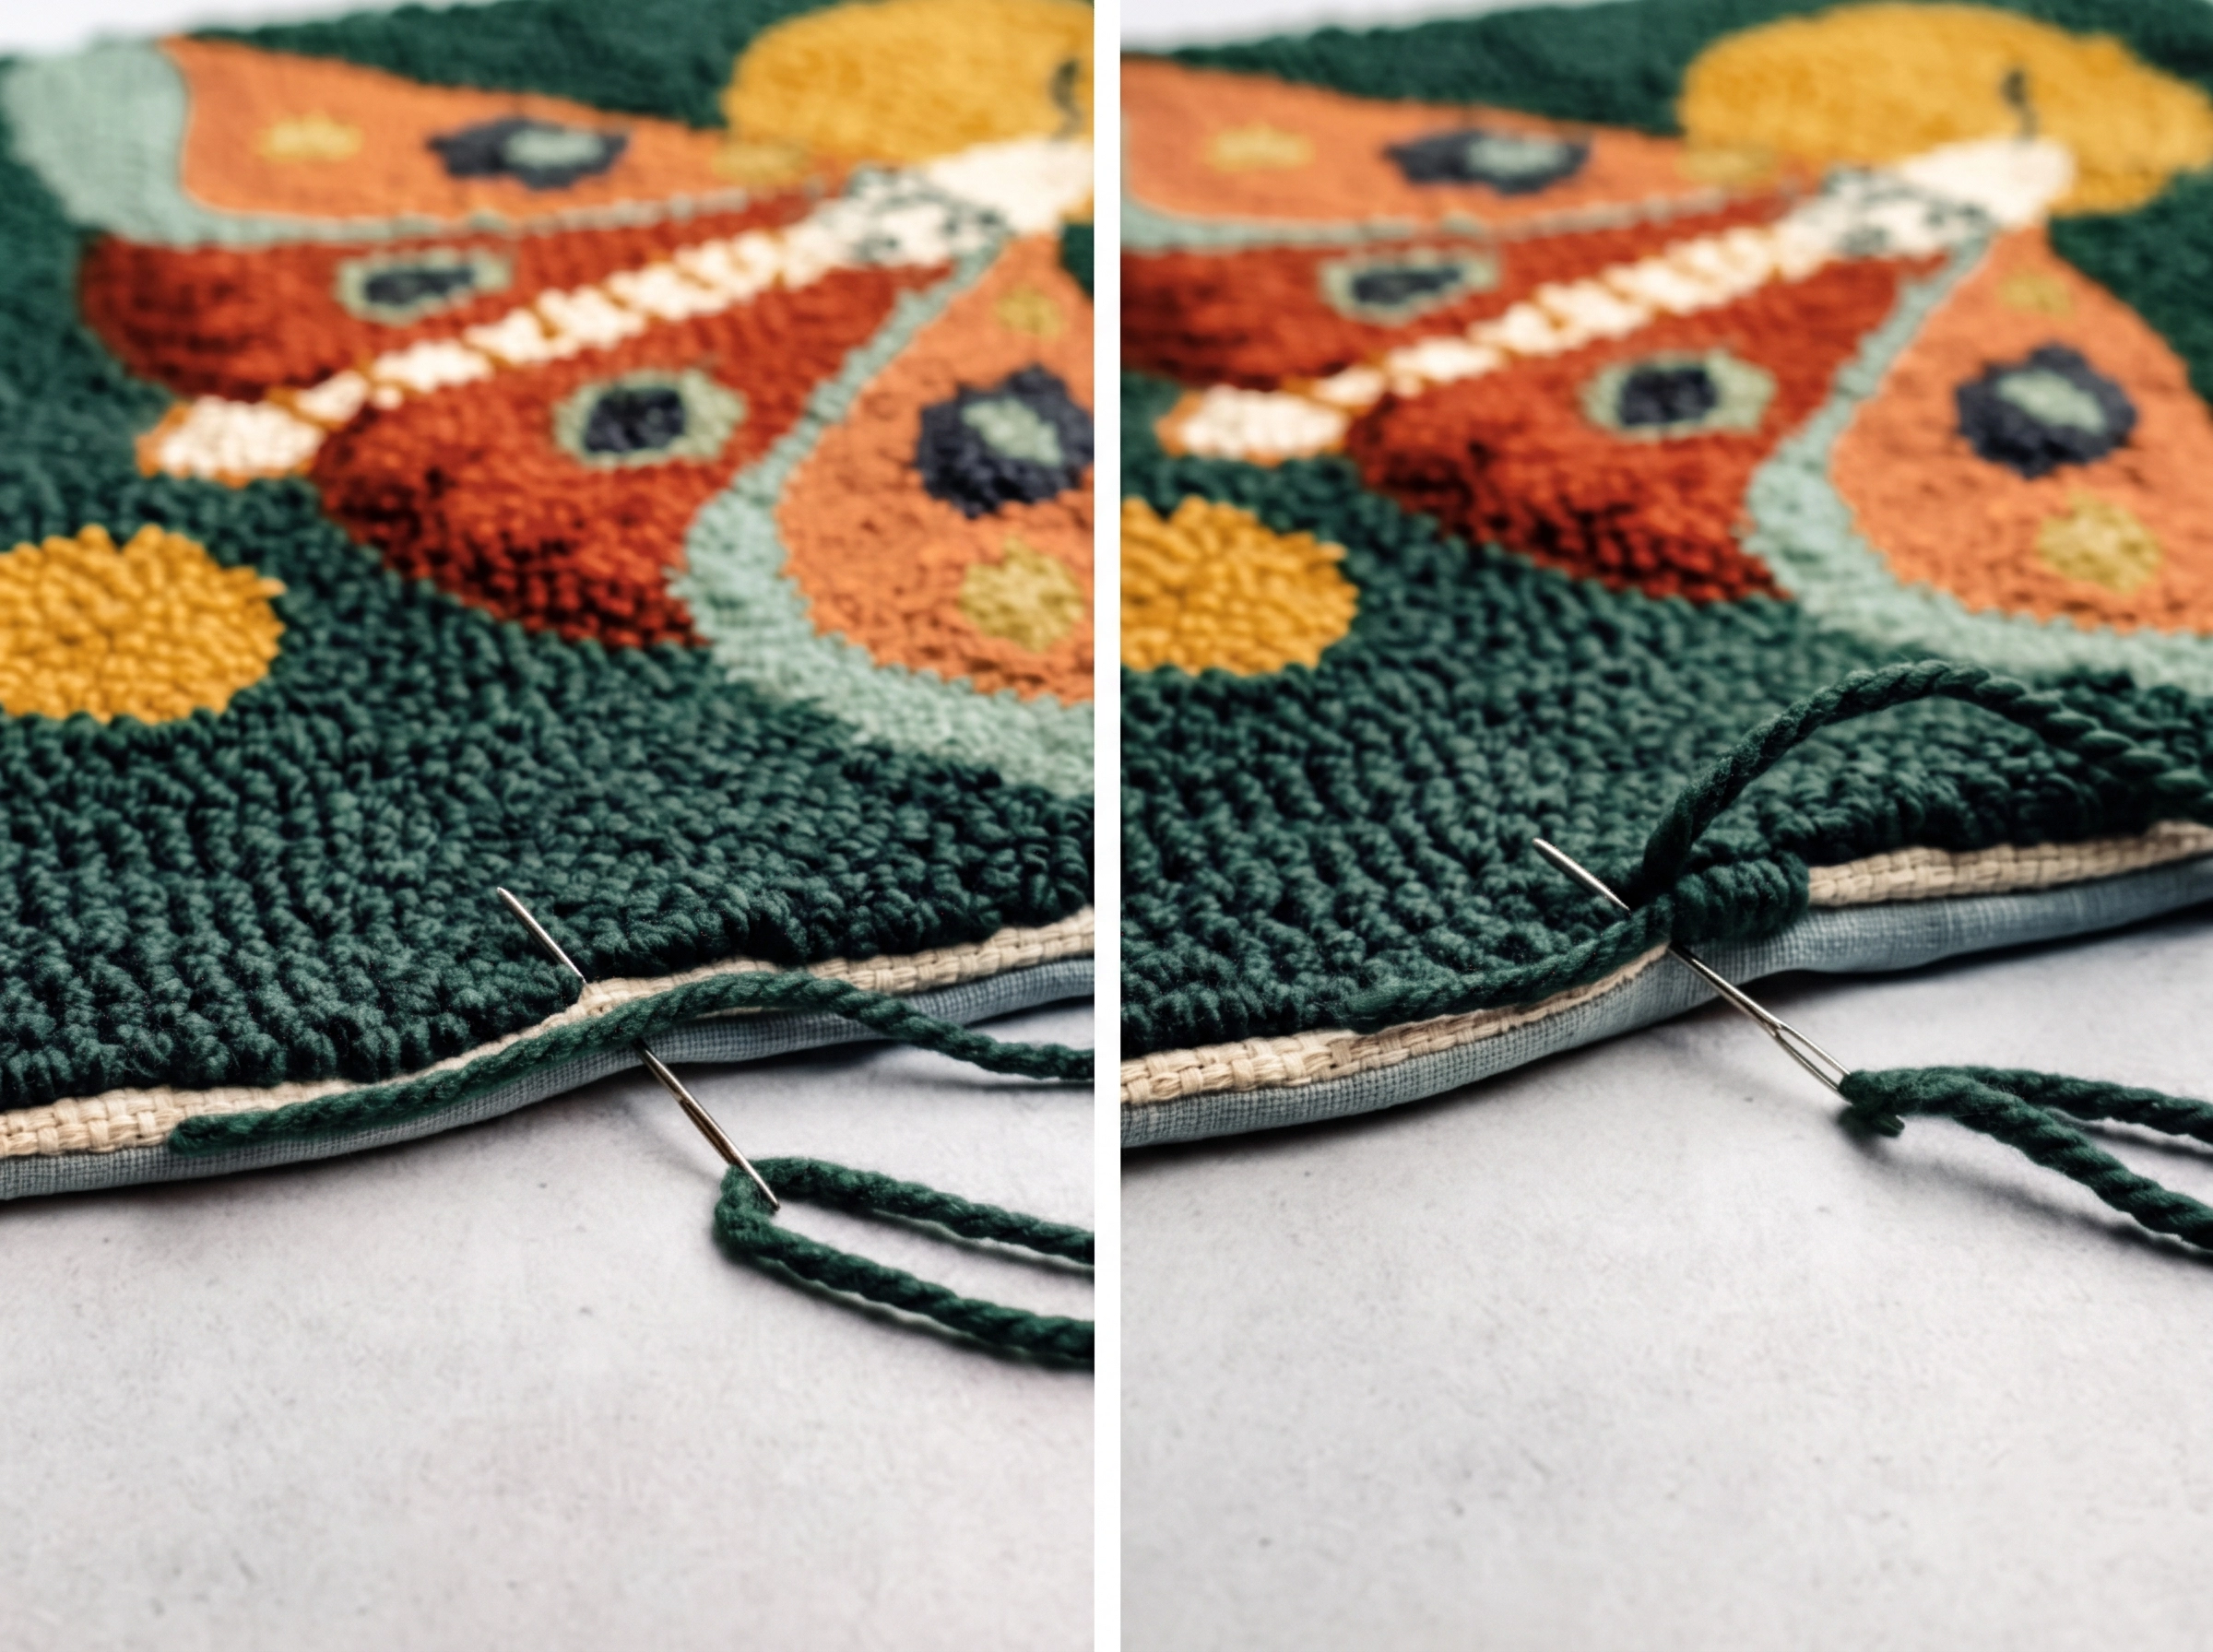
Repeat around the perimeter with even spacing. Cover the exposed strip without pulling so tightly that the pillow front puckers.
When a length of yarn runs short, secure its tail within the seam allowance and begin another length nearby. Keep the joins on the back where they are less visible.
At the corners, use a few extra wraps to cover the turn neatly. Check the front as you go: the edging should frame the loops, not flatten them.
If you prefer no wrap, sew a careful seam close to the loop boundary and let the fabric edge show as a narrow border. The choice changes the appearance, not the pillow-cover construction.
Insert, check, and care for the pillow
Fold the 12-inch insert slightly and guide it through the overlapped opening. Work the filling into the corners, then smooth the two back flaps into place.
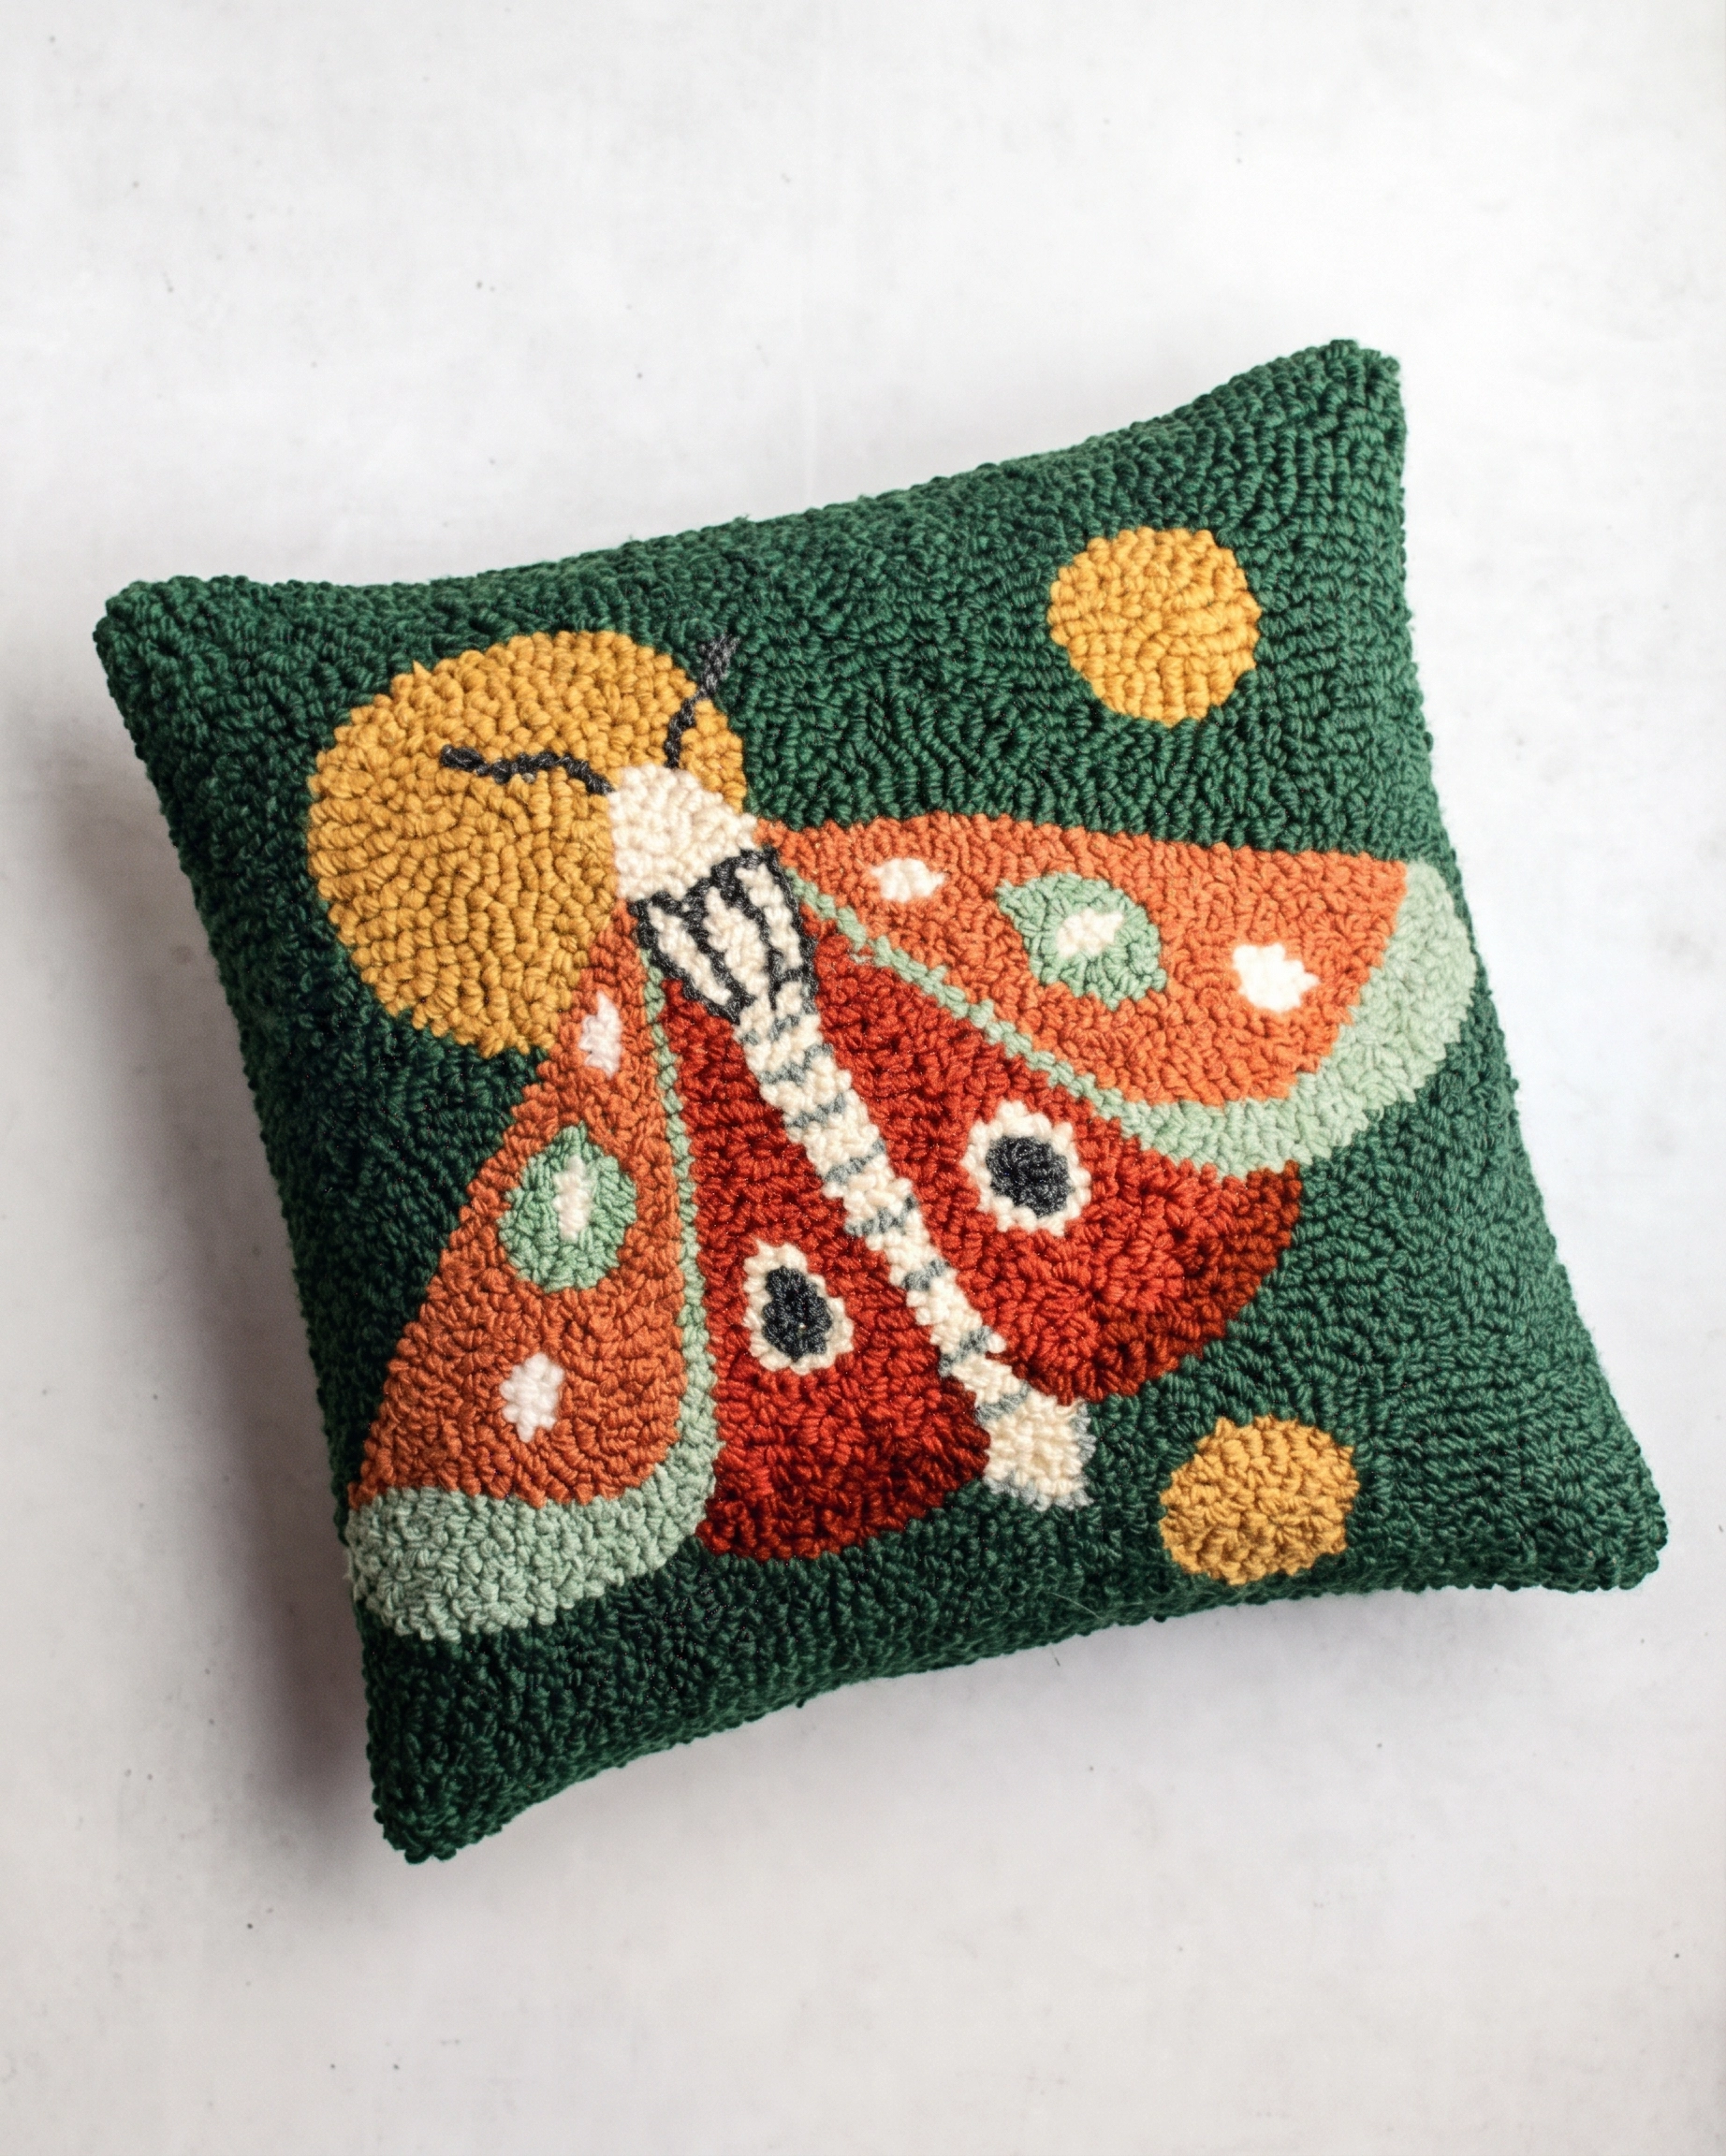
Look at the front under normal light. If a gap or loose loop appears, remove the insert and repair that area from the back before using the pillow.
The finished cover is removable, but cleaning depends on the yarn, backing, and insert labels. Spot cleaning is often the gentlest first option for a textured punched face; test any cleaner on an inconspicuous area.
Avoid rubbing the loops aggressively or pulling at individual strands. Let a damp cover dry thoroughly in the shape you want rather than pressing a hot iron directly onto the pile.
For a different project using the same basic punch needle skills, try our free written punch needle pattern. The punch needle supplies guide can help you pair cloth, yarn, needle, and frame for the next panel.
Common pillow-making questions
Can I use an existing punch needle piece? Yes, if it has enough unpunched foundation fabric around the design for a secure outer seam. Measure the visible design and recalculate the cut pieces from that size.
Do I need a zipper? No. The overlapping backing pieces make an opening large enough for the insert while keeping the back covered in normal use.
What if my loops sit under the presser foot? Stop and reposition the layers. Sewing through the looped area can flatten texture and may catch yarn that should remain on the face.
Will the design be exactly 12 inches after sewing? The worked measurements target a 12-inch face with a 1-inch seam allowance. Sewing accuracy, fabric stretch, and insert fullness can affect the final appearance, so check the cut pieces and seam line before trimming.
Save the cutting formula with your pattern notes. The same envelope-back method works for another square punched design once you measure its visible face and leave enough foundation fabric to sew.
What’s Next?
Pin this post: Save this tutorial to your Pinterest boards so that you can come back to it later.
Leave a comment: We love to hear your feedback. Tell me in the comments below!
Share on Instagram or Facebook: When you make this project, share it on social media and tag me @iheartdiybystacy. We love to see what you make!
Have questions? Join the Facebook Group!
We hope this article was useful for you! If you have any additional questions, feel free to join my Facebook Group. We created this group for you to share pictures, ask questions, and help each other out.
I hope this article was useful for you! If you have any additional questions, feel free to join my Facebook Group.
Join the group to share pictures, ask questions, and help each other out.


Have a question? Use the form above to submit your question or comment.
I love hearing from you and seeing what you made!