


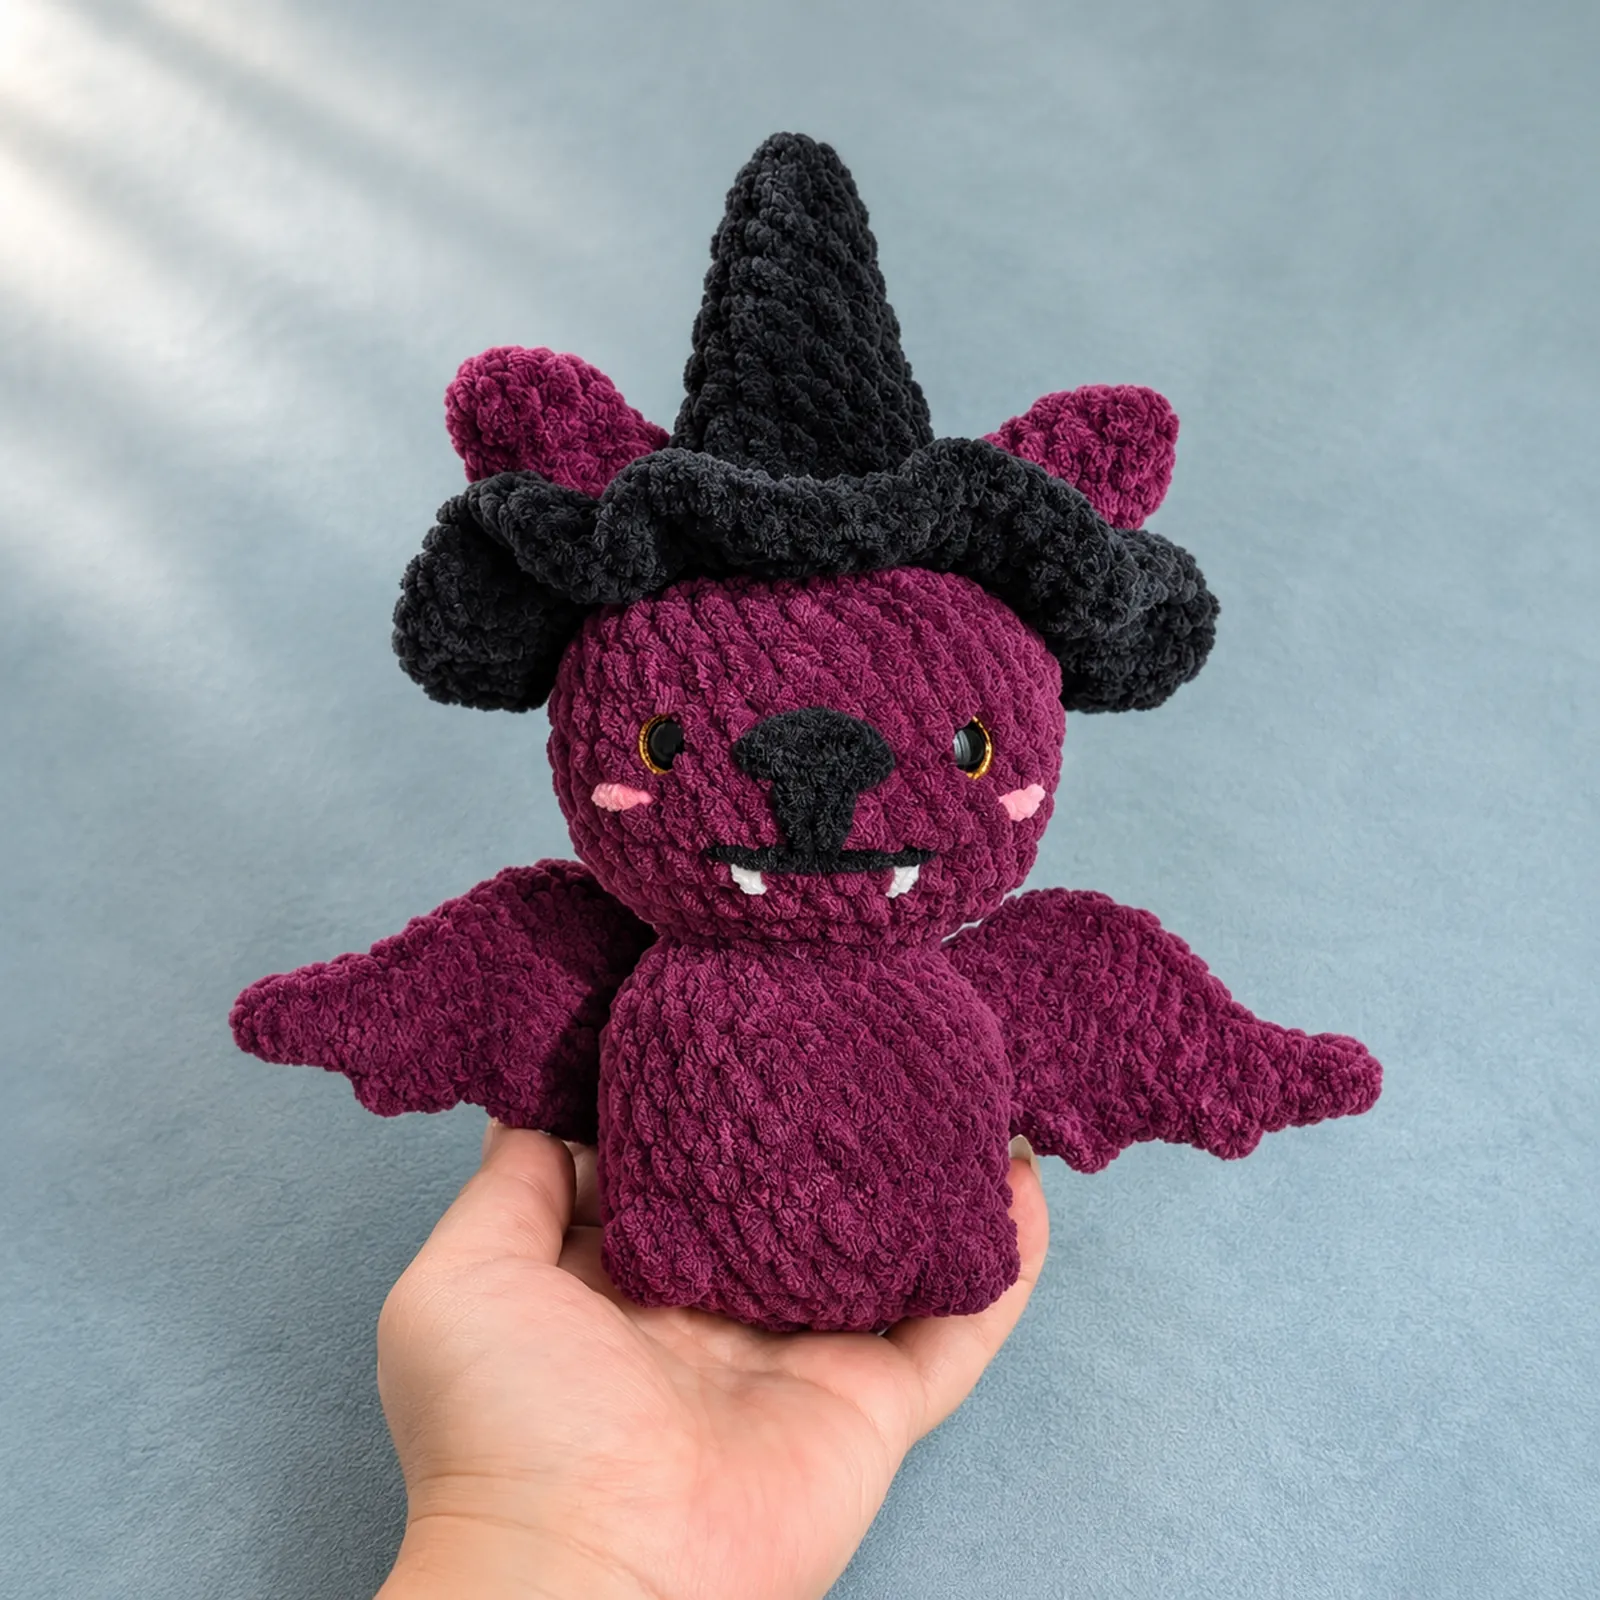
Pattern by @cuddly.krafts.
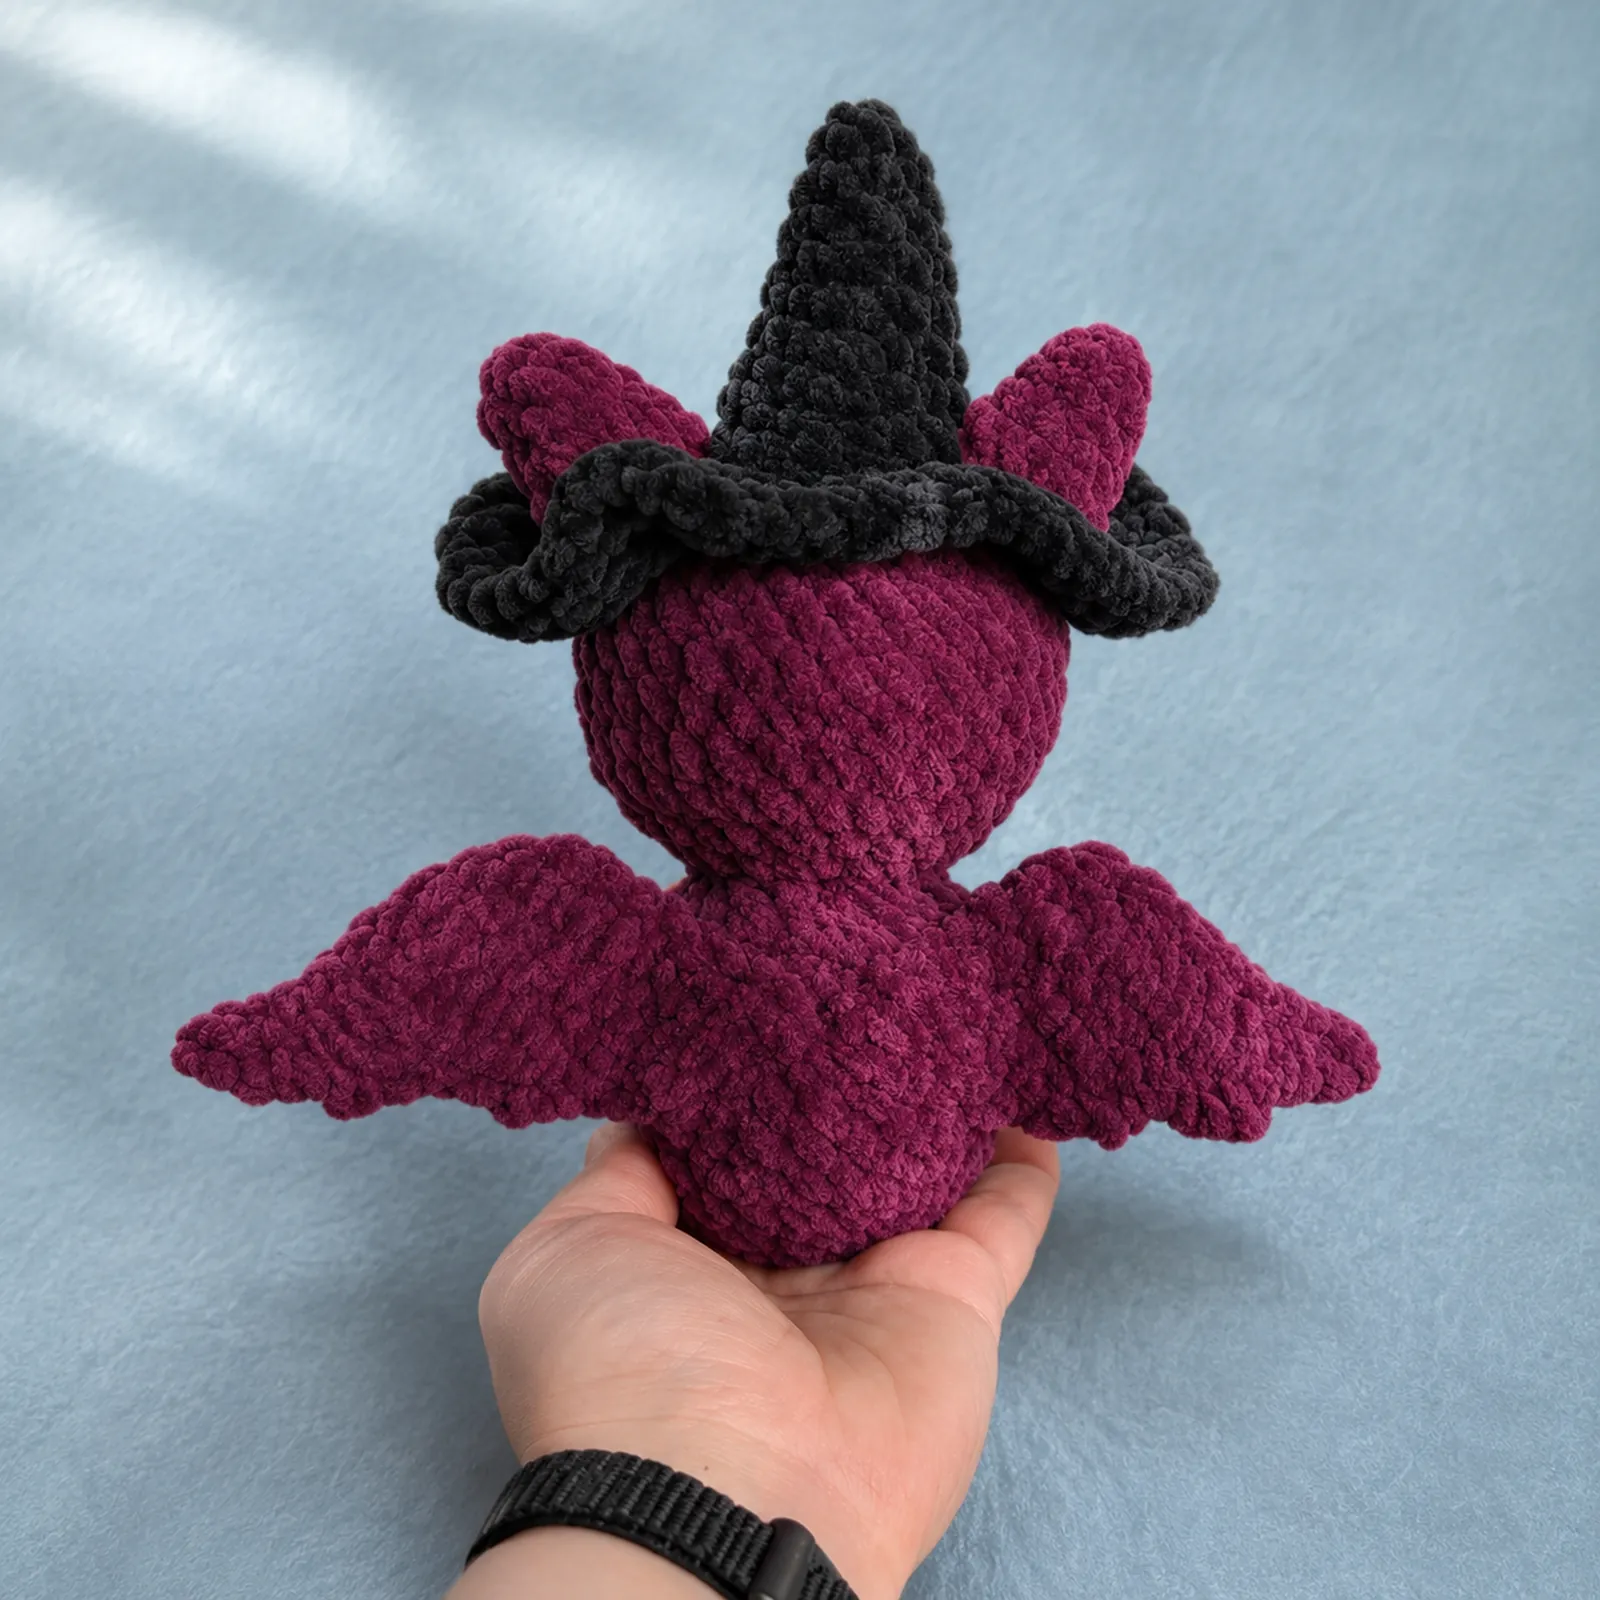
If this is your first stuffed crochet project, start with the practice row below. Then you’ll make the purple body and head in one piece, crochet two ears and two wings, and learn how to sew them on. The witch hat is the last piece. The numbers in parentheses tell you how many stitches to count before you move on.
1. Gather your supplies
- Plush yarn: Alize Velluto dark purple (111) for the bat and black (60) for the hat and nose.
- Face details: Small amounts of thinner black, pink, and white yarn.
- Tools: 5 mm crochet hook, a locking stitch marker, a blunt yarn needle, and scissors. Extra locking markers are useful for holding the ears and wings in place.
- For the head and body: Fiberfill and two 12 mm safety eyes with their backs. You can embroider the eyes with black yarn if you prefer a soft face.
For the practice row, use smooth, light-colored scrap yarn and the hook size on its label. It’s easier to see where the hook goes in smooth yarn. Switch to the plush yarn and 5 mm hook for the bat.
2. Learn the stitches on scrap yarn
Hold the hook in your dominant hand and guide the yarn with your other hand. The strand leading to the ball is the working yarn. The loose end is the tail. To yarn over, catch the working yarn with the hook.
Make a slip knot, chain, and single crochet
- Slip knot: Cross the working yarn over the tail to make a loop. Reach through the loop, catch a bend of working yarn, and draw it through. Slide the new loop onto your hook and snug it gently around the shaft so it still slides.
- Chain (ch): Yarn over and pull the yarn through the loop on the hook. Repeat until you have 7 chains. Count the little V shapes below the hook.
- Single crochet (sc): Insert your hook into the second chain from the hook. Yarn over and pull up a loop. With 2 loops on the hook, yarn over and pull through both. Make one single crochet in each remaining chain. Count 6 stitches.
- Turn: Chain 1 and flip the work so you can crochet back across it. Put your hook under both strands of the first stitch’s top V and make one single crochet in each of the 6 stitches. The turning chain sits at the edge outside the stitch count. Aim for 6 stitches again.
If you lose a stitch, put a locking marker in the first and last single crochet of the next practice row. If you gain one, check whether you worked into the turning chain. For a longer walkthrough, see the beginner crochet practice square.
Keep these stitch instructions handy
- Increase (inc): Make 2 single crochets in the same stitch. After the first one, put the hook back under the same V. You use 1 old stitch and make 2 new ones.
- Decrease (dec): Insert your hook into the next stitch and pull up a loop. Insert it into the following stitch and pull up another loop. Yarn over and draw through all 3 loops. You use 2 old stitches and make 1 new one.
- Front loop only (FLO): The top V has two strands. With the outside of the piece facing you, use the strand closer to you. You’ll do this for Head Round 13.
- Double crochet (dc): Yarn over, insert the hook, yarn over and pull up a loop. You have 3 loops. Yarn over and pull through 2, then yarn over and pull through the last 2.
- Slip stitch (sl st): Insert the hook into the next stitch, catch the yarn, and pull it through the stitch and the loop already on your hook in one motion.
- Fasten off: Cut the working yarn, leaving the tail needed for sewing or weaving in. Use your hook to pull the cut end all the way through the last loop.
The tutorial uses US crochet terms. Read a repeat such as [sc, inc] six times as one single crochet in the next stitch and two in the stitch after it, then do that same pair five more times.
3. Start the body and make the bobble feet
Start with a magic ring
- Make a large loop with the purple yarn and pinch the point where the strands cross. Reach through the ring with the hook, catch the working yarn, and draw up a loop.
- Yarn over and pull through the loop on your hook to secure the ring. Keep the large ring open. This setup chain sits outside your stitch count.
- To make the first single crochet, put the hook through the center of the large ring so the stitch wraps around the ring and tail. Pull up a loop, then yarn over and pull through both loops. Clip the marker under the top V of this first stitch. Make 5 more single crochets into the ring.
- Hold the six stitches and gently pull the loose tail to close the center. If you want to see the hand motions, follow this photo and video lesson on starting a magic ring.
How to work a spiral: Once you reach the marked stitch, count the completed round. Remove the marker, work into that marked stitch to start the next round, and clip the marker into the first new stitch. Keep the same side facing and start each round directly in the next stitch. Use this method for the body, head, ears, and hat. If your count is off, recount the top Vs in good light. Undo to the last correct count if you can’t find the mistake.
- Round 1. The magic ring holds 6 sc (6).
- Round 2. Make 2 sc in each of the 6 stitches (12).
- Round 3. Repeat [1 sc, inc] six times (18).
- Round 4. Repeat [2 sc, inc] six times (24). Spread the two plain stitches over two separate Vs before each increase.
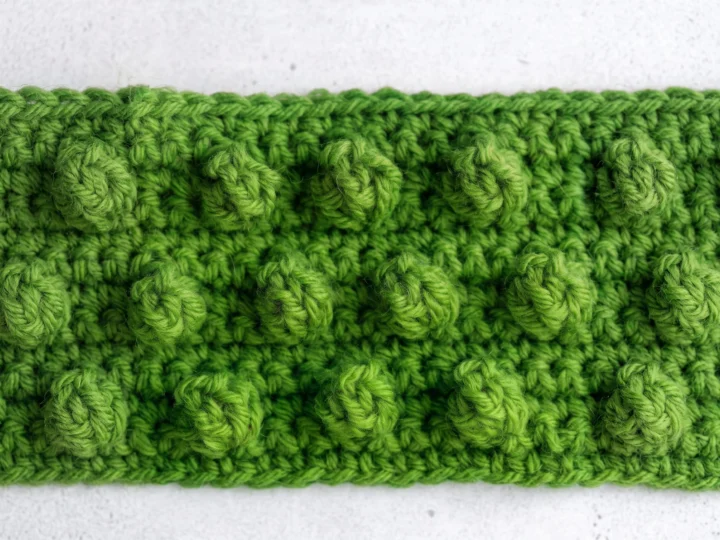
Make one four-double-crochet bobble
- Yarn over, insert the hook into the next stitch, yarn over and pull up a loop. Yarn over and pull through the first 2 loops. Leave the remaining loops on the hook.
- Do that partial double crochet three more times, all in the same stitch. You should have 5 loops on your hook.
- Yarn over and pull through all 5 loops to close the bobble. That closed top counts as 1 stitch. Continue with a single crochet in the next base stitch when the round calls for it. Nudge the bump to the outside if it sits inward.
- Round 5. Make 8 sc, one bobble, 6 sc, one bobble, then 8 sc (24). The bobbles occupy stitch positions 9 and 16 in this round.
- Rounds 6–10. Make 1 sc in each stitch for five rounds (24 each round). In Round 6, work once into the top of each bobble. Tick off each round as you finish it.
- Round 11. Repeat [2 sc, dec] six times (18).
- Round 12. Repeat [1 sc, dec] six times (12).
Pause and stuff the body. Weave in the starting tail on the inside if it’s still loose. Add small pinches of fiberfill until the body holds its shape and the stitches still sit close together. Keep the neck open and the working loop on the hook. The head starts in that same loop.
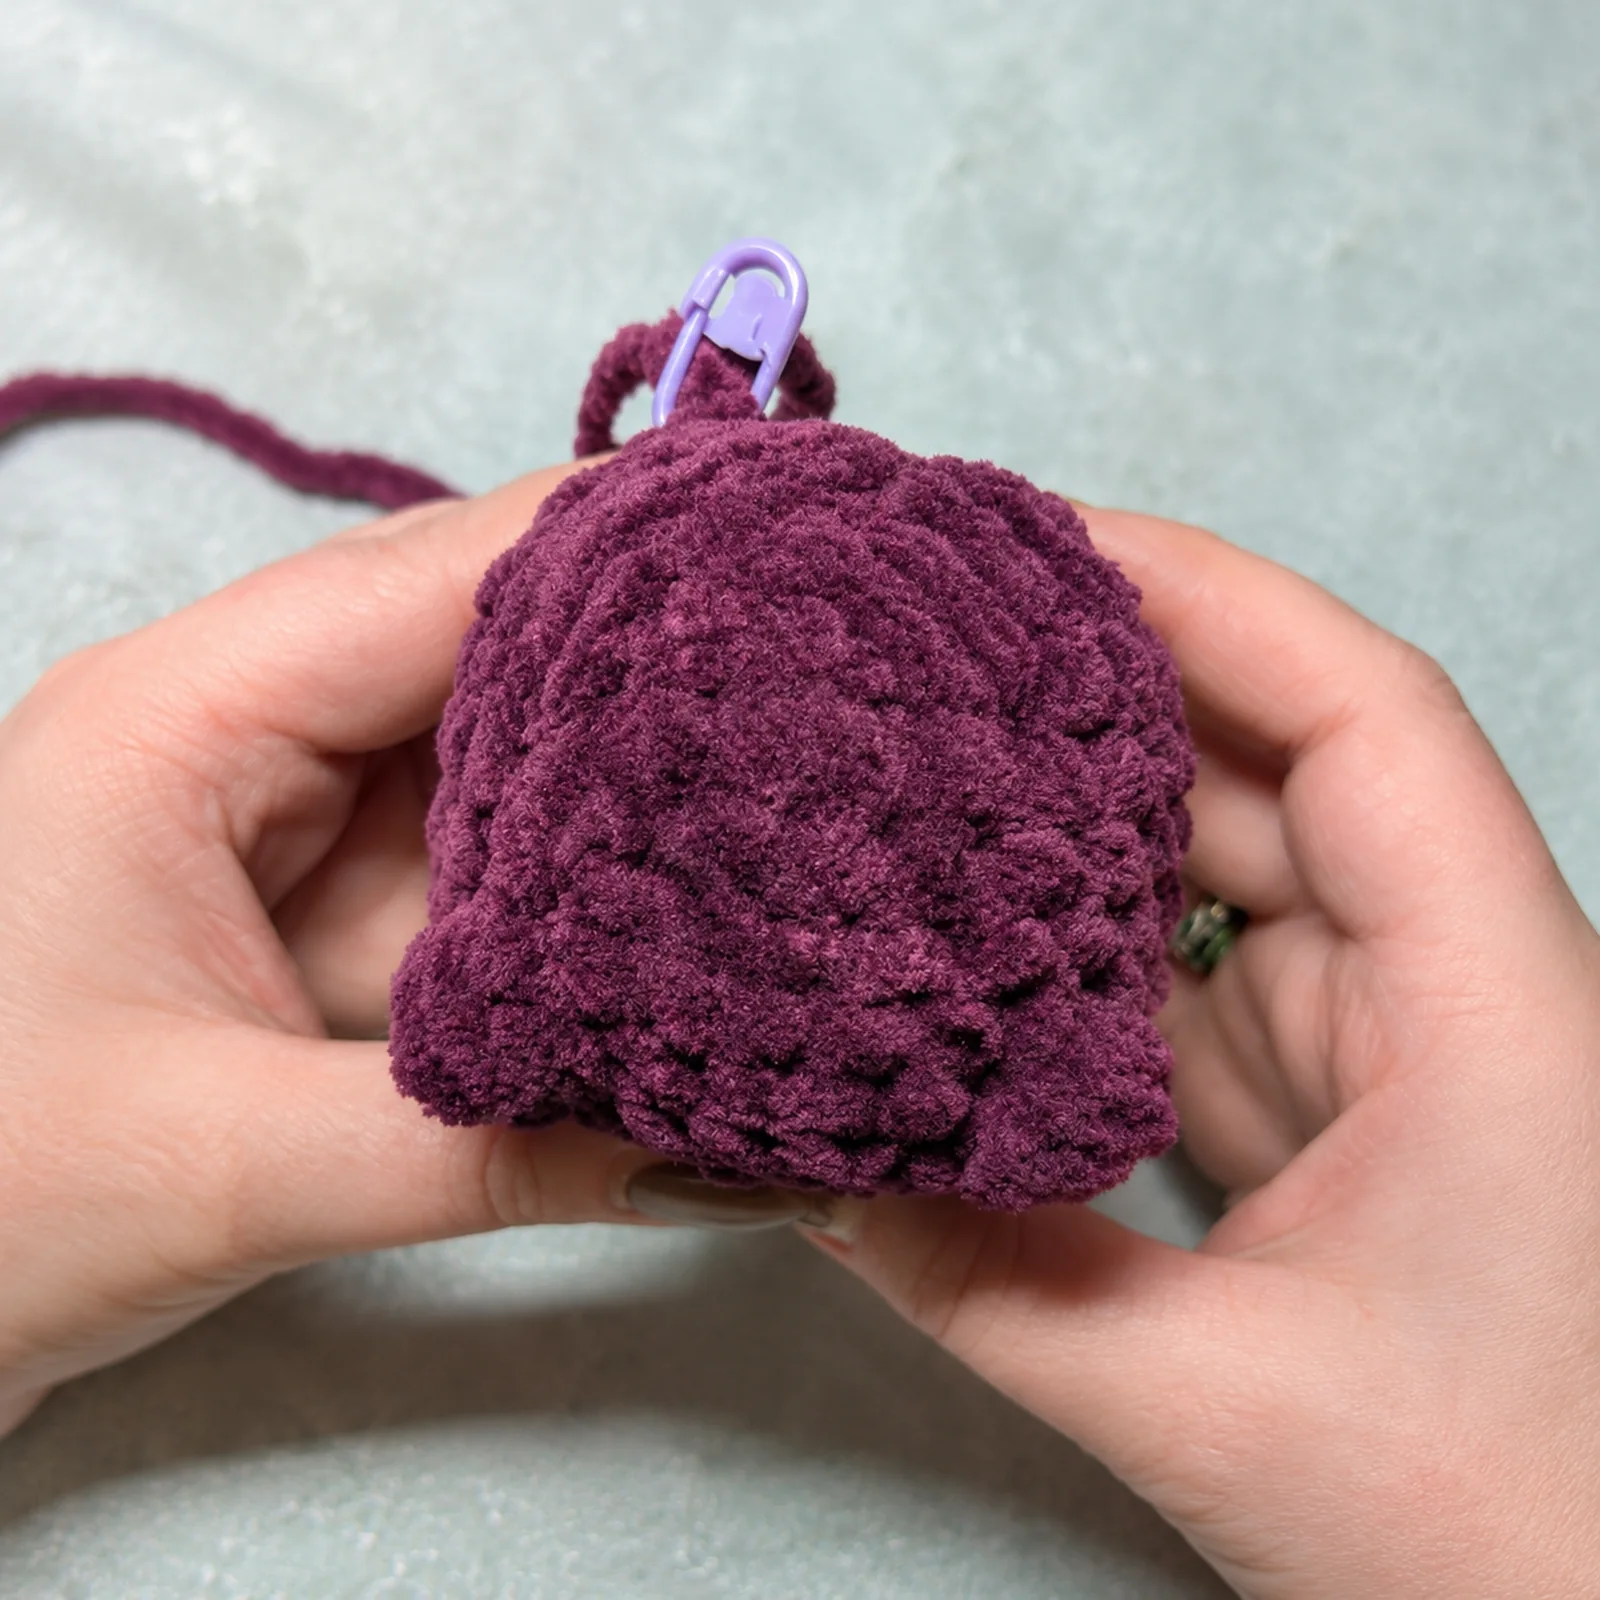
4. Crochet the head and place the eyes
- Round 13. Repeat [1 sc, inc] six times, working into the front loop of every stitch (18). For each increase, put both single crochets in the same front loop.
- Round 14. Return to working under both loops. Repeat [2 sc, inc] six times (24).
- Round 15. Repeat [3 sc, inc] six times (30).
- Rounds 16–21. Make 1 sc in every stitch for six rounds (30 each round).
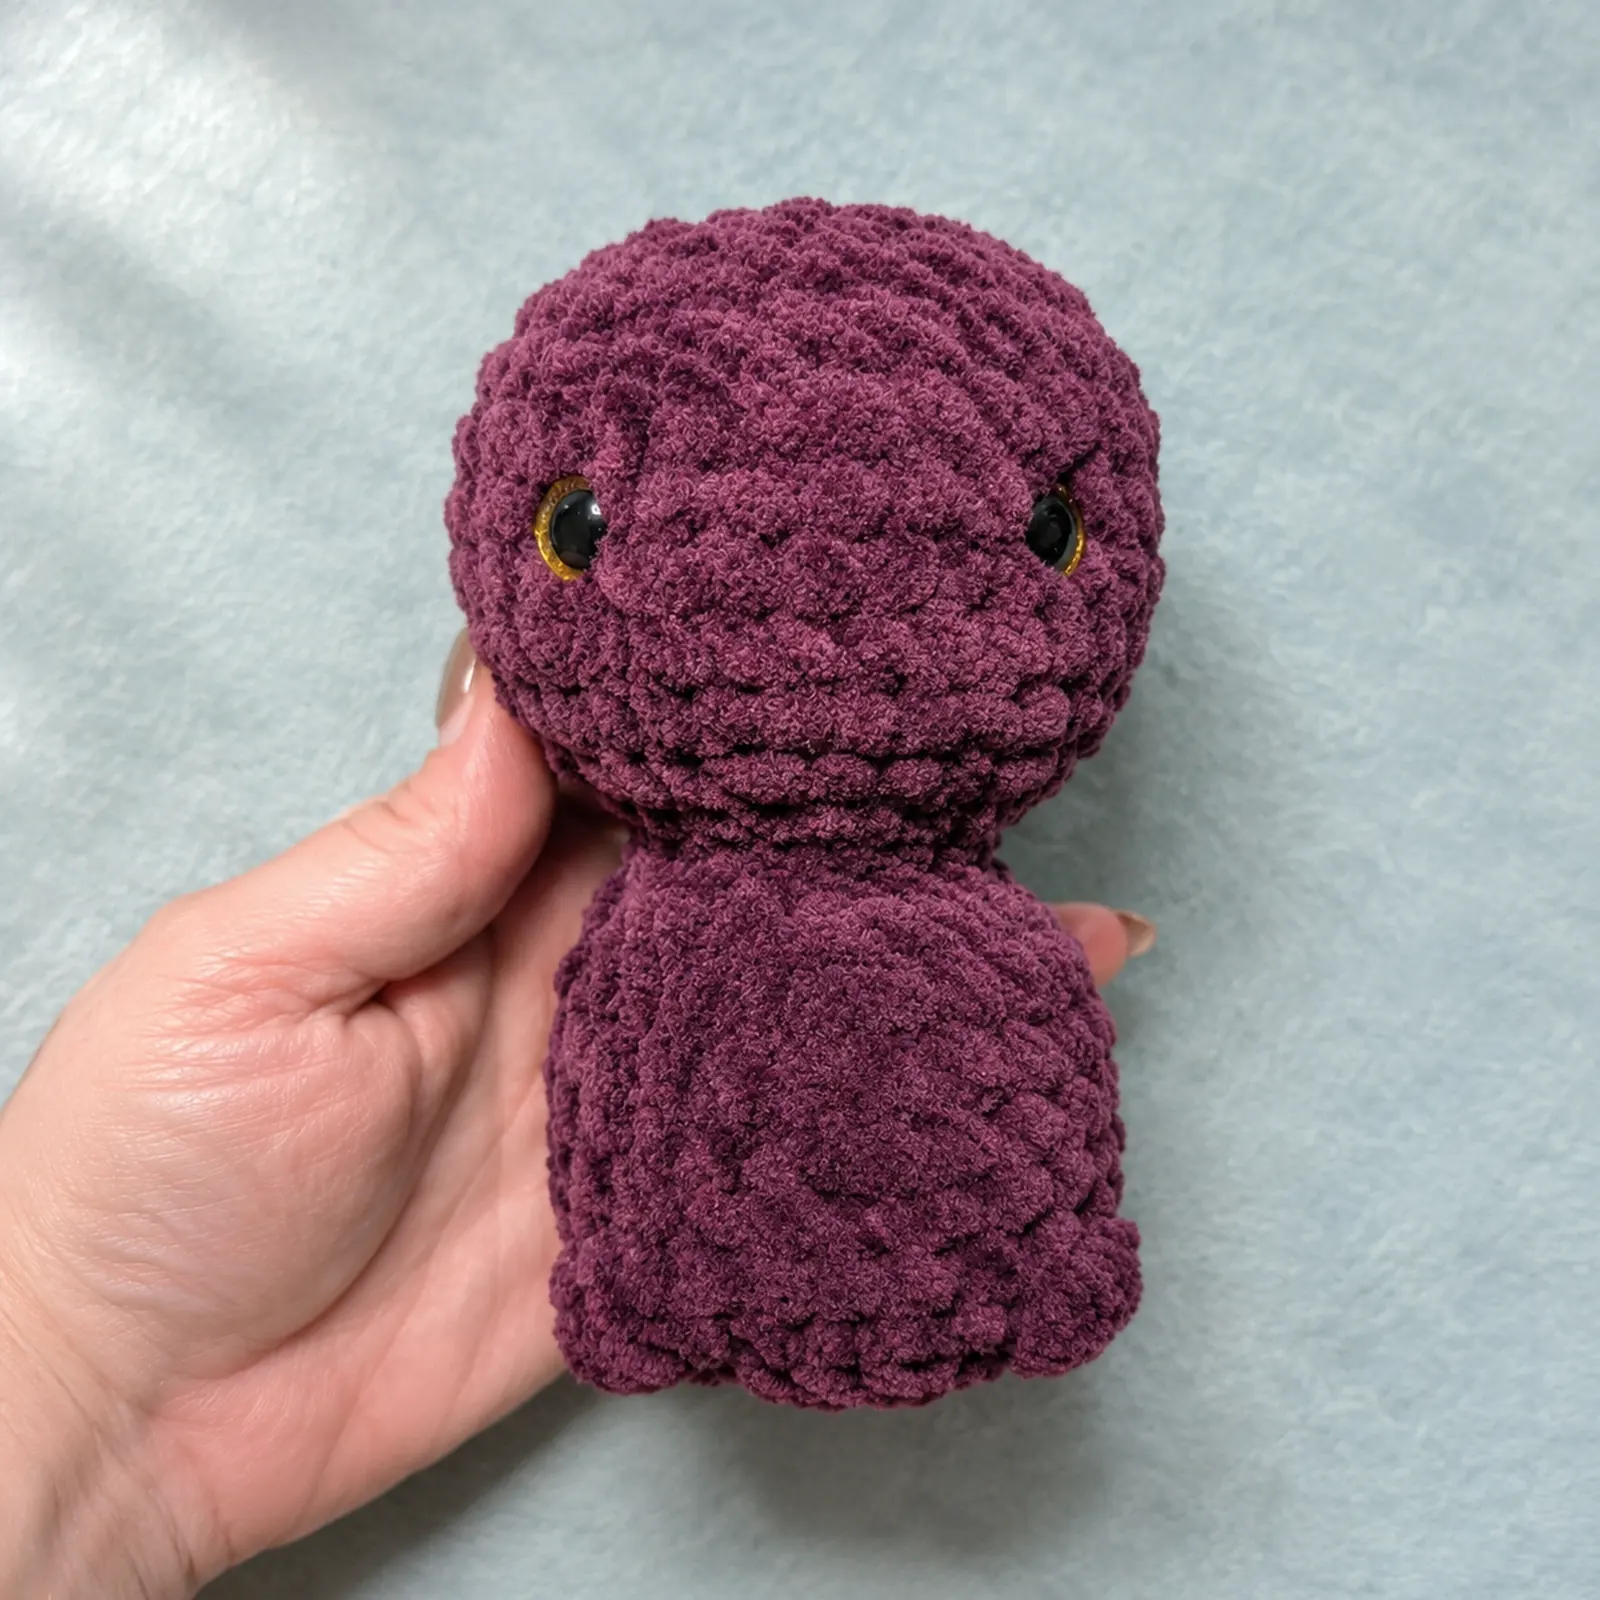
Pause after Round 21. Face the two bobble feet toward you to find the front. Mark two spots between Rounds 18 and 19, six stitches apart and centered above the feet. Insert both eye posts from the outside and compare them from the front before pushing the backs onto the posts from inside the head. For embroidered eyes, mark the same spots and sew the eyes with the other face details in Step 7.
- Round 22. Repeat [3 sc, dec] six times (24).
- Round 23. Repeat [2 sc, dec] six times (18). Stuff the head in small pinches and shape it with your fingers.
- Round 24. Repeat [1 sc, dec] six times (12).
- Round 25. Decrease six times (6). Fasten off with a sewing tail.
Close the top. Thread the tail onto the yarn needle. Pass it through the front loop of each of the six remaining stitches in order, always in the same direction. Draw the loops together gently. Take a small securing stitch, then pass the needle into the center and out through the side. Trim the tail close so the end slips back inside.
5. Make two ears
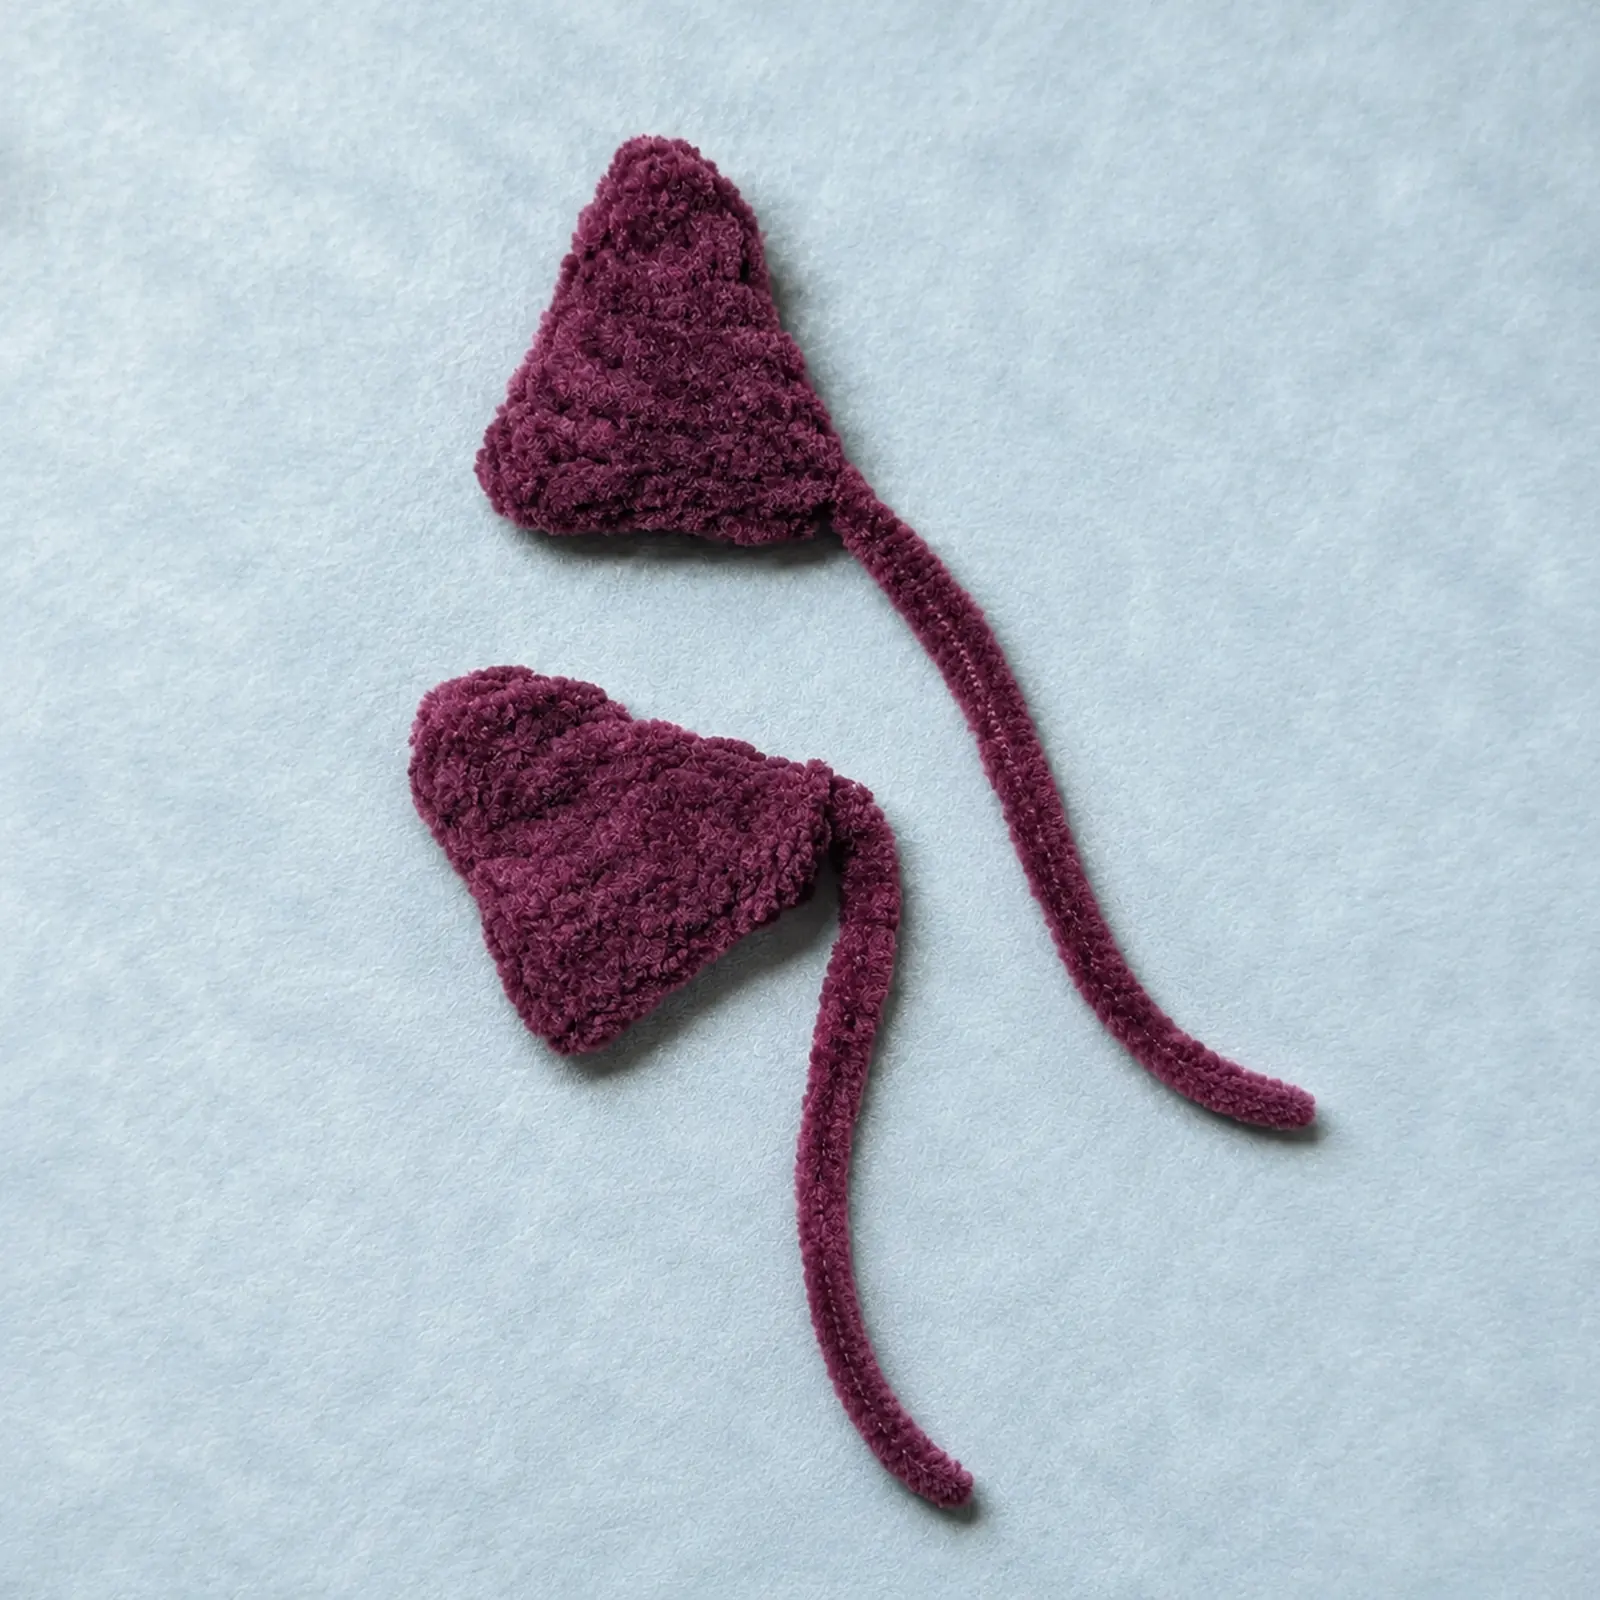
Start each ear with a fresh purple magic ring. The ring forms the tip and the last round forms the base.
- Round 1. Make 4 sc in the magic ring (4).
- Round 2. Repeat [1 sc, inc] twice (6).
- Round 3. Make 1 sc in each stitch (6).
- Round 4. Repeat [1 sc, inc] three times (9).
- Round 5. Repeat [2 sc, inc] three times (12).
- Round 6. Repeat [3 sc, inc] three times (15).
Fasten off with a long sewing tail. Leave the ear hollow and pinch its open base flat. Repeat for the second ear.
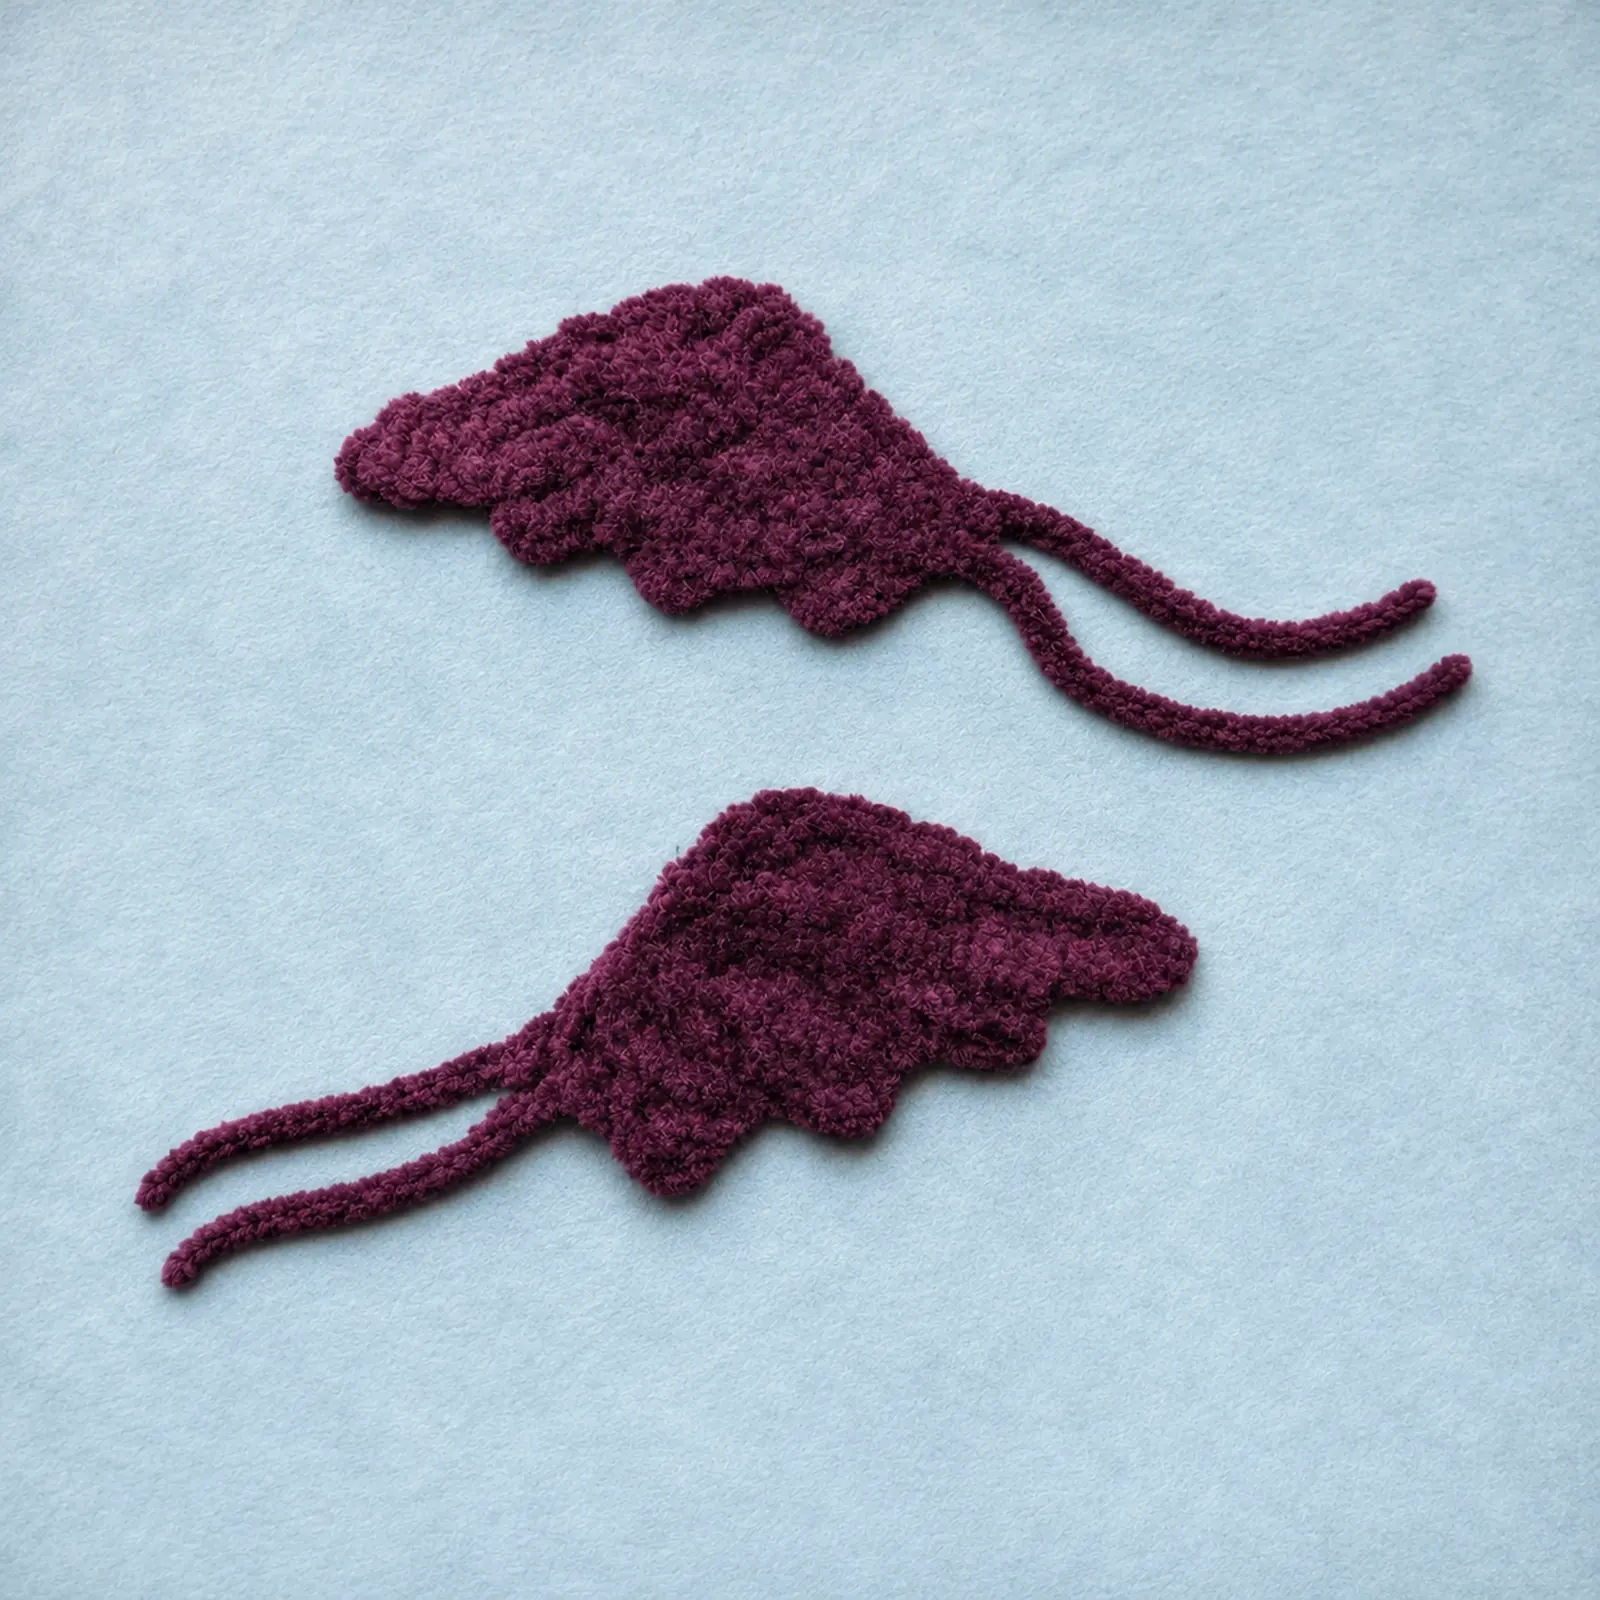
6. Make two wings
These pieces start with a purple slip knot and are worked flat. The three-chain extensions all grow from the same side and make the steps along the wing. Each extension has an outward pass across the wing and a return pass across the new chains and the wing.
- Row 1. Chain 4. Make 1 sc in the second chain from the hook and in each of the last 2 chains (3). Chain 1 and turn.
- Row 2. Work 3 sc across the wing, then chain 3. Turn back toward the wing. Skip the chain closest to the hook and put 1 sc into each of the other 2 new chains. Then put 1 sc into the top of the last single crochet you made on the outward pass, right at the base of the chain. Work 1 sc into each of the other 2 stitches (5 on the return pass). Chain 1 and turn.
- Row 3. Work 5 sc across, then chain 3. Turn back and work 2 sc along the new chain, starting in the second chain from the hook. Work 5 sc across the wing (7 on the return pass). Chain 1 and turn.
- Row 4. Work 7 sc across, then chain 3. Turn back and work 2 sc along the new chain, starting in the second chain from the hook. Work 7 sc across the wing (9 on the return pass). At the end of that pass, rotate the wing so the straight row ends face your hook. Work 7 sc evenly down that side, inserting the hook through a sturdy edge loop for each stitch (16 total on the return pass and edge).
Count the return pass only: Look for 3, then 5, then 7, then 9 stitches before the final edging. Each extension adds 2 stitches. Fasten off with a long sewing tail and repeat for the second wing. Flip one wing over when you lay them side by side so the tips point in opposite directions.
7. Sew the bat together and embroider the face
Sew on the ears and wings
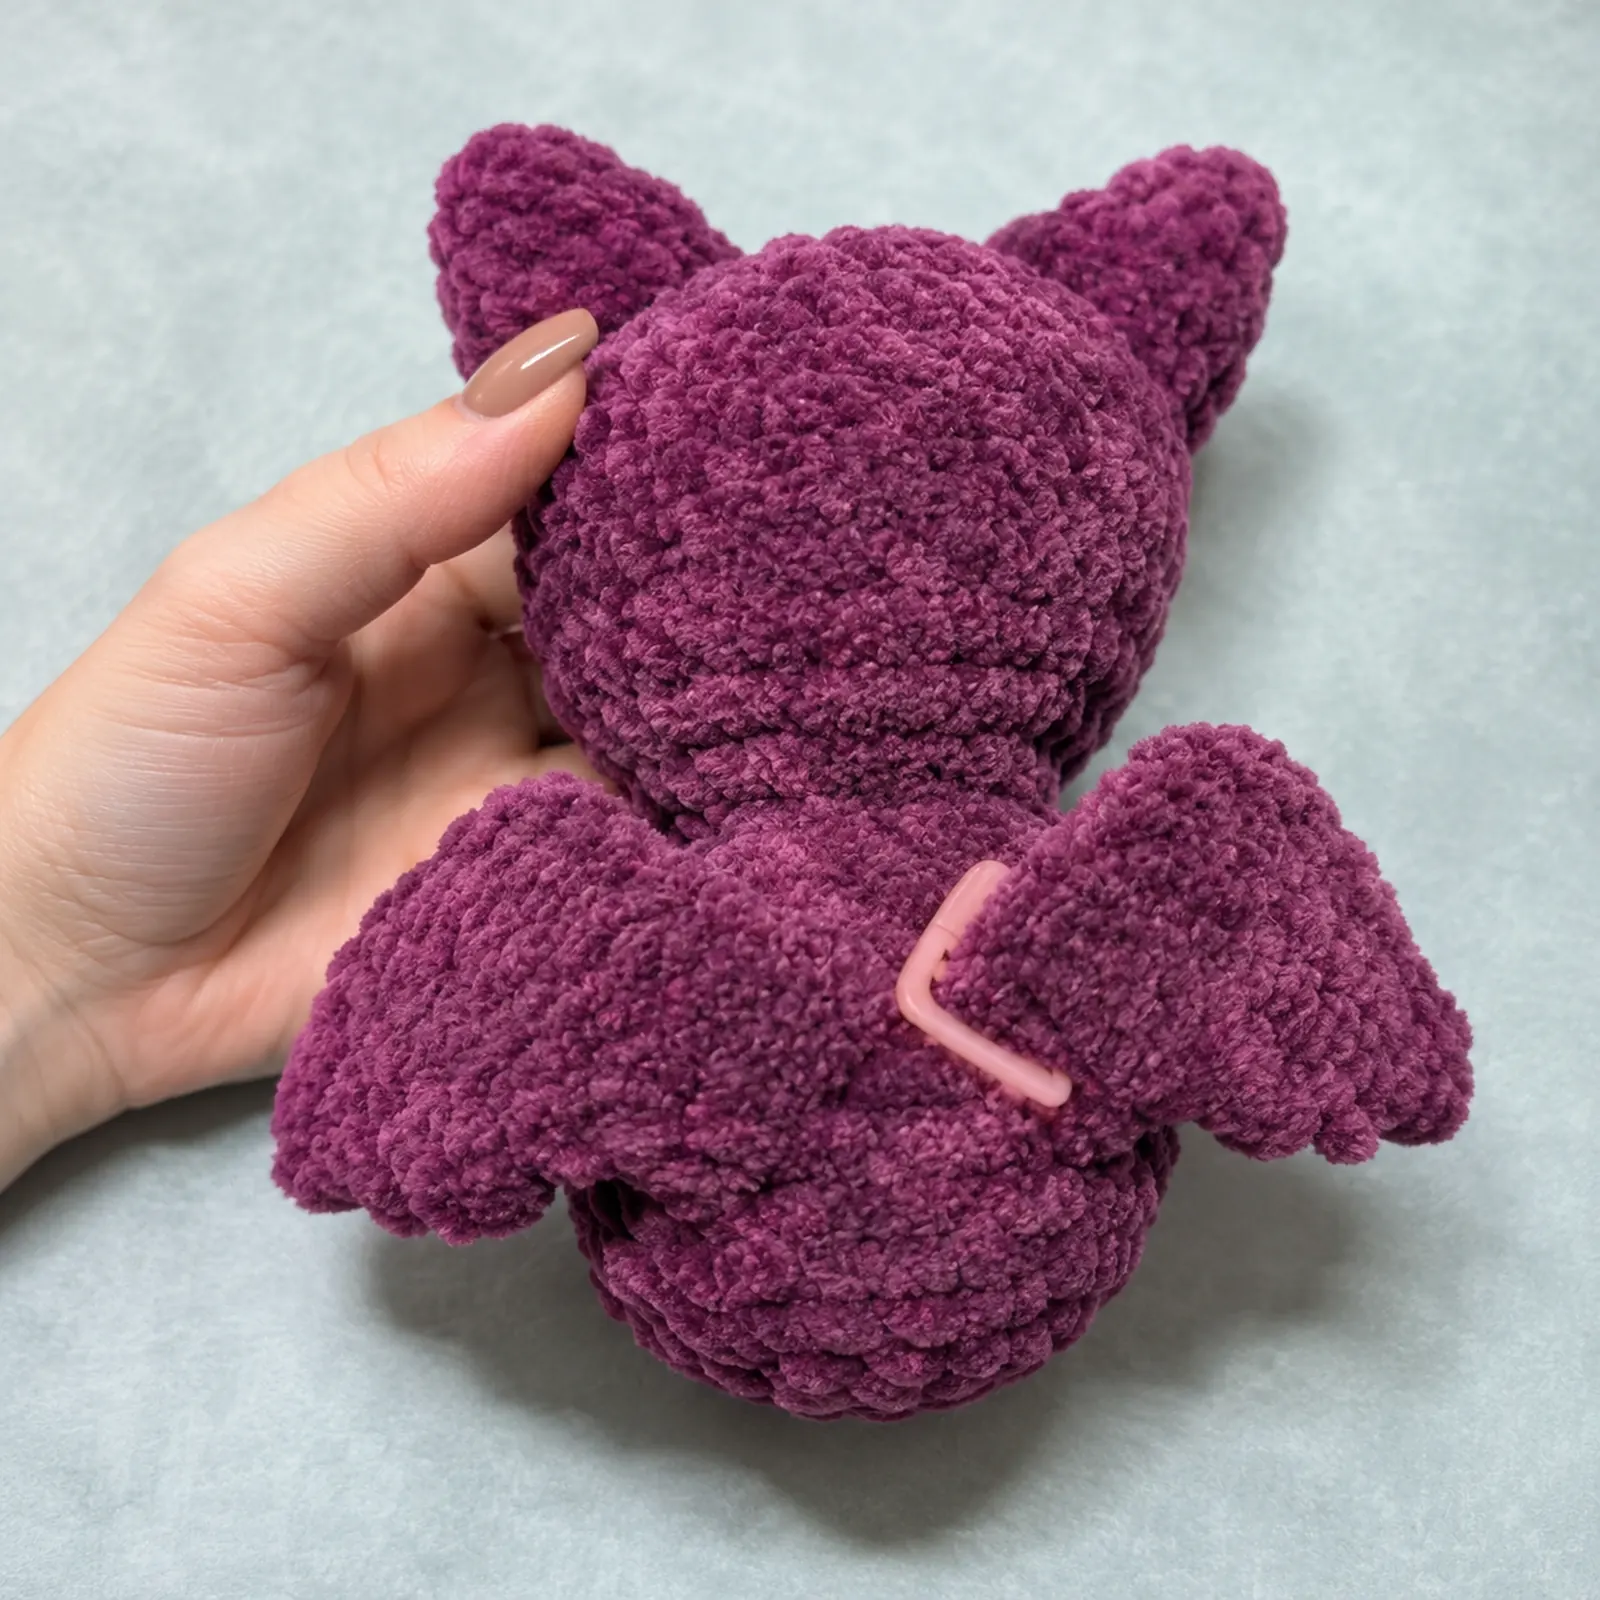
- Position both ears first. Flatten their bases and hold them against Head Rounds 20–24, about seven stitches behind the eye on each side. Use spare markers to pin them in place. Check from the front that the ears sit at similar heights and angles.
- Sew one ear at a time. Thread the ear’s tail onto the yarn needle. Pass the needle under a stitch on the head, then through both layers of the ear’s flattened base. Repeat along the base, keeping the seam snug. Secure the last stitch and bury the tail inside the head.
- Fit the wings from the back. Pin the broad base of each wing diagonally across Body Rounds 6–8, with the narrow tips pointing away from the body and the stepped edges below. Compare the angle of both tips. Thread each wing’s tail and alternate between a small stitch on the body and one through the wing base. Sew along the attachment edge, then secure and bury the tails.
Embroider the nose, cheeks, mouth, and fangs
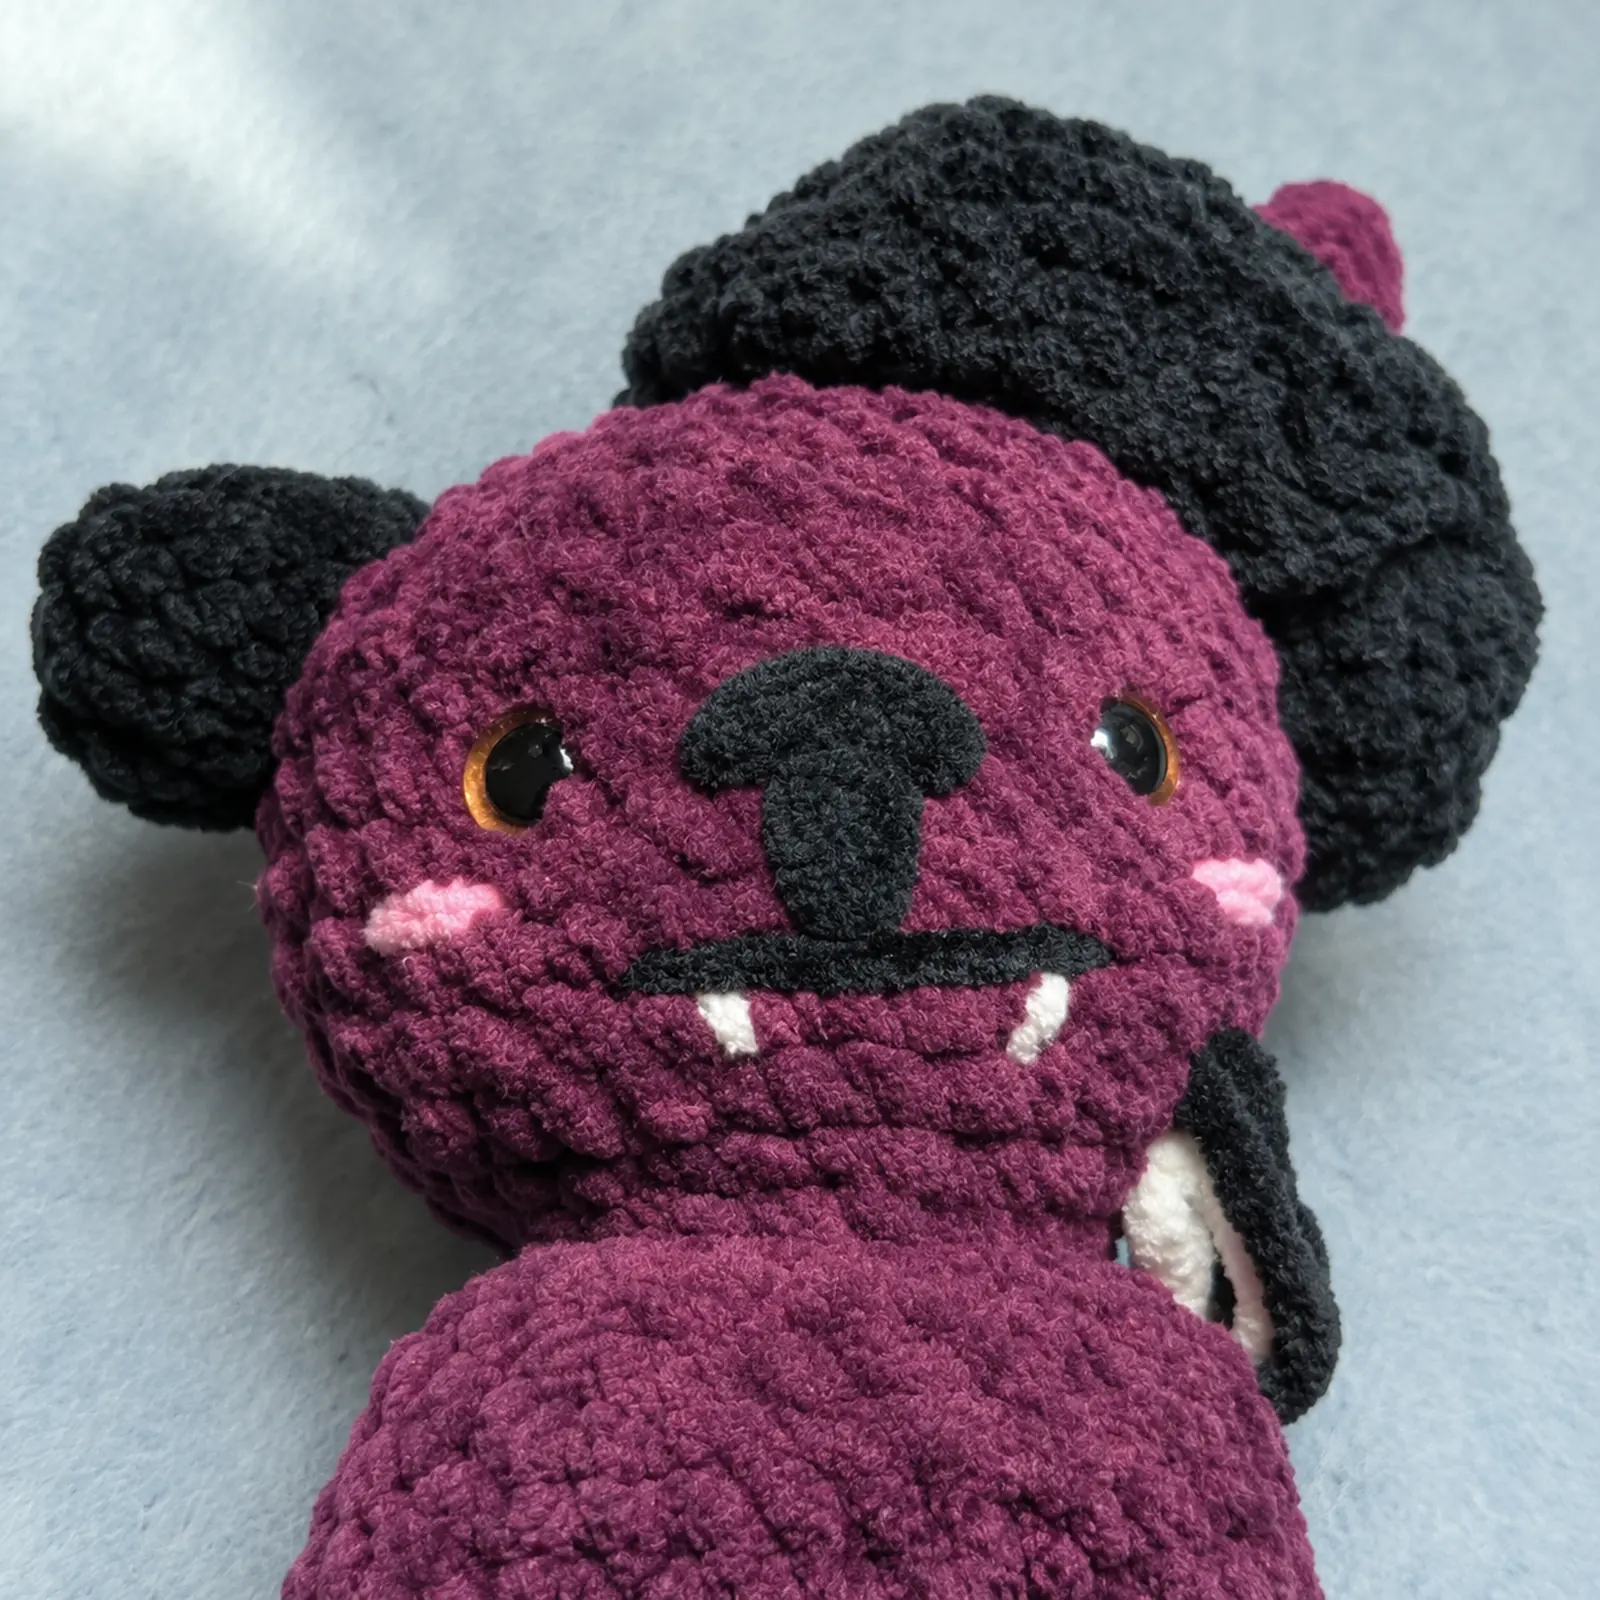
- Nose: With black Velluto (60), mark a downward-pointing triangle between the eyes over Head Rounds 16–19. Make a short horizontal stitch for the top, then fill the triangle with progressively shorter stitches toward the point.
- Cheeks: With thin pink yarn, make a short horizontal dash under each eye. Compare both dashes from the front.
- Mouth and fangs: With thin black yarn, stitch a short line six stitches wide beneath the nose. With white yarn, make a short downward stitch at each end for the fangs. If you chose embroidered eyes, fill the two marked spots with small black stitches. Secure and hide the yarn ends inside the head.
8. Crochet the witch hat and fit it over the ears
Start with black yarn and a magic ring. Use a contrasting marker so you can spot the beginning of each round against the black stitches.
- Round 1. Make 4 sc in the ring (4).
- Round 2. Repeat [1 sc, inc] twice (6).
- Round 3. Repeat [2 sc, inc] twice (8).
- Round 4. Repeat [3 sc, inc] twice (10).
- Round 5. Repeat [4 sc, inc] twice (12).
- Round 6. Repeat [5 sc, inc] twice (14).
- Round 7. Repeat [6 sc, inc] twice (16).
- Round 8. Repeat [7 sc, inc] twice (18).
- Round 9. Repeat [8 sc, inc] twice (20).
- Round 10. Make the ear openings. Work 3 sc. Chain 8, skip the next 4 stitches on the cone, then put a sc into each of the next 3 stitches. Repeat the whole sequence once. You have 12 sc and two chains of 8 (28 total). Each chain bridges one ear opening.
- Round 11. Build the brim. Increase in each of the next 3 single crochets. When you reach the first chain bridge, put the hook into the open space underneath the whole chain and work 16 sc around that bridge. Slide them along the chain as needed to make room. Increase in each of the next 3 single crochets. Repeat the whole sequence around the second opening. Each opening gets its own set of 16 sc (56 total).
- Round 12. Finish the brim. Work one double crochet in each stitch, starting directly in the first marked stitch (56). Slip stitch into the top of the first double crochet, fasten off, and weave in the tail with your needle.
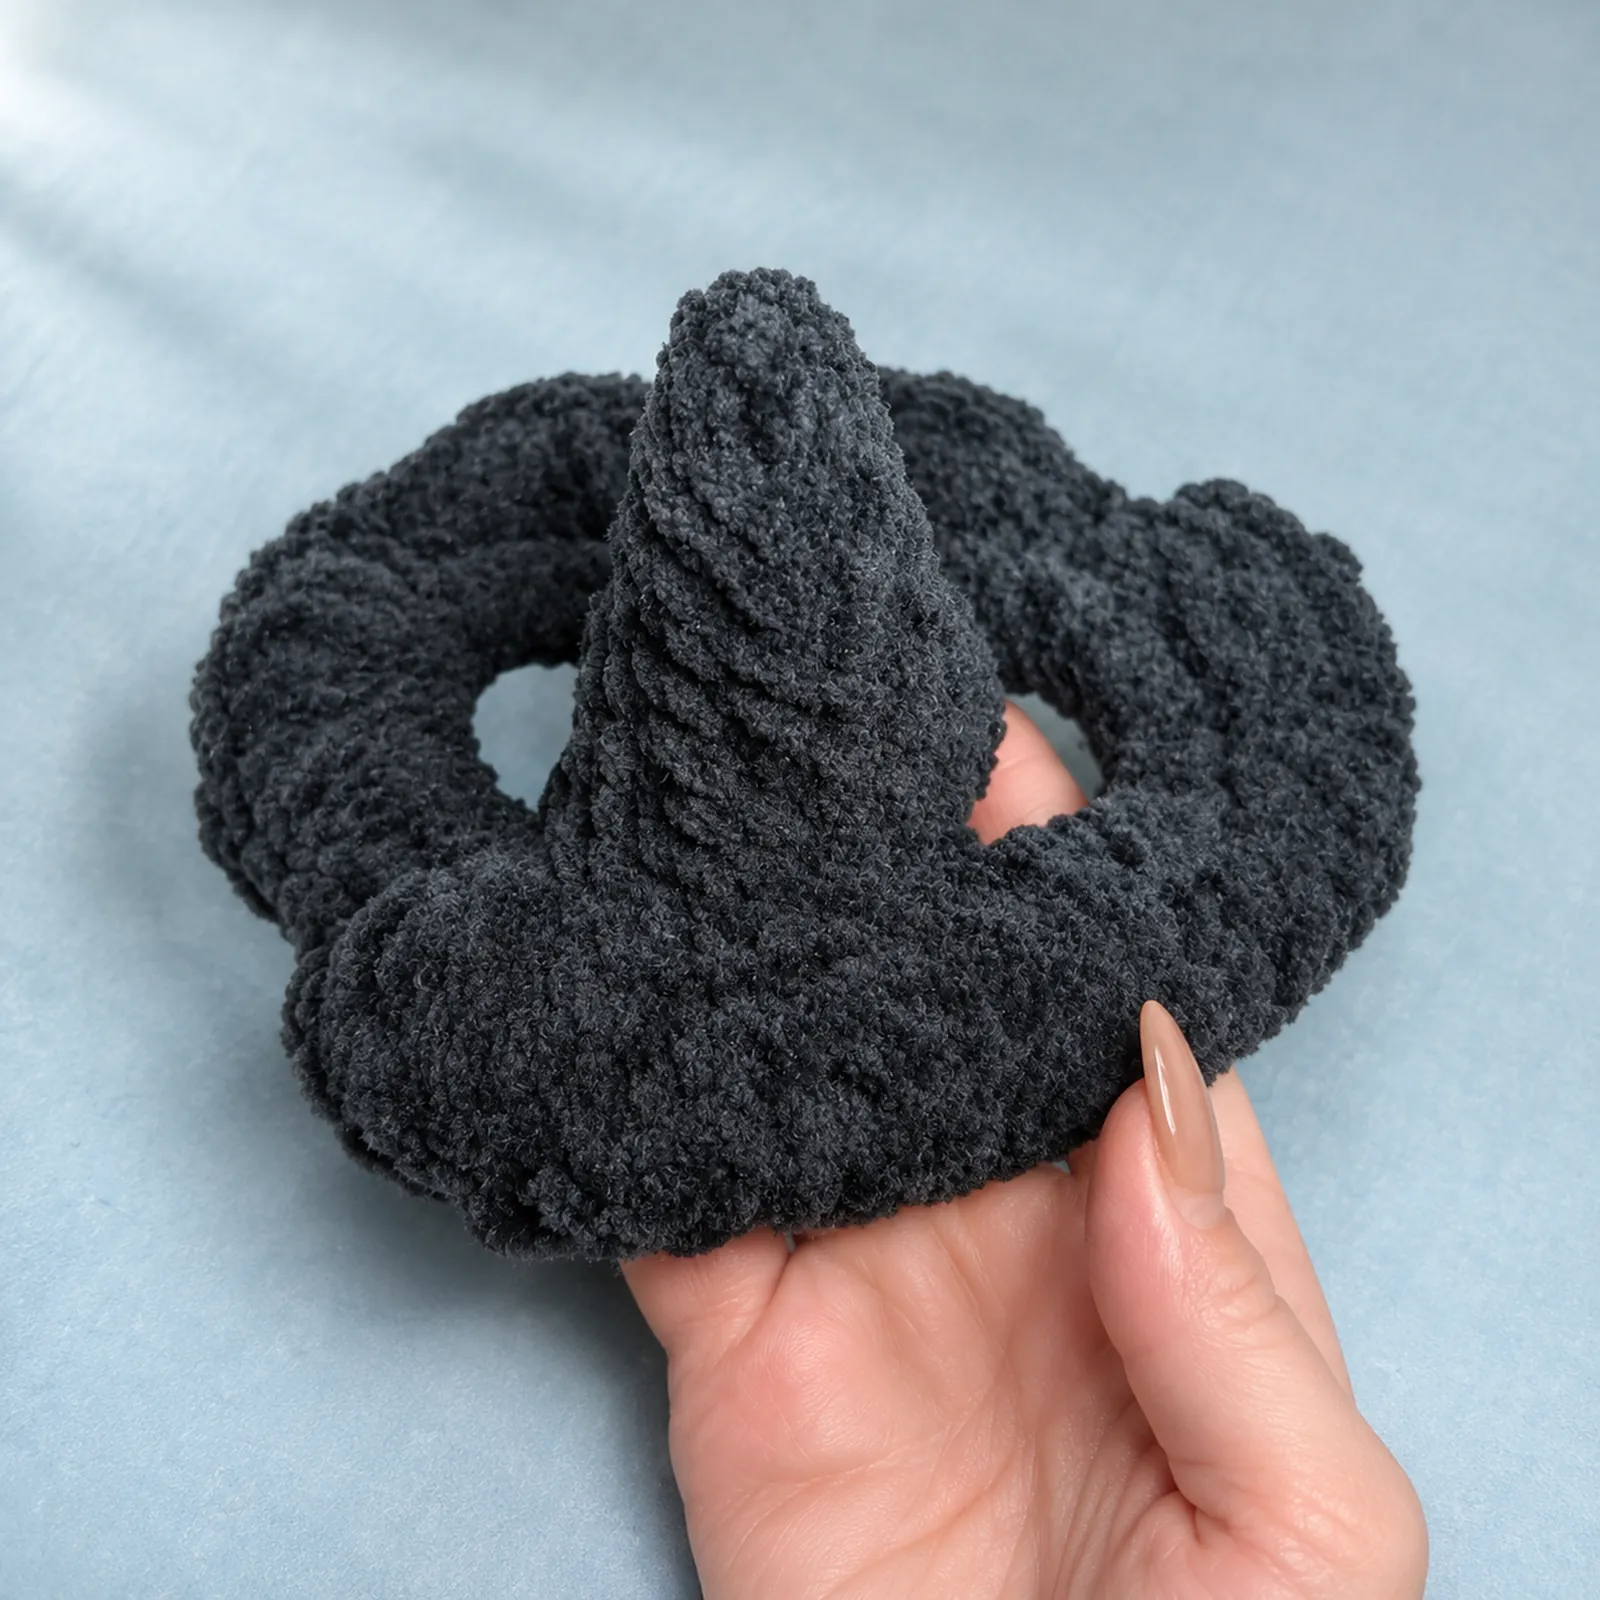
Slip the hat over the bat’s head and gently guide one ear through each opening. From the front, check that both eyes show below the brim. From the back, check that the wings sit at similar angles and that the sewing tails are tucked inside.
What’s Next?
Pin this post: Save this tutorial to your Pinterest boards so that you can come back to it later.
Leave a comment: We love to hear your feedback. Tell me in the comments below!
Share on Instagram or Facebook: When you make this project, share it on social media and tag me @iheartdiybystacy. We love to see what you make!
Have questions? Join the Facebook Group!
We hope this article was useful for you! If you have any additional questions, feel free to join my Facebook Group. We created this group for you to share pictures, ask questions, and help each other out.
I hope this article was useful for you! If you have any additional questions, feel free to join my Facebook Group.
Join the group to share pictures, ask questions, and help each other out.

Have a question? Use the form above to submit your question or comment.
I love hearing from you and seeing what you made!