


A Cricut can turn a design on your screen into a clean cut in paper, vinyl, or another compatible material. The fastest way to learn is to make one simple project, then add a new material or technique only after the basic cut makes sense.
This Cricut for beginners guide covers the machine, essential supplies, Design Space screens, and the steps from choosing a design to removing it from the mat. It also explains where heat-transfer projects differ from ordinary adhesive vinyl.
If you already own a machine, use the model-specific prompts in Design Space and the documentation for your exact model. Cricut's lineup and software change, so a fixed list of buttons or compatible materials can become outdated.
Keep the first session short. A small cut teaches the core sequence better than a complicated layered design that introduces several possible points of failure at once.
You can return to this guide by section as you work. There is no need to memorize the whole app before you load your first piece of cardstock.
What a Cricut Does
A Cricut is a computer-guided craft machine that moves a blade along paths in a digital design. With the right accessory, some models can also draw, score, or perform other operations.
It does not print colored ink onto ordinary paper. A basic cut removes a shape from material already colored or patterned; a Print Then Cut project adds a separate printer step and has its own machine requirements.
The machine follows the operation you choose in Design Space. A shape set to Basic Cut follows cutting paths, while a text or drawing operation can require a pen or another compatible tool.
For a first lesson, choose one plain material and a large, simple shape. That keeps the focus on loading, material selection, and removing the cut without tearing it.
Choose a First Project Before Buying Extras
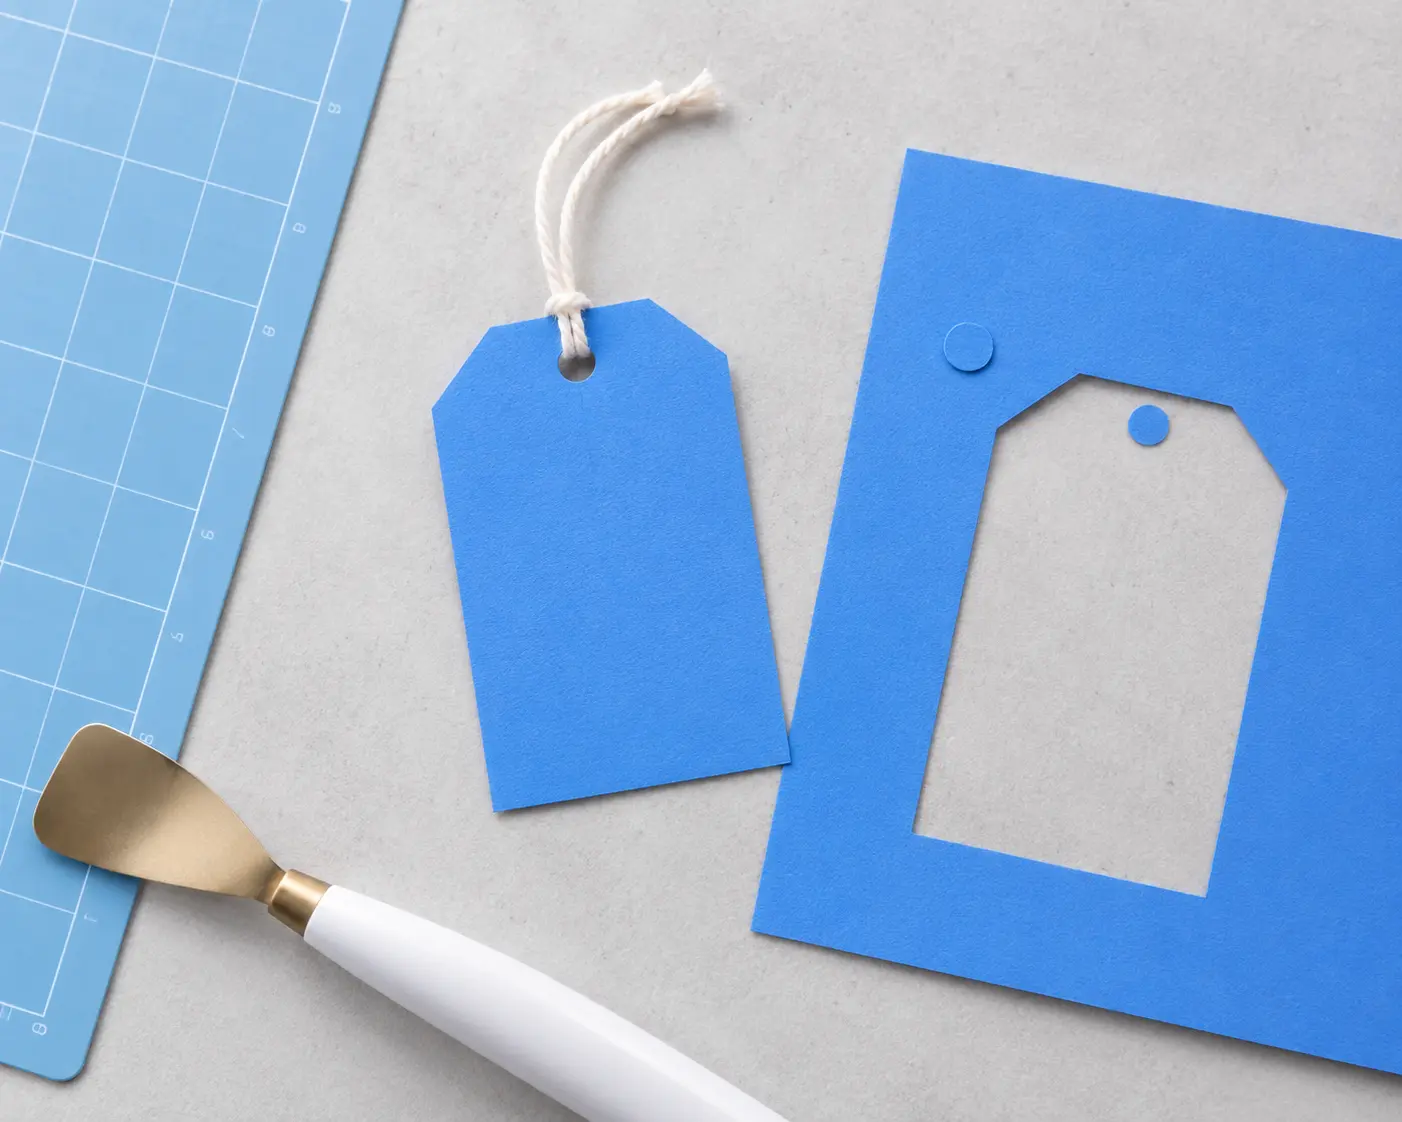
A paper gift tag or a single cardstock shape needs relatively few supplies. It also lets you see the cut line clearly without managing transfer tape or heat.
An adhesive-vinyl label introduces weeding and transfer tape. It is a good second project after a basic paper cut, especially if you have a smooth jar or box to decorate.
An iron-on design adds mirroring and a heat press. Save that for when you are comfortable with the cut workflow and ready to check material-specific temperature and peel instructions.
Infusible Ink adds a compatible blank, protective paper, and a more exact pressing process. Its smooth result is appealing, but the blank and setup matter more than they do for a first paper tag.
Choose a project you will actually use, then buy only the material and tool it needs. A large accessory bundle is less helpful than a correct mat, blade, and one suitable material.
Know Your Machine and Materials
Cricut Joy, Explore, Maker, and Venture families have different widths, tools, and material limits. Check Cricut's current guide for your model before assuming a project shown on another machine will fit yours.
The compatible blade or tool is installed in a carriage that moves while the material feeds through the machine. Keep hands, cords, and loose scraps away from the feed path during a cut.
The blade should be seated as your model's instructions show. If the tool is loose or the wrong housing is installed, a material setting alone cannot produce the expected cut.
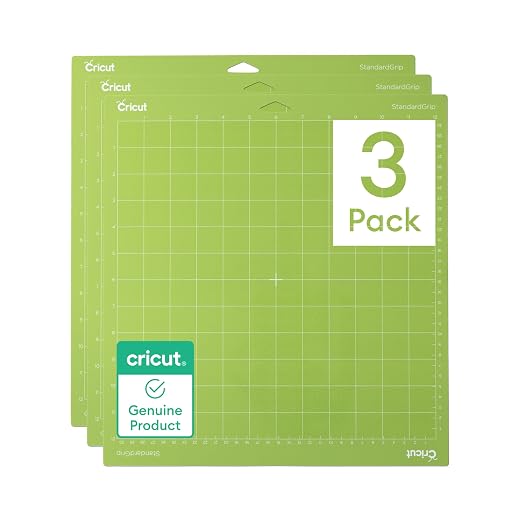
Most ordinary sheets are held on a tacky cutting mat. Some compatible machines can cut designated Smart Materials without a mat, but that depends on both the machine and the particular material.
The mat's grip should suit the material and its condition. Too little grip lets paper shift; too much grip can curl or tear a delicate sheet during removal.
Use the mat and material instructions for your model rather than memorizing one mat color for every job. Cricut's mat options and compatible tools can vary across machine families.
Keep a little free space in front of and behind the machine. The mat moves during cutting, and an obstruction can pull it out of alignment.
Measure the project against the usable material area, not the full plastic mat dimensions. The outer margin helps the rollers and guides feed the mat consistently.
The Small Starter Kit
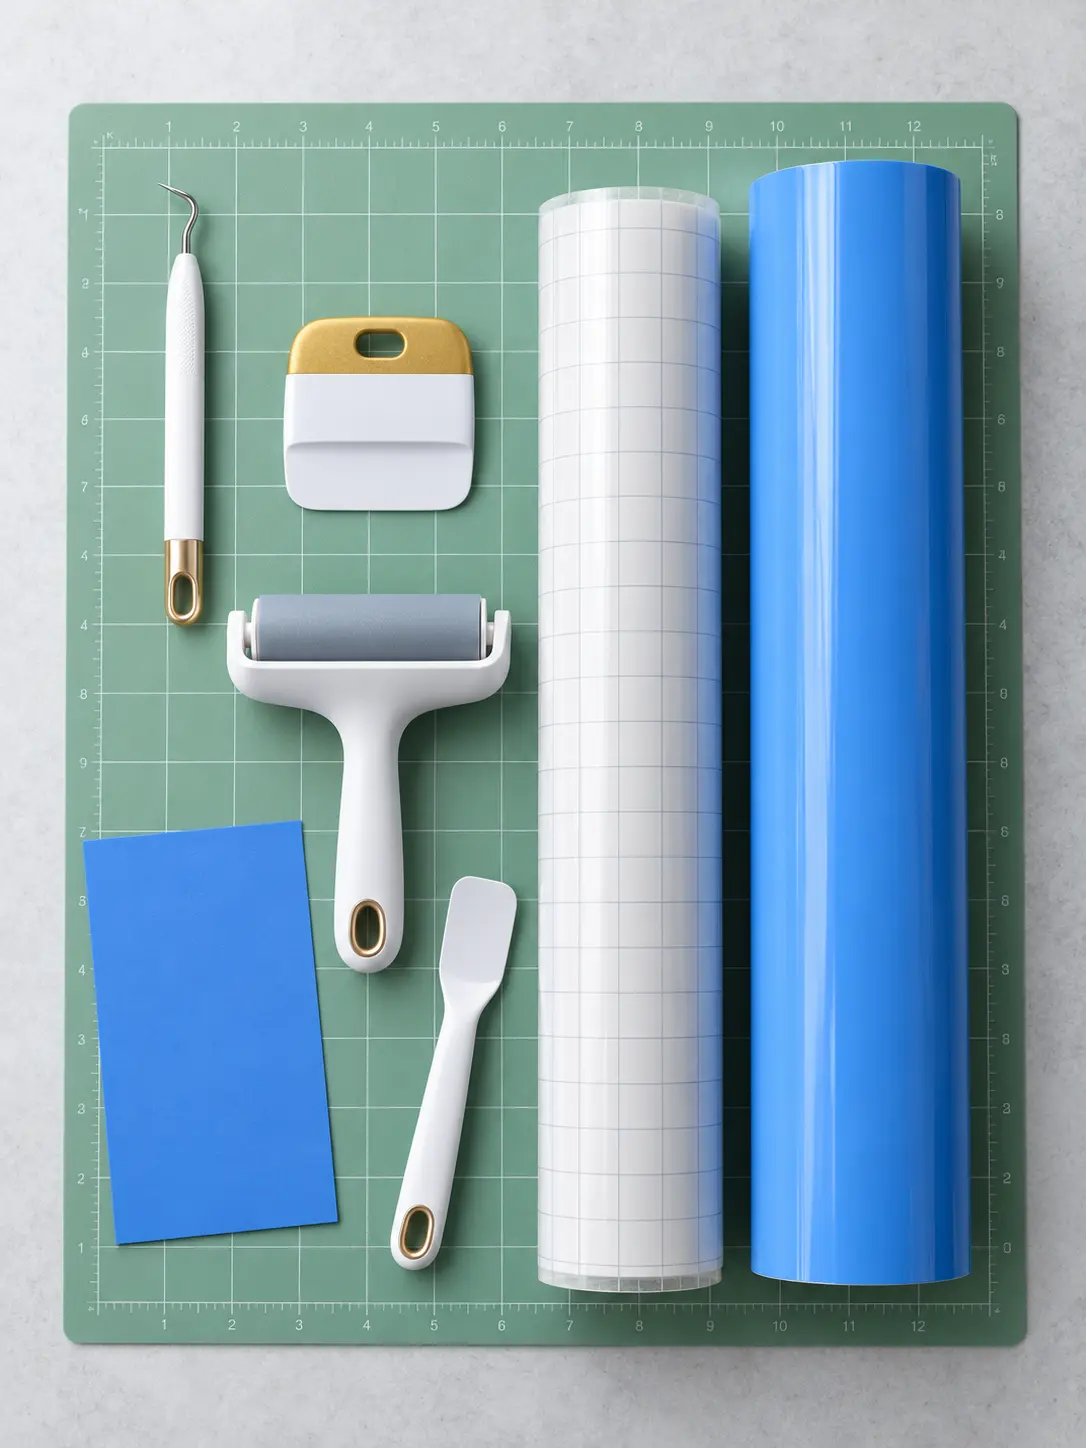
For a first paper cut, gather the machine, its supplied compatible blade, Design Space, a sheet of suitable cardstock, and a matching cutting mat if your project needs one.
A scraper or spatula can help remove paper without bending a delicate point. Save the negative scraps until you confirm the finished shape has cut completely.
Scissors are useful for trimming one sheet to the amount needed for a test. Keeping leftover material clean and flat makes it easier to use later.
For adhesive vinyl, add a weeding tool and transfer tape chosen for that vinyl. Ordinary smooth vinyl and textured glitter vinyl may need different tape strengths.
For iron-on, add a suitable pressing mat and heat tool. The blade makes the design, but heat, pressure, and the correct liner orientation make it adhere to fabric.
For Infusible Ink, add a compatible blank, butcher paper, white cardstock, and a lint roller. The sheet alone cannot create the intended result on an ordinary cotton shirt.
You do not need a paid Cricut Access subscription to install Design Space or make a project from your own compatible file. Check whether a particular image or font requires purchase before using it.
Check the box contents before purchasing duplicate accessories. Included mats, sample materials, and connection cables vary by machine and bundle.



Set Up the Machine
Place the machine on a stable surface with room for the mat to travel. Remove packing pieces and follow the safety and power instructions for your model.
Go to Cricut's setup page or follow the QR code supplied with your machine to install the current Design Space app on a supported device.
Sign in or create the account requested by Design Space. Then select the model you actually own so the app shows the correct connection and project options.
Connect by the method your model supports, such as USB or Bluetooth. Follow the app's guided setup and any firmware update rather than relying on an older screenshot from a different model.
If Design Space offers a test cut during setup, complete it. A successful small cut confirms the machine, connection, tool, and material can work together before you start a larger project.
Keep the machine powered on during a required firmware update. Interrupting setup can leave you troubleshooting a connection issue that is unrelated to the project itself.
If the machine is not found, check power, the selected model, and the connection method first. Cricut's model-specific help is the best next stop for pairing details.
If you are on a shared computer, save your Cricut account details securely before you begin. Returning to the same account helps you find the project you saved in Design Space.
Learn the Four Design Space Stages
The Home area helps you find projects and return to saved work. Availability of a design can depend on whether it is free, purchased, or part of a subscription.
The Canvas is where you add shapes, text, and images and adjust their size and arrangement. Choose the operation on the Canvas before sending a project to cut.
The Prepare screen shows the mat or material layout. Review the size, position, copies, and Mirror setting here, especially when the project uses iron-on or Infusible Ink.
The Make screen connects the machine and asks for material and tool choices. Cricut's Make screen guide explains the current sequence.
Menus differ between desktop and mobile versions. The names of these stages are more useful to learn than the exact location of a button in one dated screenshot.
When a project has multiple material colors, Design Space can separate them into different mats. Review each mat rather than assuming a setting chosen on the first applies to the rest.
Before pressing Make, save the project with a descriptive name. A saved version makes it easier to return to a design if you need to adjust its size after a test.
Keep an untouched copy before trying a permanent shape operation such as Weld. That gives you a version with the original editable pieces if you change your mind later.
Make a First Paper Cut
Choose a simple heart, circle, or gift-tag outline from shapes available to you. A shape with a generous border is easier to lift intact than a delicate lattice.
Set its size to fit well inside the paper and mat. Check both width and height, not only the scale handle, so the full path remains in the usable cut area.
Confirm that the operation is Basic Cut. A pen operation would ask for a drawing tool and leave you with a different result.
For the very first cut, avoid a shape that is smaller than your fingernail. Tiny pieces need more careful settings and removal than a large outline.
Place the cardstock on the appropriate mat and smooth it flat. Curling corners can snag as the mat moves, so replace a badly warped sheet.
Select Make and review the Prepare preview. Paper does not normally need mirroring for this front-facing shape.
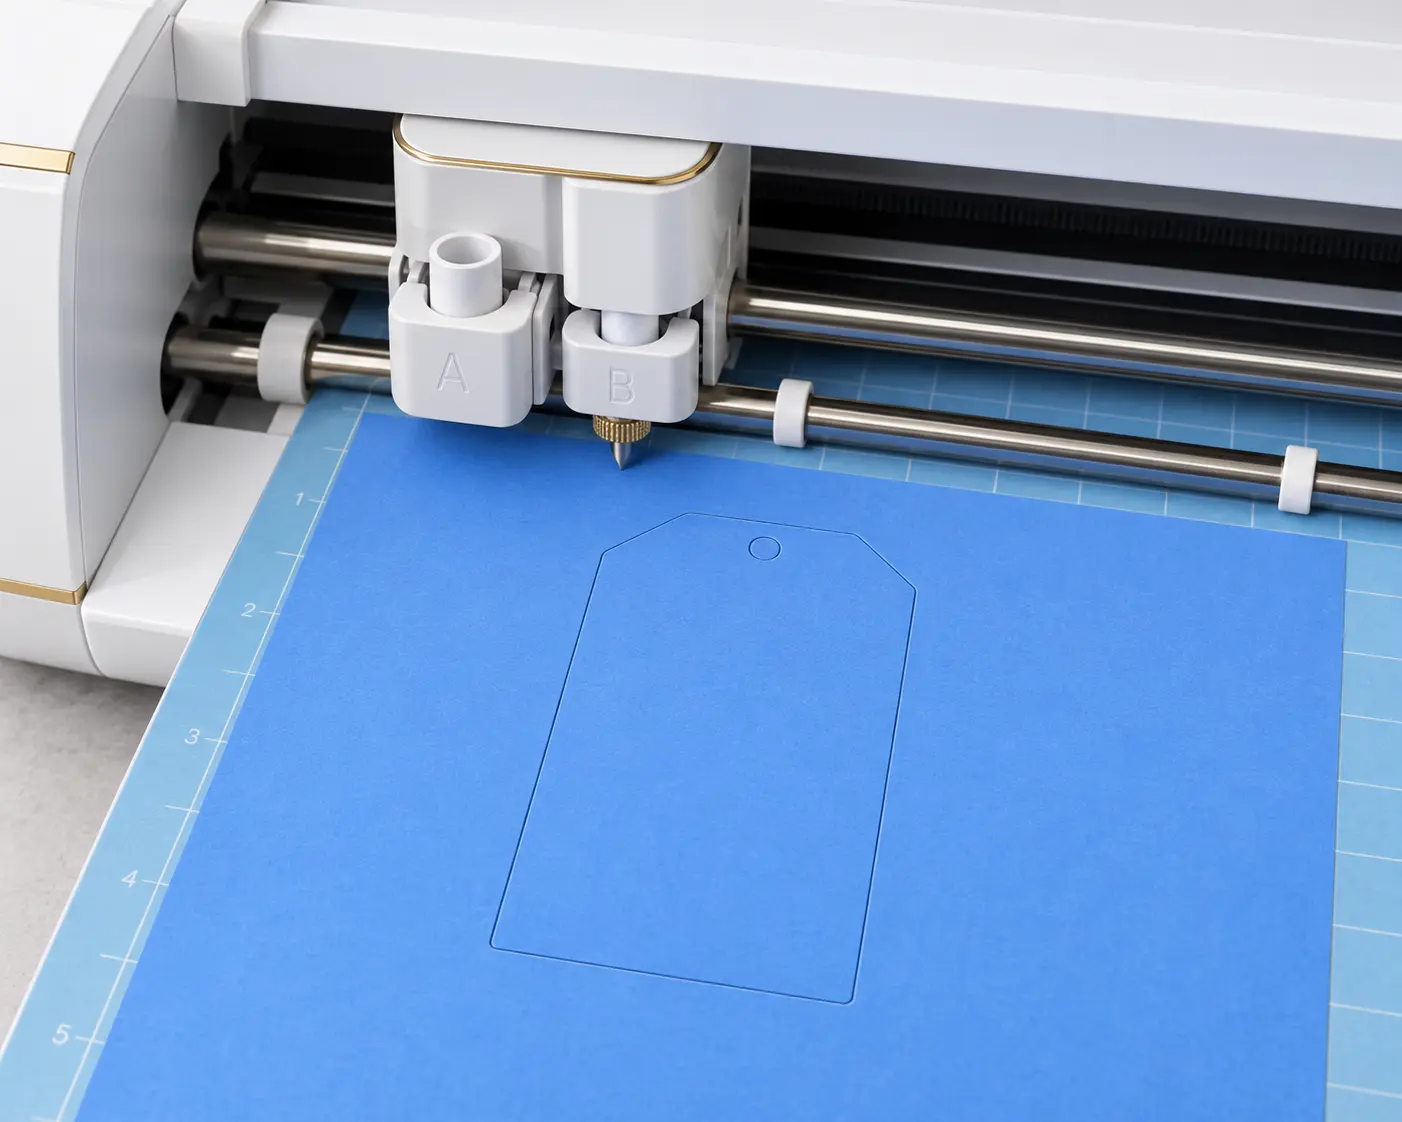
Choose the material that matches your cardstock in Design Space. If the machine asks for a blade or loading method, follow the prompts for the machine you selected.
Load the mat in the direction shown by your model's guides. Keep it level until the rollers grip it, and do not push or pull it while the cut is running.

Start the cut when the machine or app prompts you. Watch the first moments; if the paper shifts, stop and secure a fresh piece before retrying.
When the cut ends, unload the mat. Flip it over on a clean table and bend the flexible mat away from the paper to reduce curling.
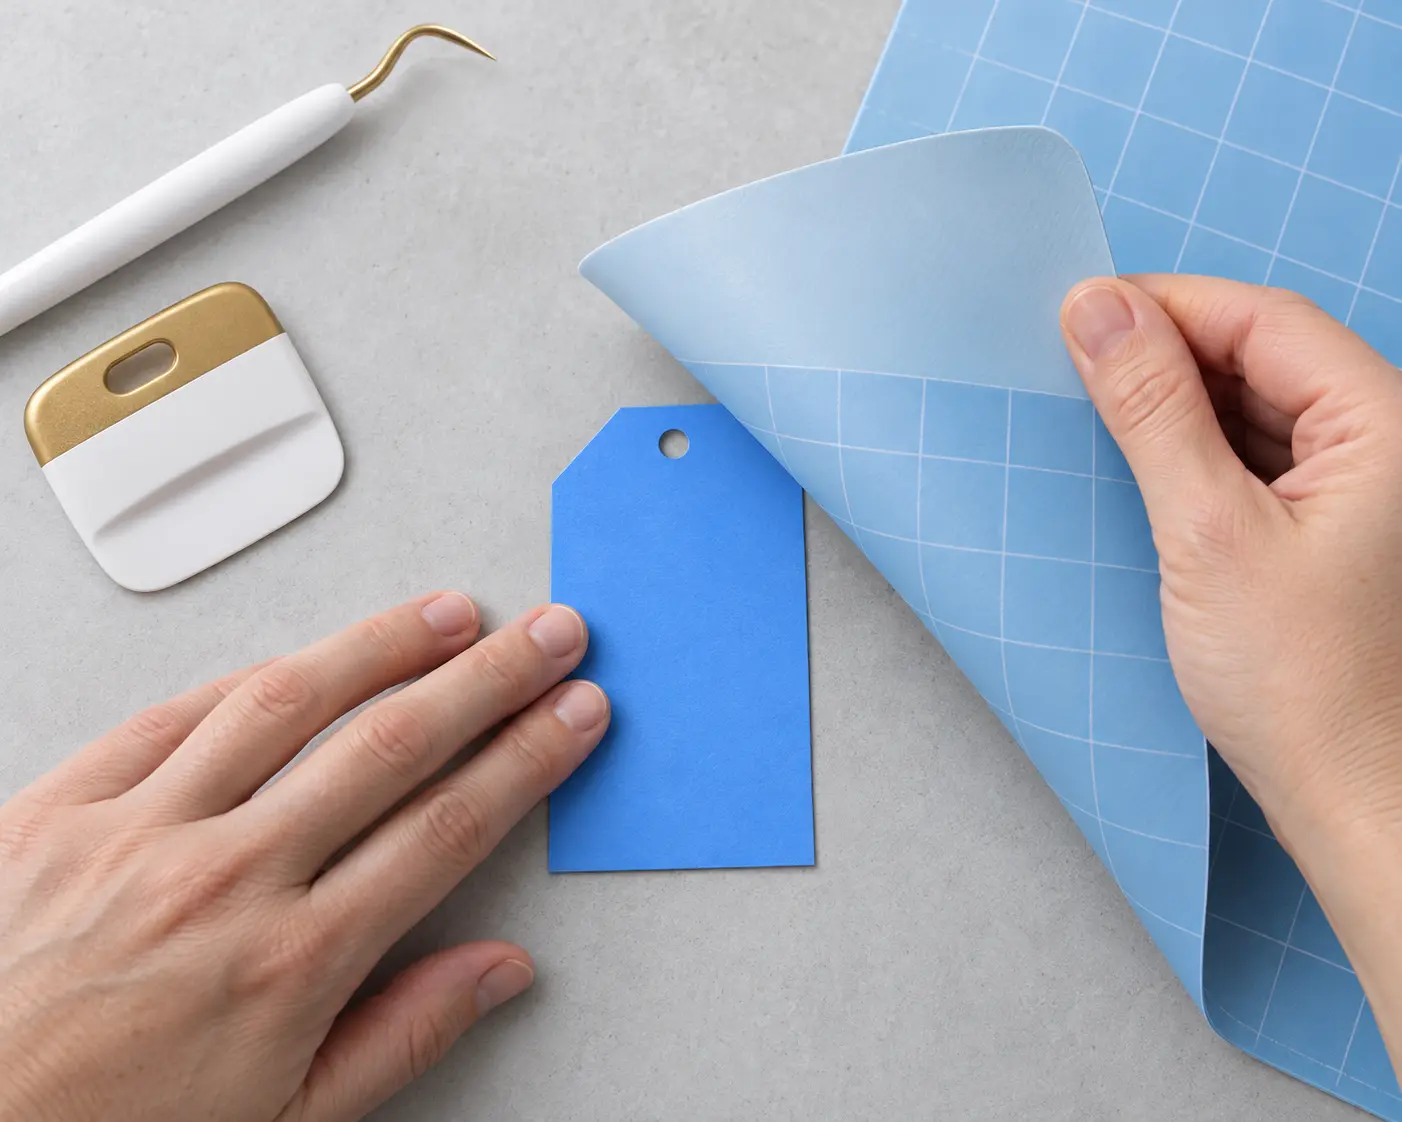
Lift the shape carefully, then inspect the edge. If the cut did not go through, check the material setting and blade condition before increasing pressure on a new small test.
If a corner tears while you lift it, the cut may still be correct. Try supporting the paper from underneath before recutting or changing the machine setting.
That first shape completes the core workflow: design, prepare, choose the material, load, cut, and remove. You can reuse the same mental sequence for more ambitious projects.


Make the Second Project More Useful
If you want a practical next step, make a small adhesive-vinyl label for a smooth craft box. Our first vinyl-label project supplies a complete cut-and-transfer example.
Adhesive vinyl cuts with its paper or plastic backing against the mat and its colored face up. The cutter should cut the vinyl while leaving the backing intact.
Weed away the vinyl you do not want. For a word, remove the outer background and the enclosed pieces inside letters before lifting the design with transfer tape.
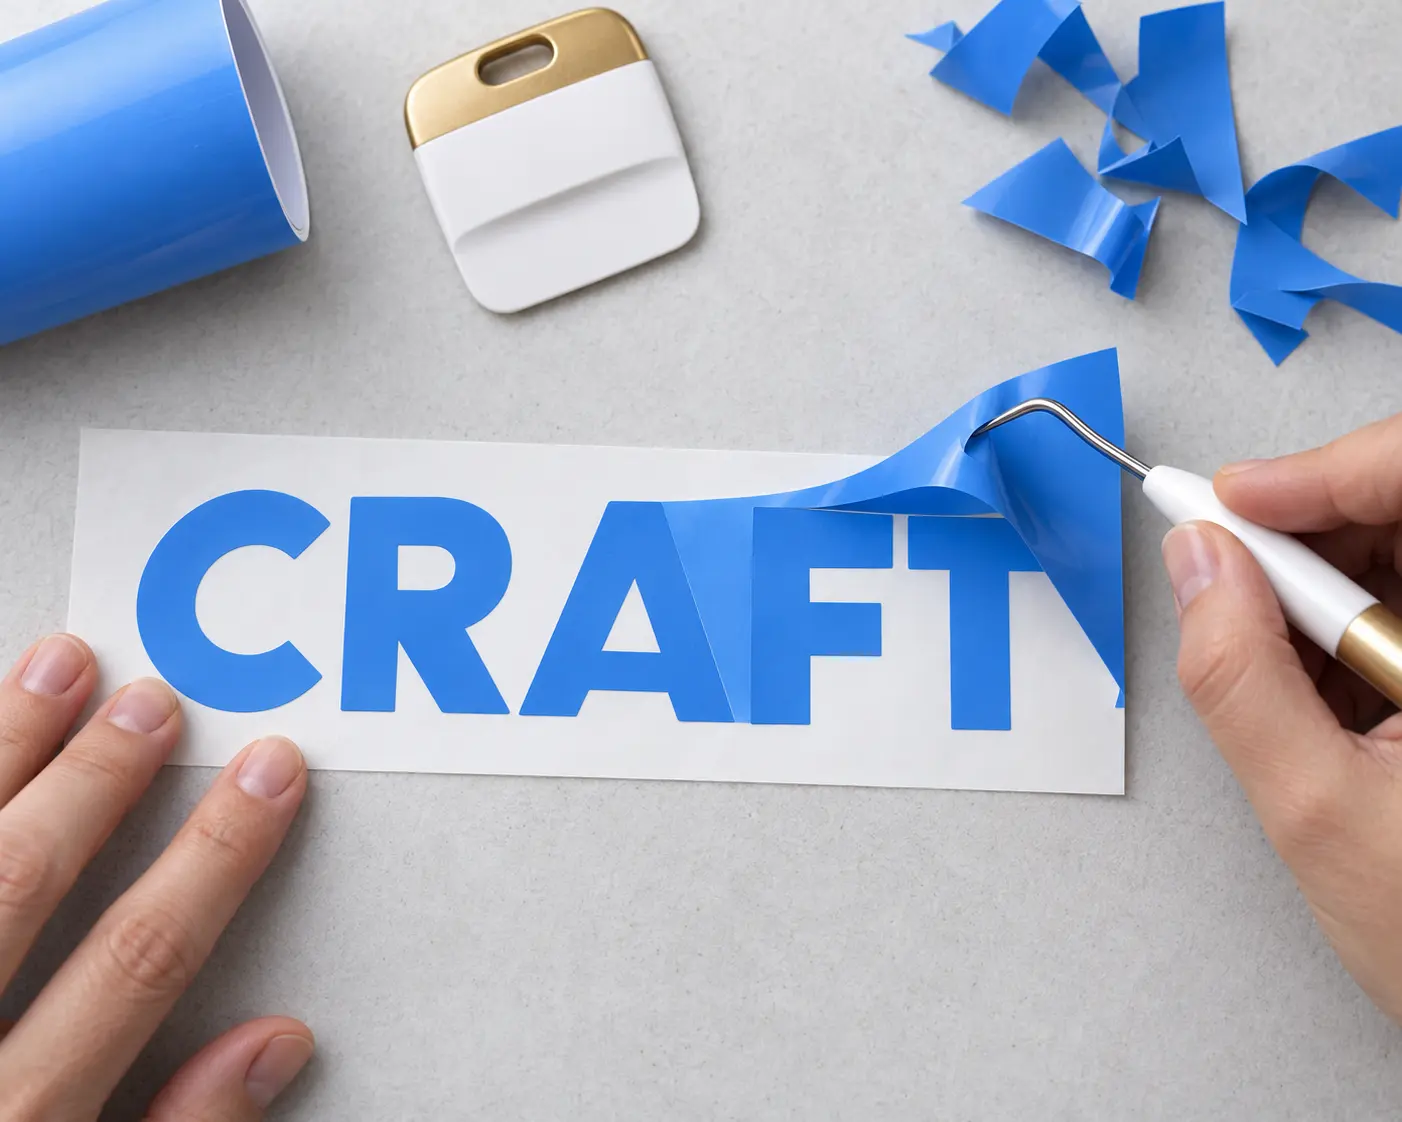
For an ordinary front-facing label, leave Mirror off. Mirror is for projects whose transfer orientation requires a reversed cut, including most iron-on and Infusible Ink designs.
Use transfer tape suited to the vinyl finish. Burnish the design onto the tape, peel the backing away, then burnish the vinyl onto a clean, dry surface.
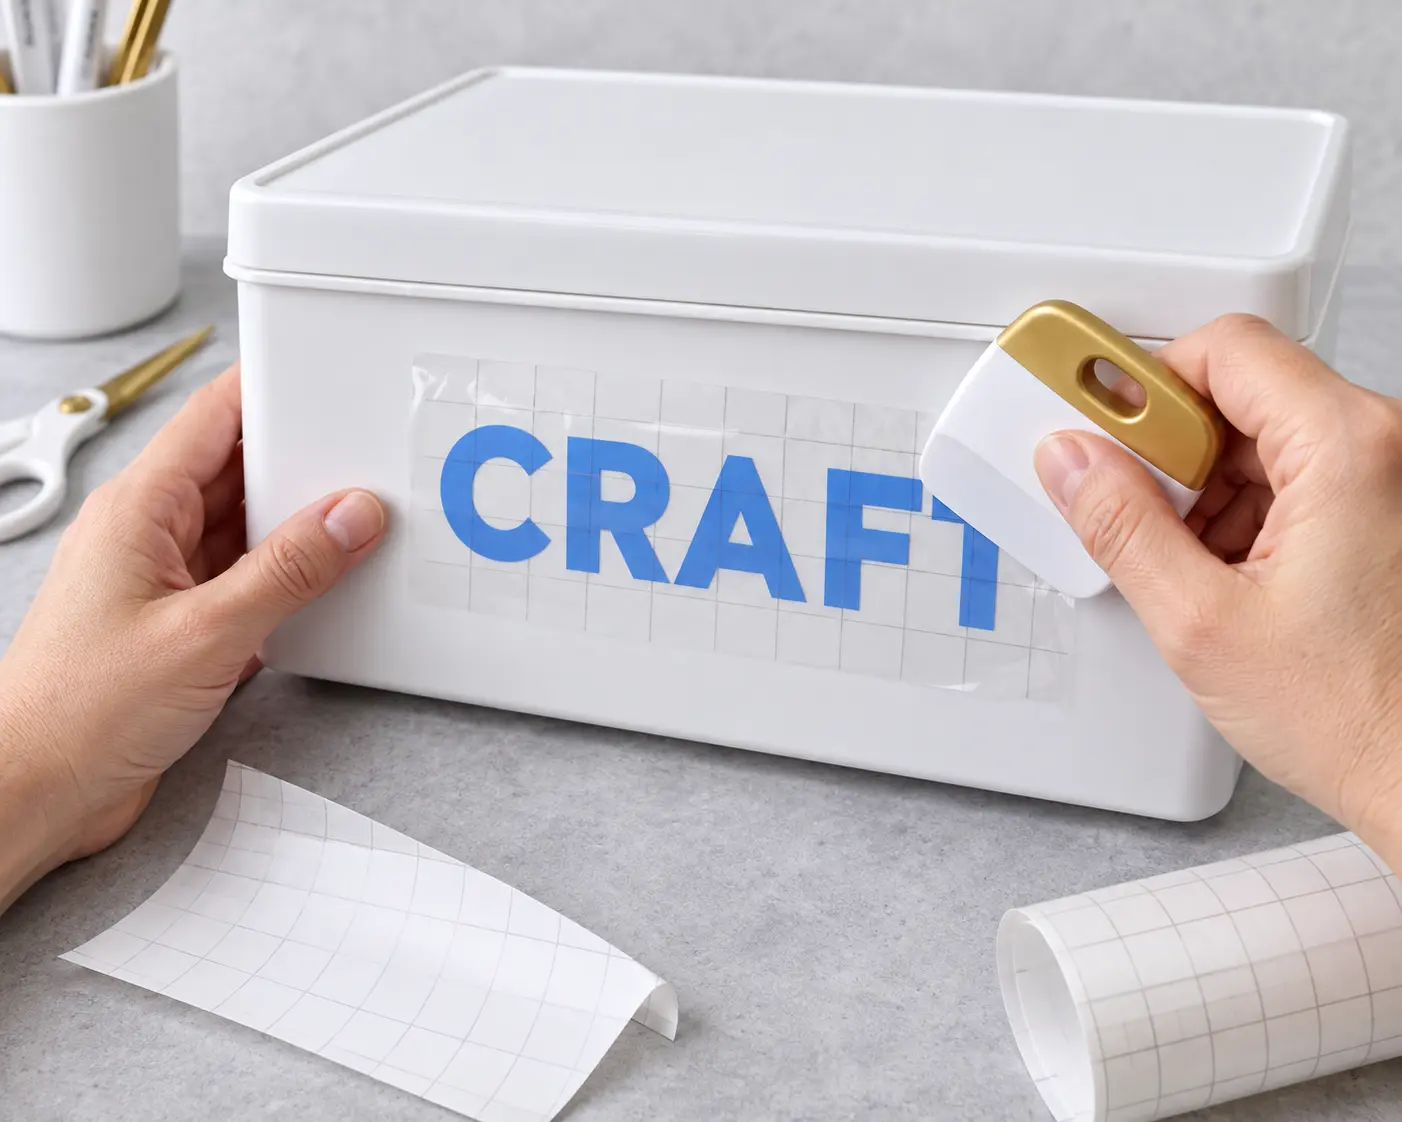
Peel the tape back slowly. If a letter lifts, press it down and burnish that area again instead of tugging the whole design off the surface.


Understand Other Cricut Materials
Iron-on vinyl, also called HTV, sticks to a compatible base with heat-activated adhesive. It comes on a clear carrier that remains with the design while you press it.
For iron-on, mirror the design in Prepare and cut with the shiny carrier against the mat. Our iron-on vinyl guide covers the full cut, weed, and press sequence.
Use the Cricut Heat Guide for the specific iron-on, fabric, and press you have. A number from a different blank is not a universal setting.
Infusible Ink uses a compatible polymer or polyester-based blank and transfers ink into that surface. It is not a substitute for ordinary adhesive vinyl or a way to print on any cotton shirt.
Mirror a transfer-sheet design and keep its liner side down during cutting. Our Infusible Ink guide explains the blank, protective papers, and pressing steps.
Paper and cardstock can become cards, tags, banners, or simple layered decorations. Start with designs that leave enough material around thin shapes so they survive removal from the mat.
Printable stickers belong to the Print Then Cut workflow. Cricut's current help page lists compatible machines and explains the printer-and-sensor sequence.
Do not assume every Cricut model can cut every material or perform every operation. Check the model guide before buying a specialty blade, thick material, or printer-dependent project.
Terms That Save Beginners Time
Weeding means pulling away the cut material that is not part of the final design. You usually weed adhesive vinyl, iron-on, and Infusible Ink transfer sheets.
Burnishing means rubbing firmly with a scraper or similar tool to help a vinyl design transfer from its liner to tape, and then from tape to the final surface.
Mirror reverses a design for heat-transfer orientation. Review every mat of an iron-on or Infusible Ink project; a multi-color project may have more than one mat to check.
Attach keeps objects arranged together when they move from the Canvas to the cutting mat. It does not remove cut lines where overlapping shapes meet.
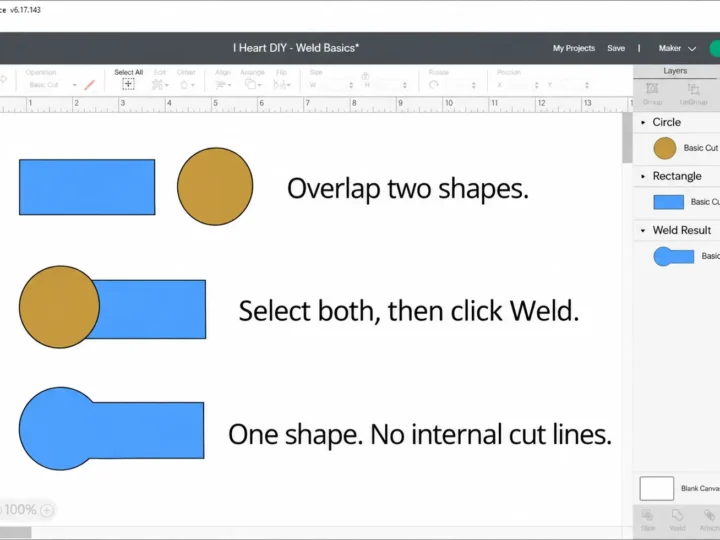
Weld combines selected shapes into a permanent single cut layer. Unite can create a similar joined shape while keeping its component objects editable; our Cricut Weld guide explains the difference.
Flatten prepares layers for a Print Then Cut result. It is different from joining cut paths for a one-color vinyl design.
Test cut means a small trial shape on the material you plan to use. It is a cheap way to check cut pressure before risking a full sheet.
Liner is the backing that carries a cut material before application. Adhesive vinyl and iron-on have different liners and transfer steps, so identify the material before peeling anything away.
Fix the First Common Problems
If the material shifts, check that it is flat, the mat is clean enough to hold it, and the loading method matches the material. A loose sheet cannot produce an accurate cut.
If the backing or mat is cut too deeply, confirm the material selection and run a new test. Do not keep sending full designs through an obviously wrong setting.
If the blade barely marks the material, check that the protective cap was removed, the blade is installed correctly, and the selected tool matches the prompts for that project.
If the design moves around on the Prepare preview, return to the Canvas and consider Attach for objects that must hold their layout. Do not use Weld when you still need separately editable shapes.
If an adhesive-vinyl word is backward, it was likely mirrored unnecessarily. If iron-on text is backward after pressing, mirroring was likely missed before cutting.
If paper curls when removed, turn the mat over and peel it away from the sheet. A scraper or spatula can help support a small shape as it releases.
If a file looks different after upload, check whether it is an SVG with cut paths or a raster preview such as PNG or JPG. Different file types can need different preparation in Design Space.
If a tool or menu seems missing, confirm the selected machine, operation, platform, and app version. Cricut's current help pages are more dependable than a screenshot from several years ago.
Build a Simple Learning Path
Make one clean paper cut first. Then make a small label, where you can practice weeding and transfer tape without a heat tool.
After that, choose iron-on if you want fabric decoration, or Infusible Ink if you have a compatible blank and want a smooth ink finish. Follow each material's separate instructions instead of blending their steps.
Save the project file and write down the material setting that worked. Those notes make your next project easier, especially when you change machines, brands, or blanks.
You do not have to master every Design Space tool on day one. A few successful small projects will make the software's later options easier to understand.
What’s Next?
Pin this post: Save this tutorial to your Pinterest boards so that you can come back to it later.
Leave a comment: We love to hear your feedback. Tell me in the comments below!
Share on Instagram or Facebook: When you make this project, share it on social media and tag me @iheartdiybystacy. We love to see what you make!
Have questions? Join the Facebook Group!
We hope this article was useful for you! If you have any additional questions, feel free to join my Facebook Group. We created this group for you to share pictures, ask questions, and help each other out.
I hope this article was useful for you! If you have any additional questions, feel free to join my Facebook Group.
Join the group to share pictures, ask questions, and help each other out.


Have a question? Use the form above to submit your question or comment.
I love hearing from you and seeing what you made!