


Stockinette stitch is the smooth fabric many people picture when they think of a knitted sweater. It is also one of the simplest stitch patterns to learn once you know how to knit and purl.
Work one knit row, then one purl row, and repeat. This guide shows how to make stockinette flat and in the round, read its two sides, check gauge, and manage the edges that tend to curl.
What Is Stockinette Stitch?
Stockinette stitch is a fabric pattern made by alternating a knit row with a purl row when working back and forth. The knit stitches form small V shapes on one face of the fabric.
The other face shows the purl bumps. Because the two sides look different, stockinette has a clear right side and wrong side rather than a reversible texture.
In a written pattern, the repeat may be shortened to “knit one row, purl one row” or abbreviated as “St st.” Follow the pattern’s row instructions because designers may include edge stitches or shaping around the stockinette section.
In much of the UK, the same fabric is called stocking stitch. In US patterns, “stockinette stitch” is the more familiar term; the Craft Yarn Council lists “St st” as the US abbreviation for stockinette stitch.
Stockinette is soft and flexible, so it is common in sweaters, hats, scarves, and other projects. It also tends to curl at its edges, a behavior to plan for when choosing a border or finishing method.
Recognize the Front and Back
The smooth V side is usually treated as the right side (RS) of a stockinette piece. When that face is toward you, the next row in flat stockinette is normally a knit row.
The bumpy face is the wrong side (WS). With that side facing you, purl across the row to keep the smooth V side on the opposite face.
A simple swatch makes the difference easy to see: look for columns of Vs on one face and horizontal bumps on the other. These clues are also useful when you lose track of your row count.
What You Need
For a small practice swatch, gather smooth yarn, a pair of needles that suit the yarn, scissors, and a tapestry needle for weaving in the ends. A light or medium color makes the stitches easier to see.
Straight needles are convenient for a flat sample. Circular needles can also be used while working flat, and they are needed when knitting a tube in the round.
If you need a refresher before you begin, use our beginner guide to casting on in knitting. A neat cast-on helps the first row go more smoothly.




How to Knit Stockinette Flat
When you work flat, you turn the fabric at the end of every row. Knit across the right-side row, turn the work, purl across the wrong-side row, then turn again.
Cast on enough stitches to make a manageable practice piece. The number is up to you; a wider swatch is easier to handle than a very narrow strip.
For Row 1, knit every stitch across. Keep the working yarn behind the needles as you knit, and try to keep the stitches an even size.
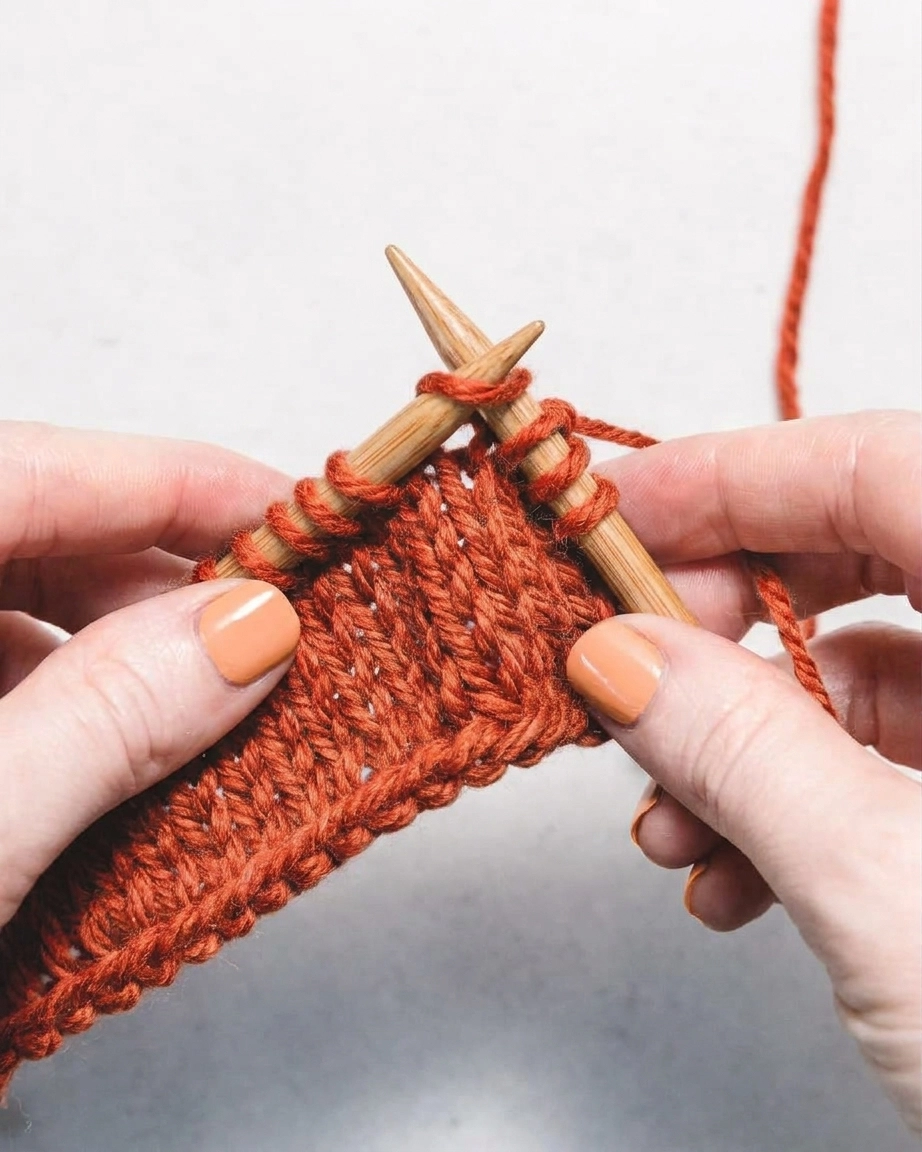
At the end of the row, turn your work so the opposite face is toward you. The yarn will now be at the side where the next row begins.
For Row 2, purl every stitch across. Keep the working yarn in front while making each purl stitch, then move it between the needle tips before the next stitch as needed.
After the purl row, turn the work again. The smooth side should face you, ready for another knit row.
Repeat these two rows: knit across the RS, then purl across the WS. Continue until the swatch is the length you want or until your pattern tells you to change stitches.
If your pattern includes edge stitches, work those exactly as written. The first or last stitch may be slipped, knitted, or purled to create a particular edge, so do not assume every stitch in the row is stockinette.
To finish a practice swatch, bind off with a flexible edge and cut the yarn, leaving a tail long enough to weave in. Use a tapestry needle to secure the end without pulling the fabric tight.
Here is the basic flat repeat at a glance: Row 1 is knit across; Row 2 is purl across; repeat those rows. “Bind off” is the US term; “cast off” is also used in other knitting traditions.
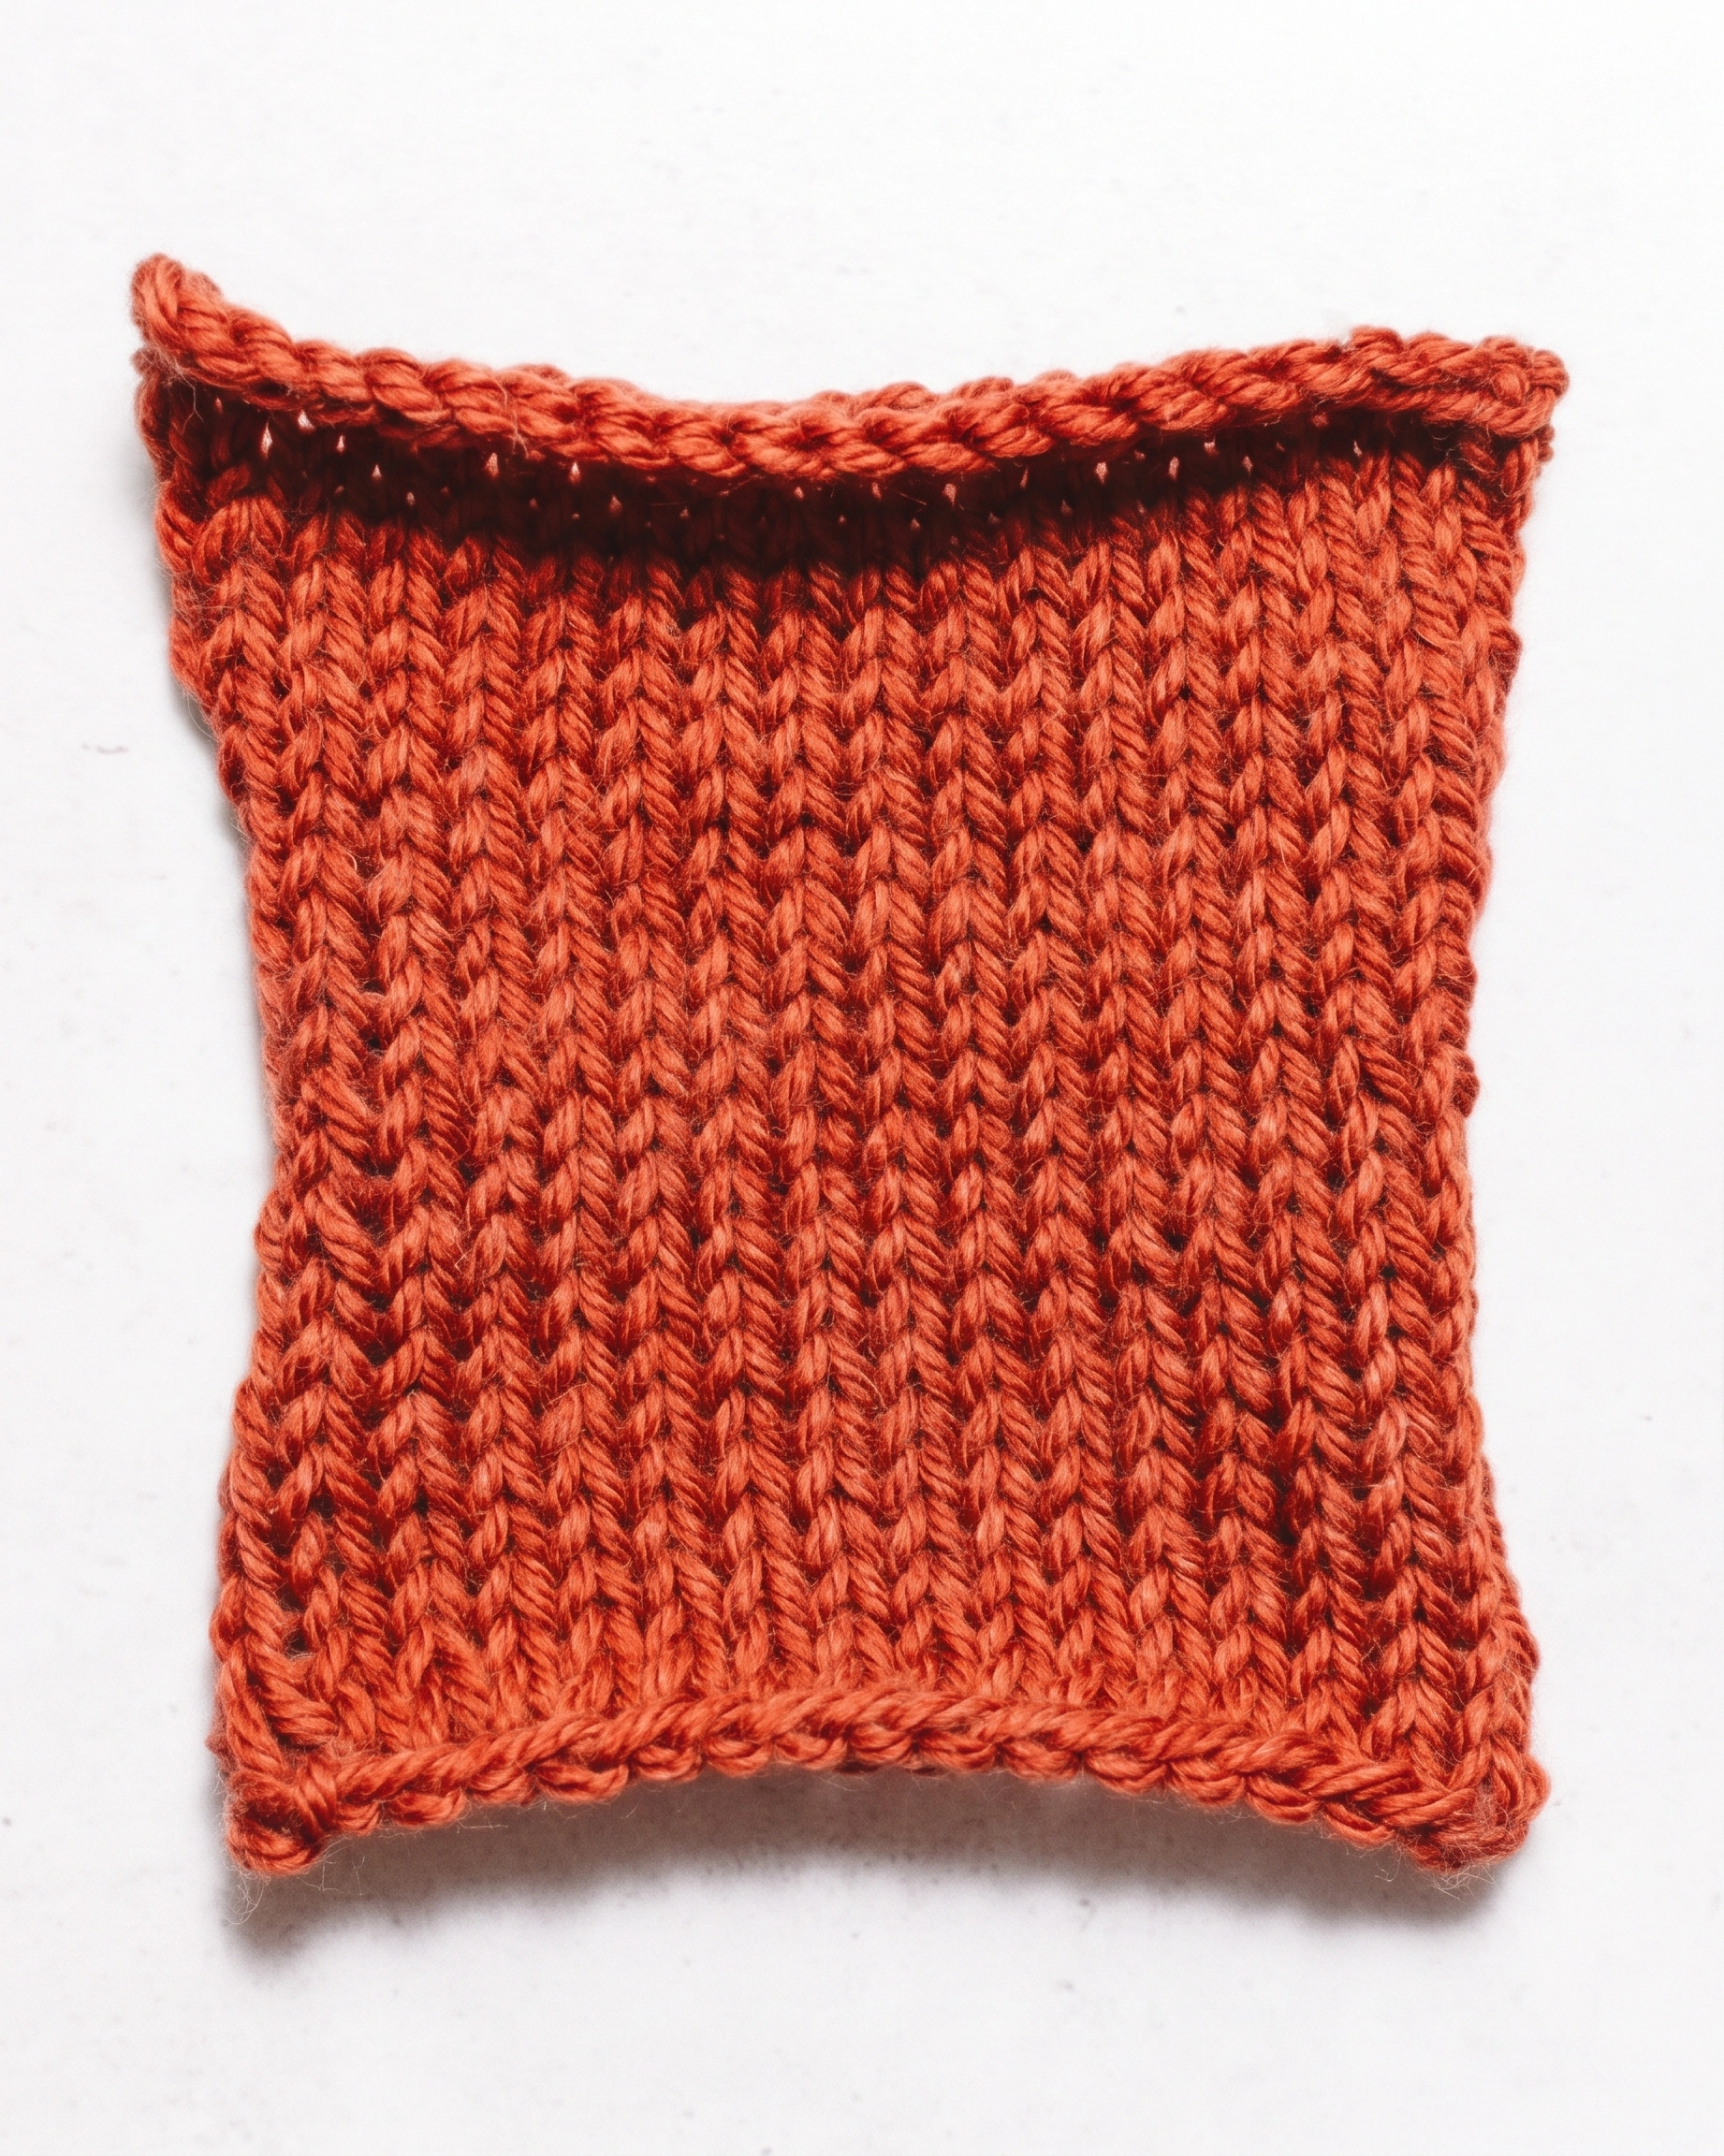
Expect the lower and upper edges to roll toward the smooth side, and the side edges to roll toward the bumpy side. This is normal for stockinette and does not mean your tension is wrong.
How to Read Your Knitting
When you are unsure which row comes next, look at the face of the fabric that is toward you. The stitch shapes tell you what you are seeing.
On the smooth V side, knit the stitches for a standard flat stockinette repeat. On the bumpy side, purl the stitches.
This is sometimes summarized as “knit the knits and purl the purls.” It is a visual reminder, not a substitute for pattern instructions when you are working increases, decreases, ribbing, or another stitch pattern.
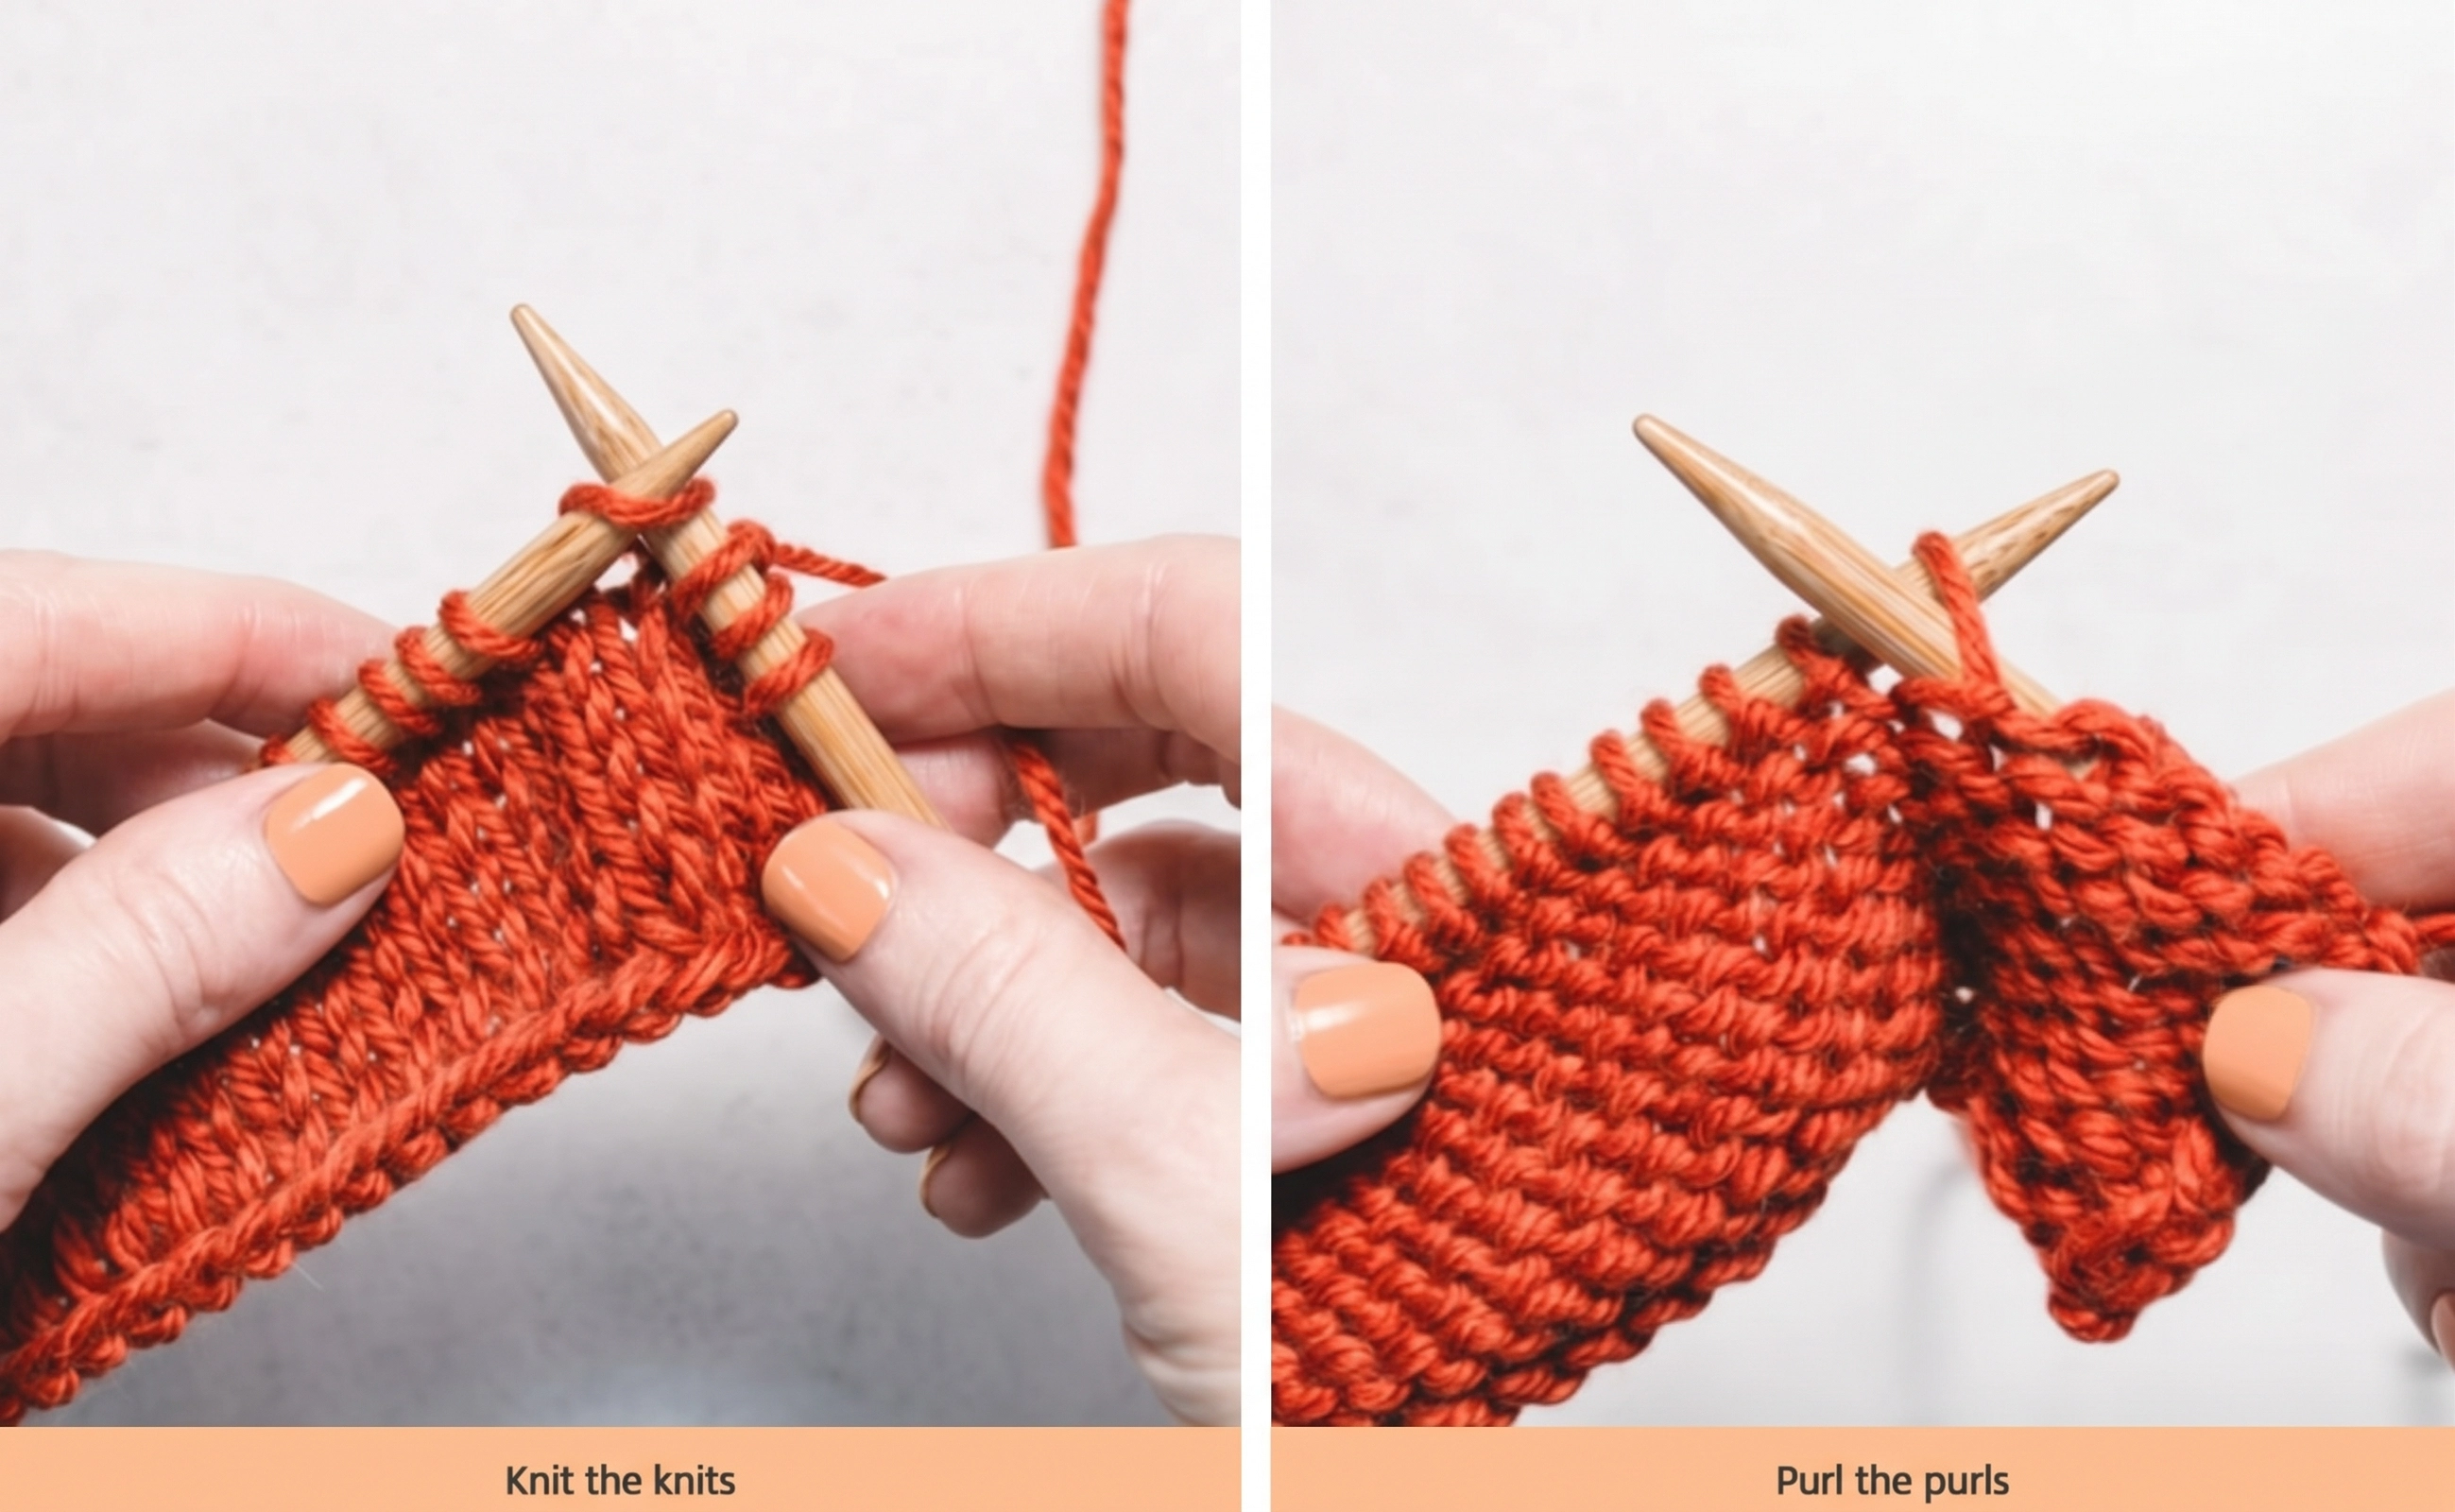
A row counter can help on a larger project, but also note whether the next row is RS or WS in your pattern. This is especially helpful after setting the work down between sessions.
How to Knit Stockinette in the Round
When knitting a tube in the round, the right side stays facing outward as you work. You do not turn the fabric after each round.
Cast on the number of stitches required for your project, then join the stitches into a circle without twisting the cast-on edge. Place a marker at the start of the round if your pattern calls for one.
For stockinette in the round, knit every stitch on every round. Since the right side always faces you, there is no separate purl row in the basic stockinette repeat.
Continue until the piece reaches the length specified by your pattern, then follow its instructions for shaping or binding off. Hats and sweater bodies often combine stockinette with ribbing or other sections.
Check the fabric periodically for a twisted join or dropped stitch, especially during the first few rounds. Fixing a small issue early is easier than repairing it after the tube grows.


How to Check Gauge
Gauge is the number of stitches and rows in a measured area of fabric. It matters when size is important because a small difference across many stitches can change the finished dimensions.
Make a swatch using the yarn and needles you plan to use for the project. Follow the pattern’s stitch pattern and any finishing instructions that affect the fabric, such as washing or blocking.
Lay the swatch flat without stretching it. Place a ruler across the center, away from the cast-on and side edges, and count the stitches across a four-inch span.
To check row gauge, count the rows in a four-inch span as well. In stockinette, each visible V column helps you identify a stitch, while the stacked rows of Vs help you count rows.
Compare both measurements with the gauge listed in your pattern. If the pattern gauge is given over a different width, measure that stated width instead of assuming it is four inches.
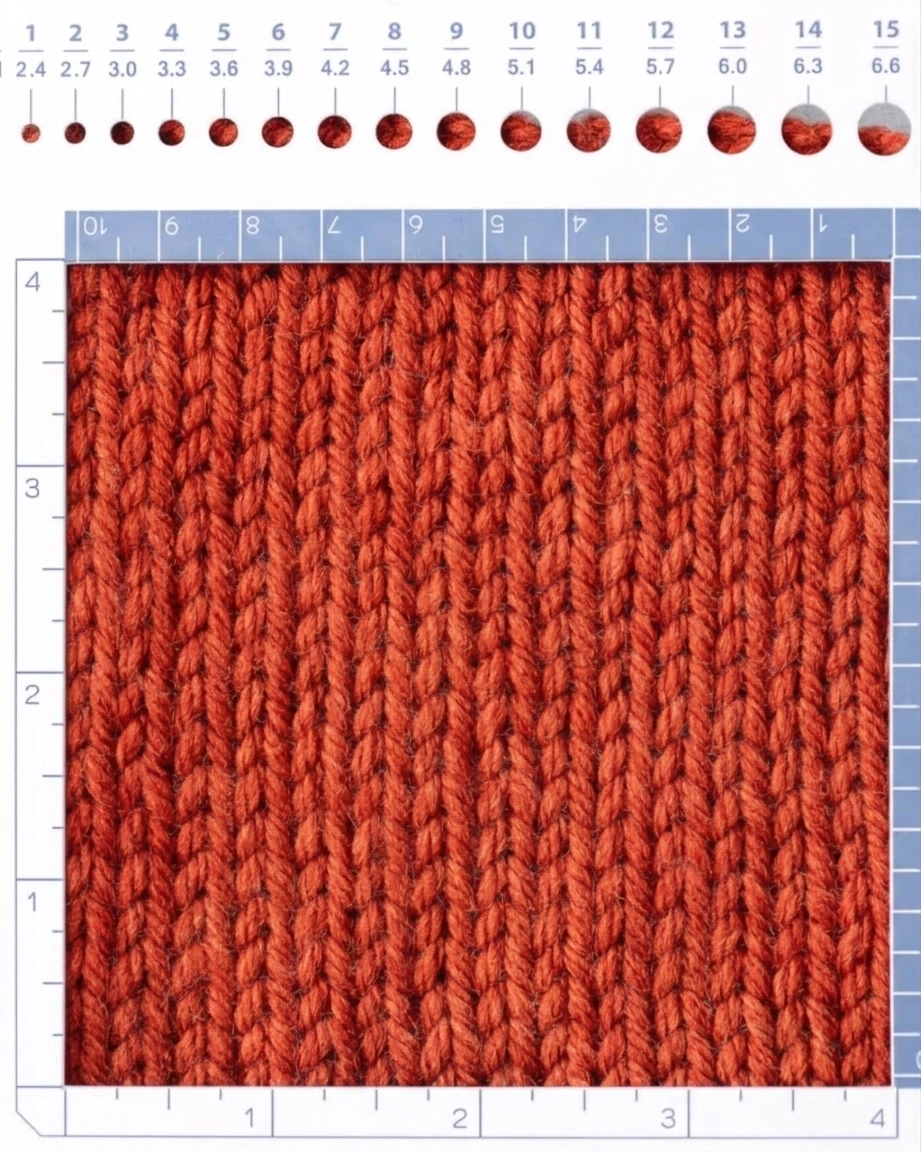
If you have more stitches per inch than the pattern gauge, try a larger needle; if you have fewer, try a smaller needle. Knit a new swatch after changing needle size and measure again.
For the most useful result, measure after any blocking or laundering the pattern recommends. Record the yarn, needle size, and measured gauge so you can compare swatches consistently.


Why Stockinette Curls
Stockinette fabric naturally rolls because the knit and purl sides respond differently at the edges. The top and bottom often roll toward the smooth side, while the side edges roll toward the bumpy side.
The curl is most visible in an unbordered swatch. It can make a finished piece look narrower or less even than expected, even when the center fabric is knitted correctly.
Blocking can relax and shape many fibers, but it may not keep a plain stockinette edge flat permanently. A border is often the more dependable way to control the roll.
Ways to Keep the Edges Flatter
Add a flat-lying stitch pattern around the stockinette section. Garter stitch, seed stitch, and ribbing are common choices, but use the border specified by your pattern when you are following one.
A few rows of garter stitch at the beginning and end, plus several garter stitches along each side, can frame a small swatch. The border width depends on the project and the look you want.
Blocking means shaping the fabric and letting it dry in that shape. Use a method suitable for the yarn’s fiber, and check the yarn label or pattern before applying heat or moisture.
Blocking can improve the finished shape, but it cannot reliably erase every curl from a plain stockinette edge. For garments, the pattern’s finishing instructions should guide the final treatment.
Stockinette vs. Garter Stitch
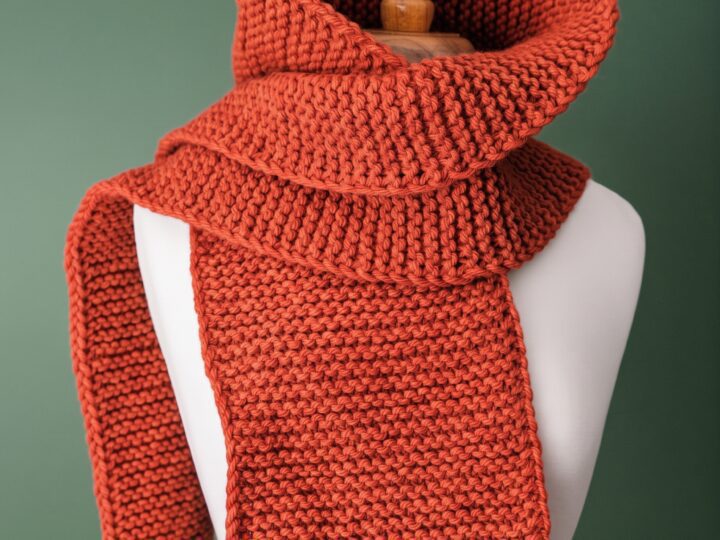
Stockinette is made by alternating knit and purl rows when worked flat, which creates a smooth face and a bumpy face. Garter stitch is made by knitting every row when worked flat.
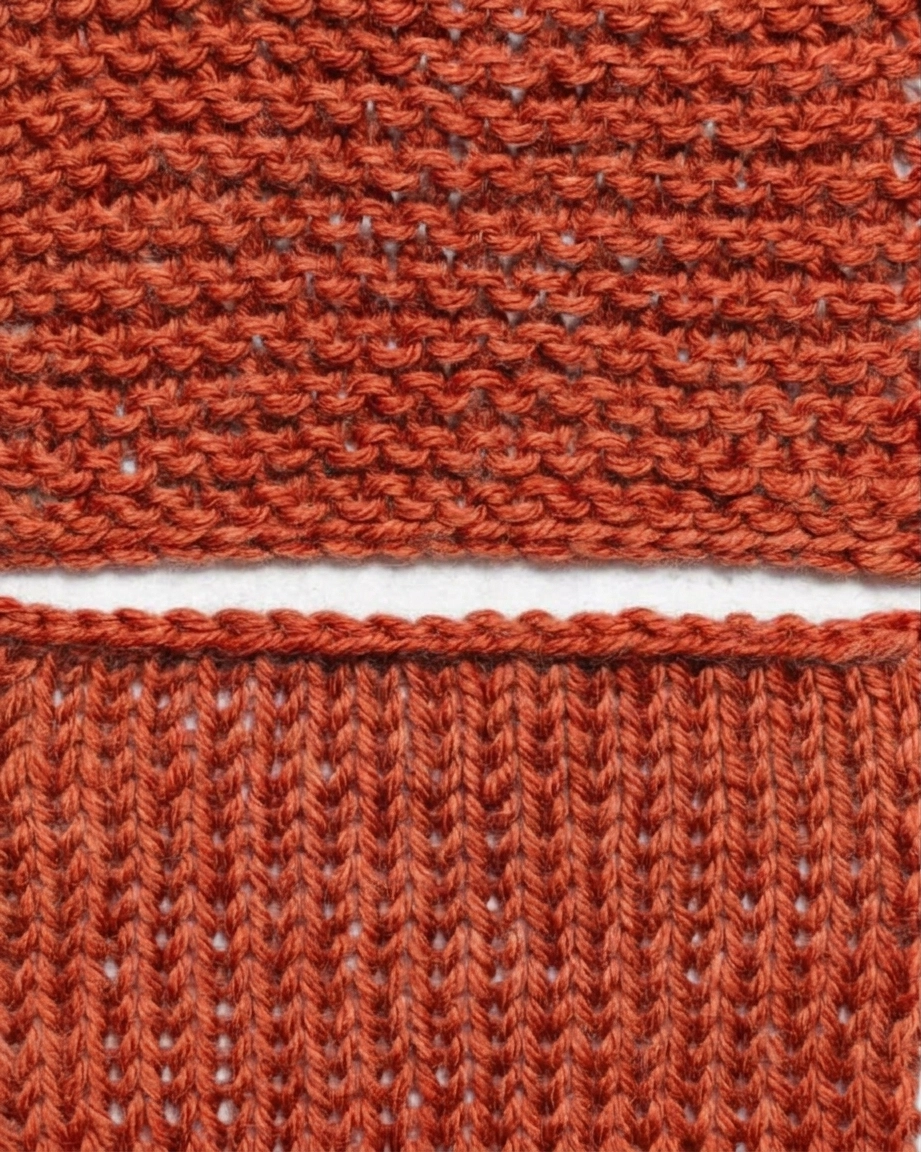
Garter stitch has ridges on both faces and usually lies flatter at the edges than plain stockinette. That makes it a useful border when a project needs a tidy frame.
In the round, the instructions differ: stockinette is knit every round, while garter stitch requires alternating knit and purl rounds to create ridges. Check the pattern’s terminology before substituting one for the other.
Stockinette Stitch FAQs
These quick answers cover common questions that come up while learning the stitch. If you are following a pattern, its stitch counts and finishing directions take priority.
Is stockinette the same as stocking stitch? Yes. The names refer to the same knit-and-purl fabric; “stockinette” is common in US instructions, while “stocking stitch” is common in the UK.
What does “St st” mean? It is a common abbreviation for stockinette stitch in US knitting patterns. The Craft Yarn Council’s abbreviation list defines “St st” as stockinette stitch.
Why is my swatch curling? Curling is a normal characteristic of plain stockinette. Add a border in a flatter stitch pattern or use the finishing method recommended for your project.
Do I purl every other round? Not for basic stockinette worked in the round. Knit each round because the right side remains facing you; flat stockinette alternates knit and purl rows because you turn the work.
Can a beginner learn stockinette? Yes, if you can knit and purl. Practice each stitch on a small swatch first, and use a light-colored, smooth yarn if the stitch shapes are hard to see.
How many stitches should I cast on? For practice, choose a comfortable width that lets you see several columns of stitches. For a garment or accessory, use the stitch count in the pattern rather than a generic number.
How do I know when to change needle size? Compare your blocked swatch with the pattern gauge. If the stitch count does not match, adjust the needle size and knit another swatch before beginning a project where fit matters.
Once the knit-row and purl-row rhythm feels familiar, stockinette becomes a useful foundation for many projects. Start with a small swatch, check both sides, and add a border when you want the edges to lie flatter.
What’s Next?
Pin this post: Save this tutorial to your Pinterest boards so that you can come back to it later.
Leave a comment: We love to hear your feedback. Tell me in the comments below!
Share on Instagram or Facebook: When you make this project, share it on social media and tag me @iheartdiybystacy. We love to see what you make!
Have questions? Join the Facebook Group!
We hope this article was useful for you! If you have any additional questions, feel free to join my Facebook Group. We created this group for you to share pictures, ask questions, and help each other out.
I hope this article was useful for you! If you have any additional questions, feel free to join my Facebook Group.
Join the group to share pictures, ask questions, and help each other out.
Have a question? Use the form above to submit your question or comment.
I love hearing from you and seeing what you made!